Table of Contents
Introduction
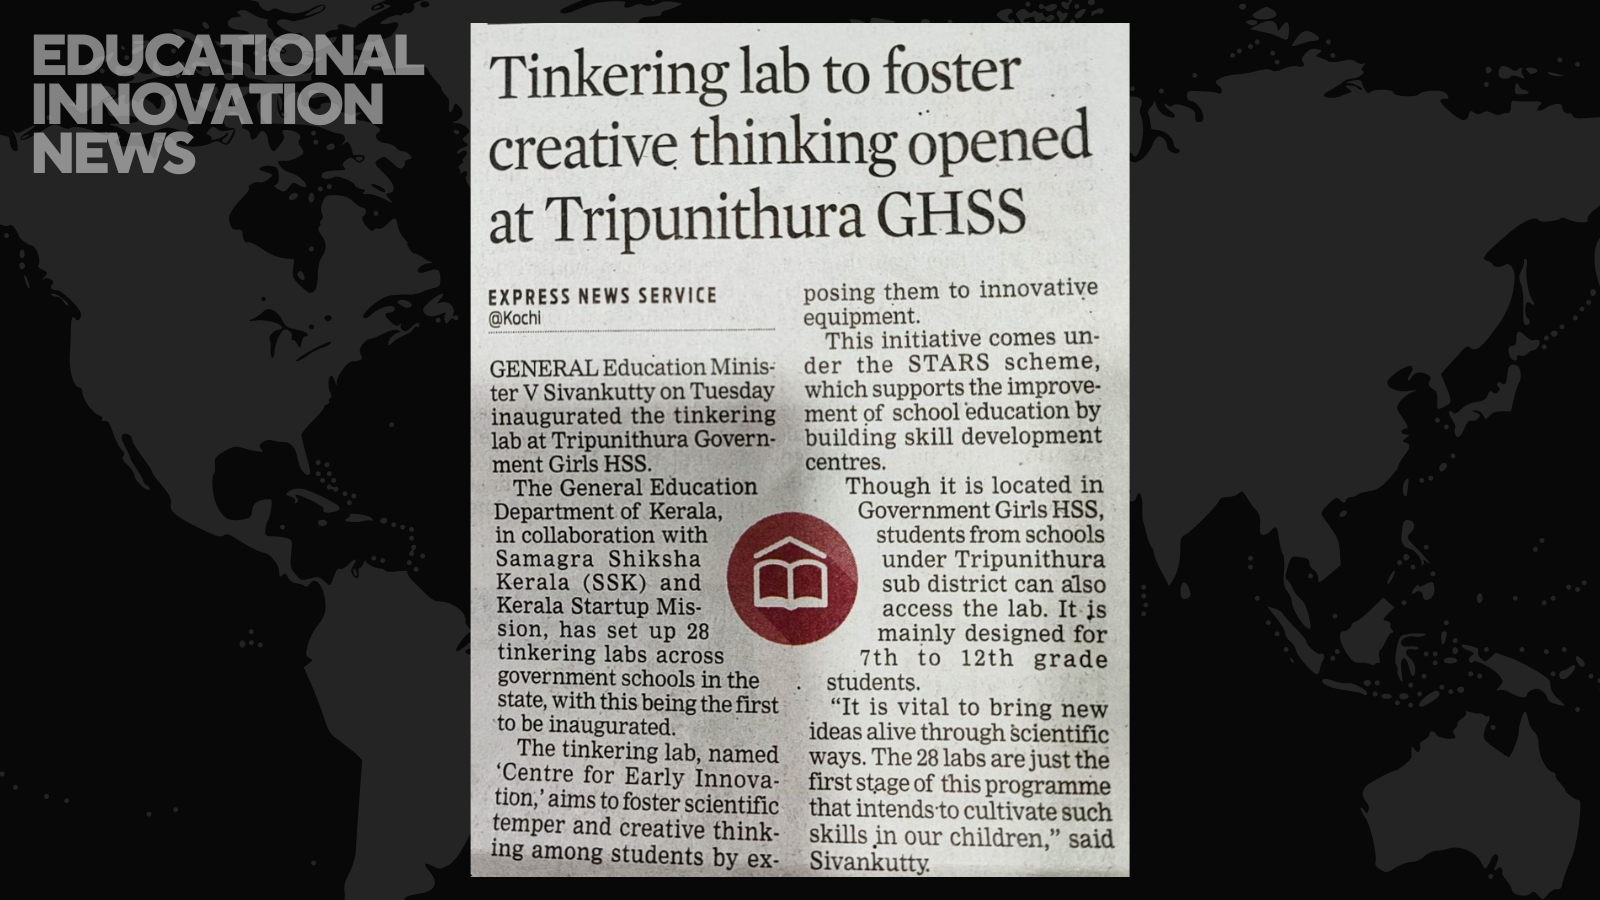
The Molecular Structure STEM Kit is an innovative learning tool designed specifically for students in grades 7 through 9 . This kit aims to transform the abstract concept of molecular structures into a tangible and interactive experience. By providing students with hands-on activities, the kit helps bridge the gap between theoretical knowledge and real-world application, making the study of chemistry more engaging and accessible.
Objective
To create 3D-printed ball-and-stick models of key molecules to help students visualize molecular structures and understand chemical bonds as shown below.

Machines and Materials Required
- 3D Printer (Creality K1C)
- Slicer software (Creality Print)
- Colored filaments for different atoms (white, black, orange, and blue)
- Nose plier for post-processing
Prerequisites
-
Successfully installed Creality K1C 3D printer.
-
Successfully installed Creality Print slicing software in your system.
Molecules Covered
| Molecule | Formula | Embossed Letter |
|---|---|---|
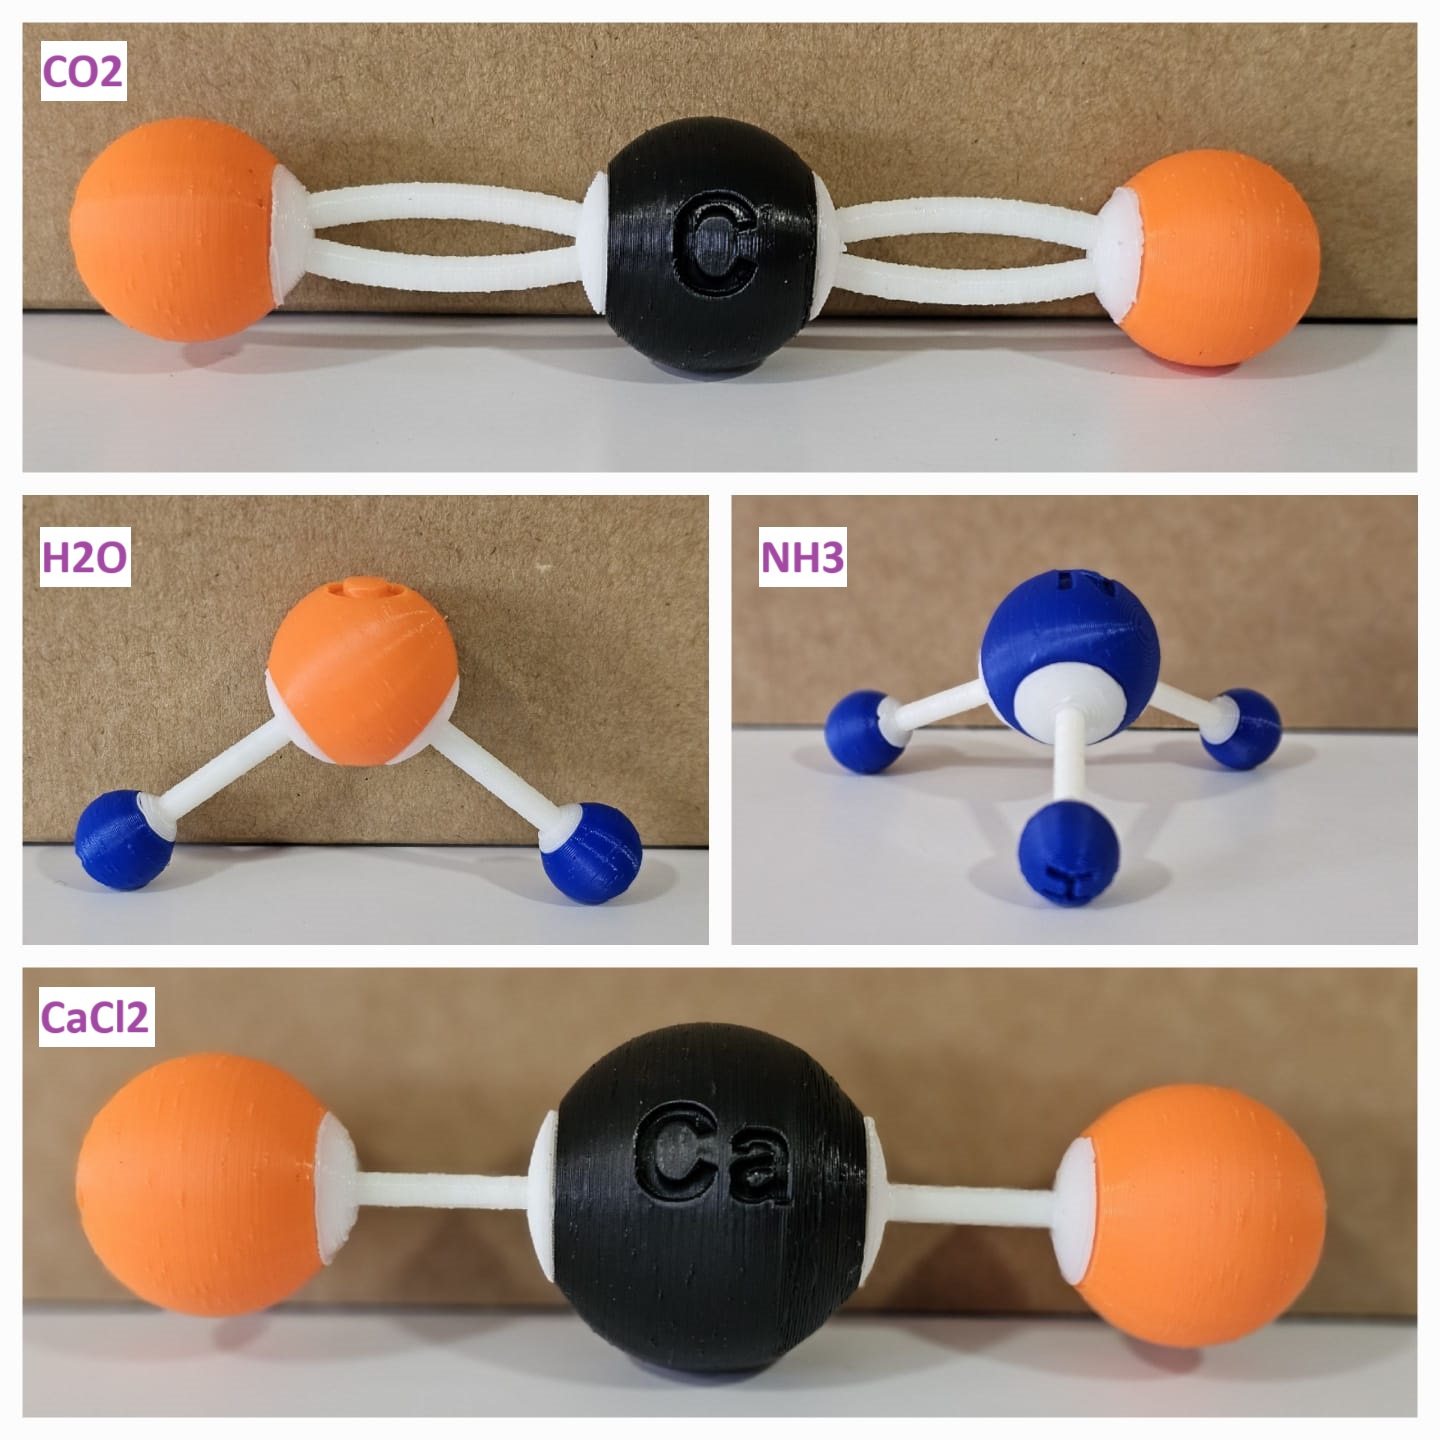
| Water | H2O | H, O |
| Carbon Dioxide | CO2 | C, O |
| Methane | CH4 | C, H |
| Ethene | C2H4 | C, H |
| Ethane | C2H6 | C, H |
| Butane | C4H10 | C, H |
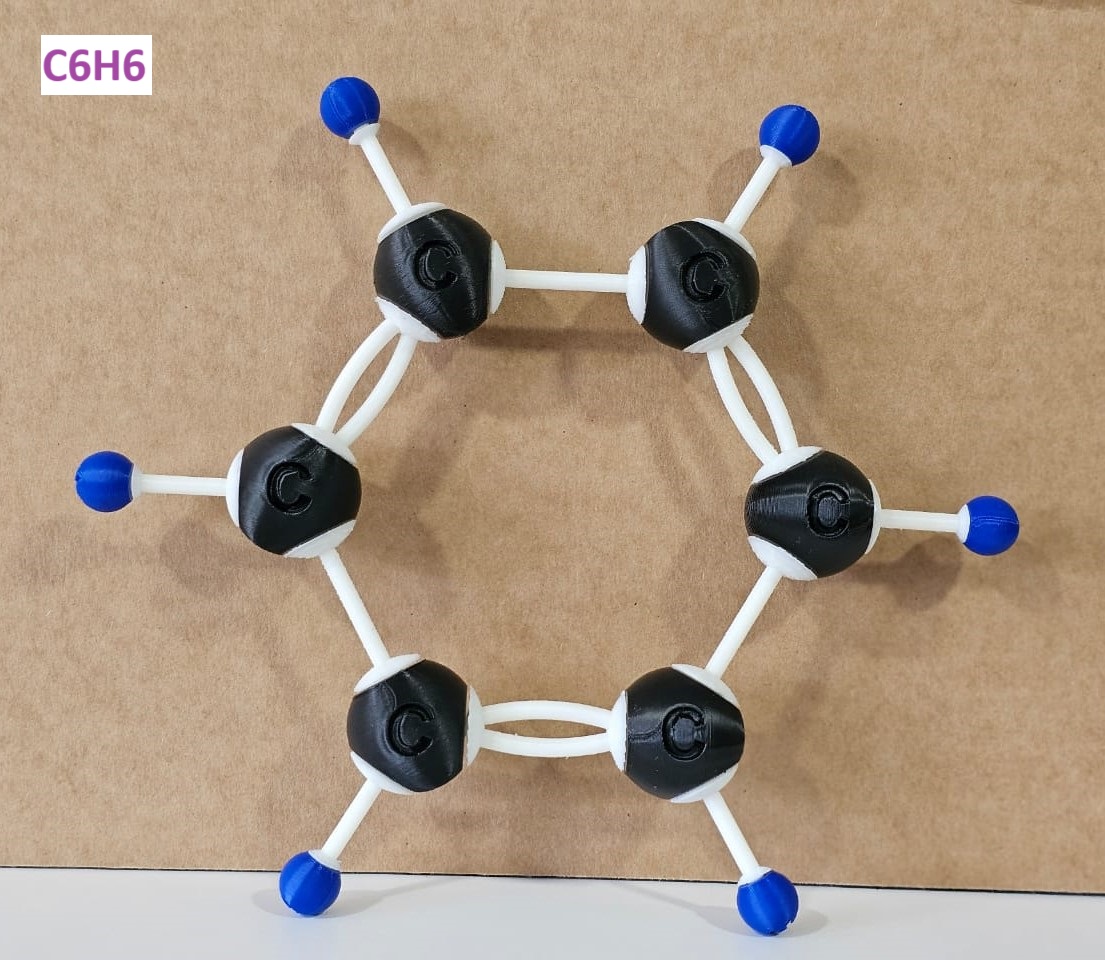
| Benzene | C6H6 | C, H |
| Ammonia | NH3 | N, H |
| Calcium Chloride | CaCl2 | Ca, Cl |
Basic Standards
Available filament colors: White, Blue, Black, and Red
| Atoms and bonds | Symbol | Size (in mm) | Filament Color |
|---|---|---|---|
| Carbon | C | ⌀ 28 mm | Black |
| Hydrogen | H | ⌀ 13 mm | Blue ( or White) |
| Oxygen | O | ⌀ 24 mm | Orange |
| Nitrogen | N | ⌀ 26 mm | Blue |
| Chloride | Cl | ⌀ 30 mm | Orange |
| Calcium | Ca | ⌀ 40 mm | Black |
| Single and double-bond | - , = | White |
Activity 1: 3D-Printed C2H4 Molecule
This activity aims to create 3D-printed models of the key ethene (C2H4) molecule to help students visualize the molecular structures and understand chemical bonds as shown below.
How to Perform this Activity
There are three main methods to perform this activity.
- Based on the molecules, print the atoms and bonds.
- Based on the colors, print the atoms and bonds.
- Print all the atoms and bonds in a single color.
It is always preferable to go with either method 1 or method 2 .
Method 1 is preferred when you want to print the molecules chapter-wise, and Method 2 is preferred when you want to print and assemble all the molecules at once.
The detailed documentation to perform this activity is provided below. However, if you find it long and you want to get it done even more quickly, I suggest you follow the videos mentioned below. The video involves the same procedures that are mentioned in this documentation.
Select the molecules that you want to make. For the demonstration purpose, I chose an ethene (C2H4) molecule . Using this molecule, I could demonstrate all the processes involved in this activity, and you could replicate the same process for the rest of the models.
The image below shows the rendered picture of the ethene.

In C2H4, H is in blue color, C is in black color, and bonds are in white color.
3D Printing
Make sure your 3D printer and Slicer software are ready. If not, click here .
Most likely, the filament color will be white. In the C2H4 molecule, the bonds are white. So, let's first print the C2H4 bonds (single and double bonds).
To learn: How to slice the single and double bonds of the ethene (C2H4)? Follow the link below.
Now let’s print the single and double bonds of ethene.
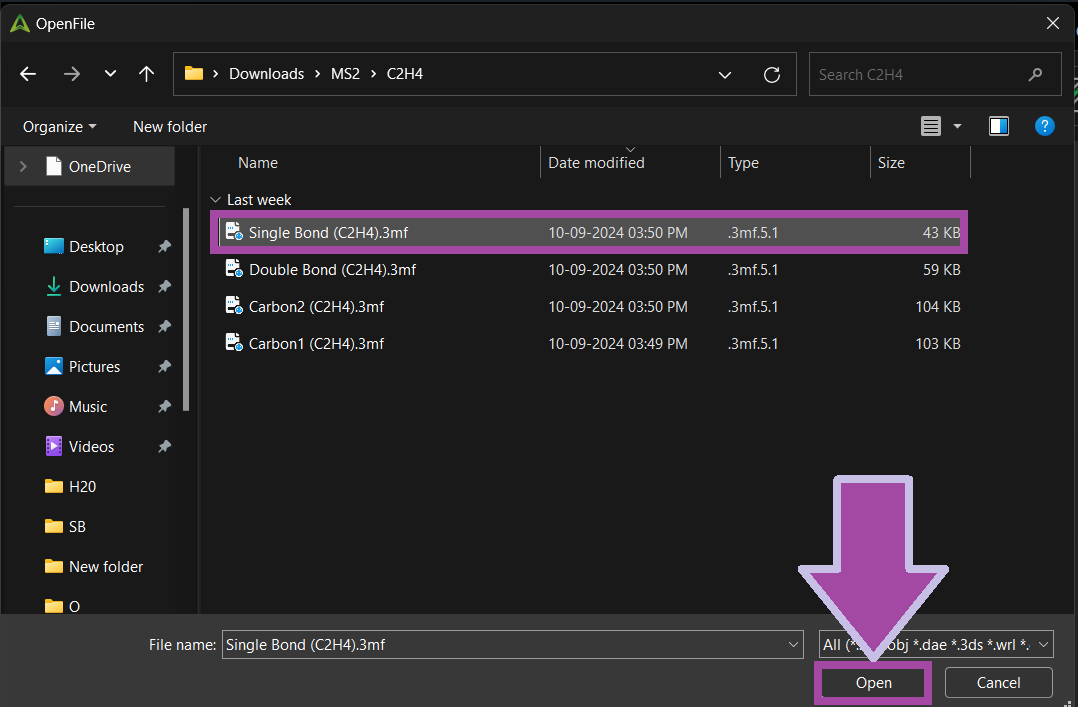
You can download the single bond's 3MF file from the " Resources and Downloads " section below.
Open the “ Creality Print ” slicer, and from " File ” select “ Import ” and then “ Model File ”.

Select the “ Single Bond (C2H4) ” file and click “ Open ”.
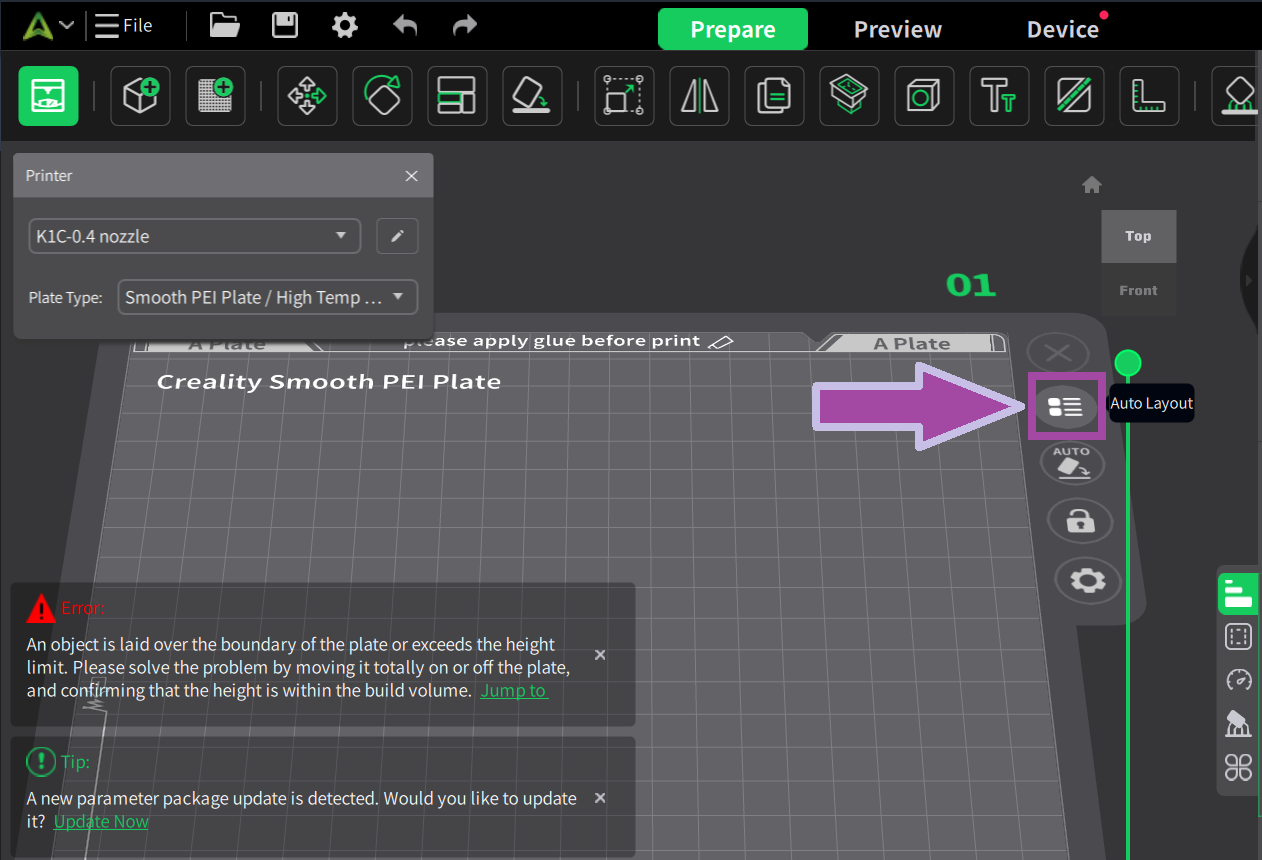
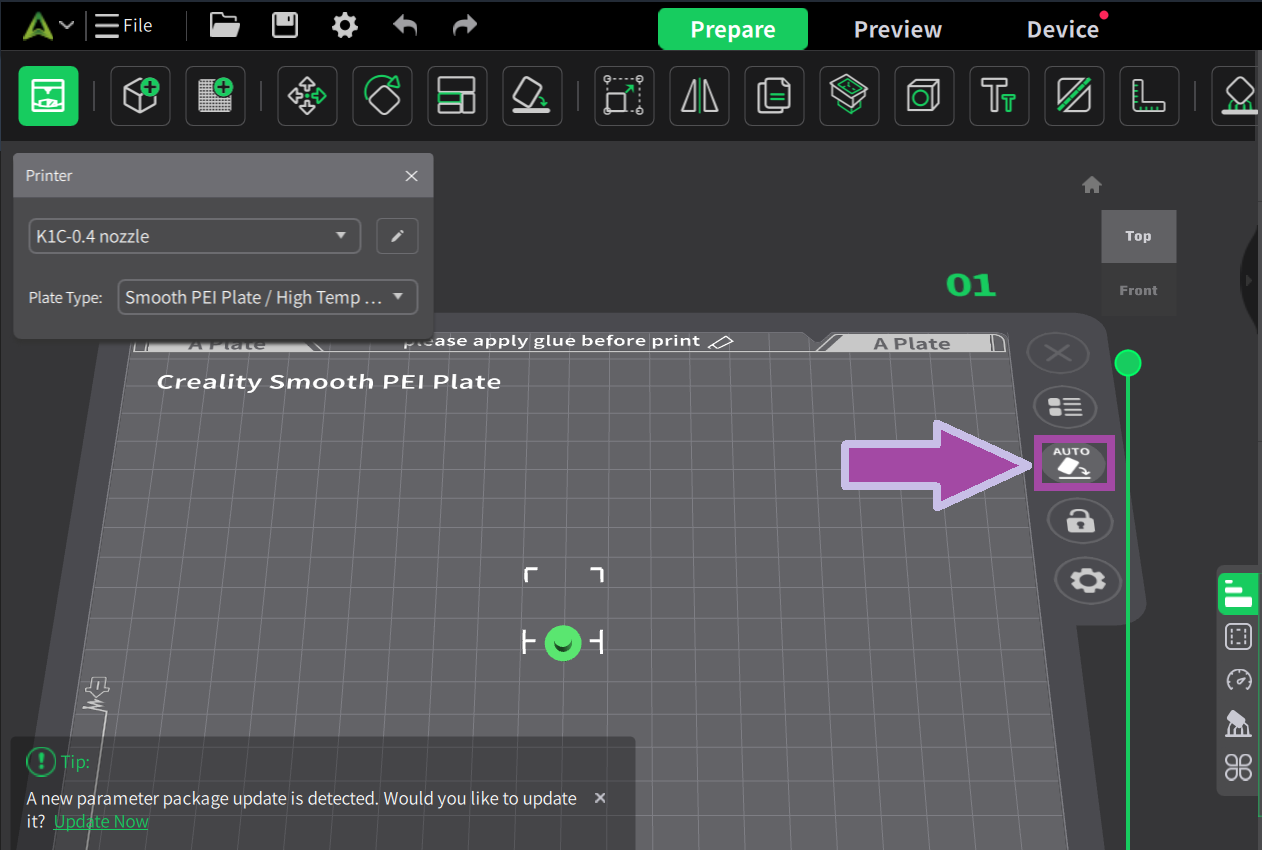
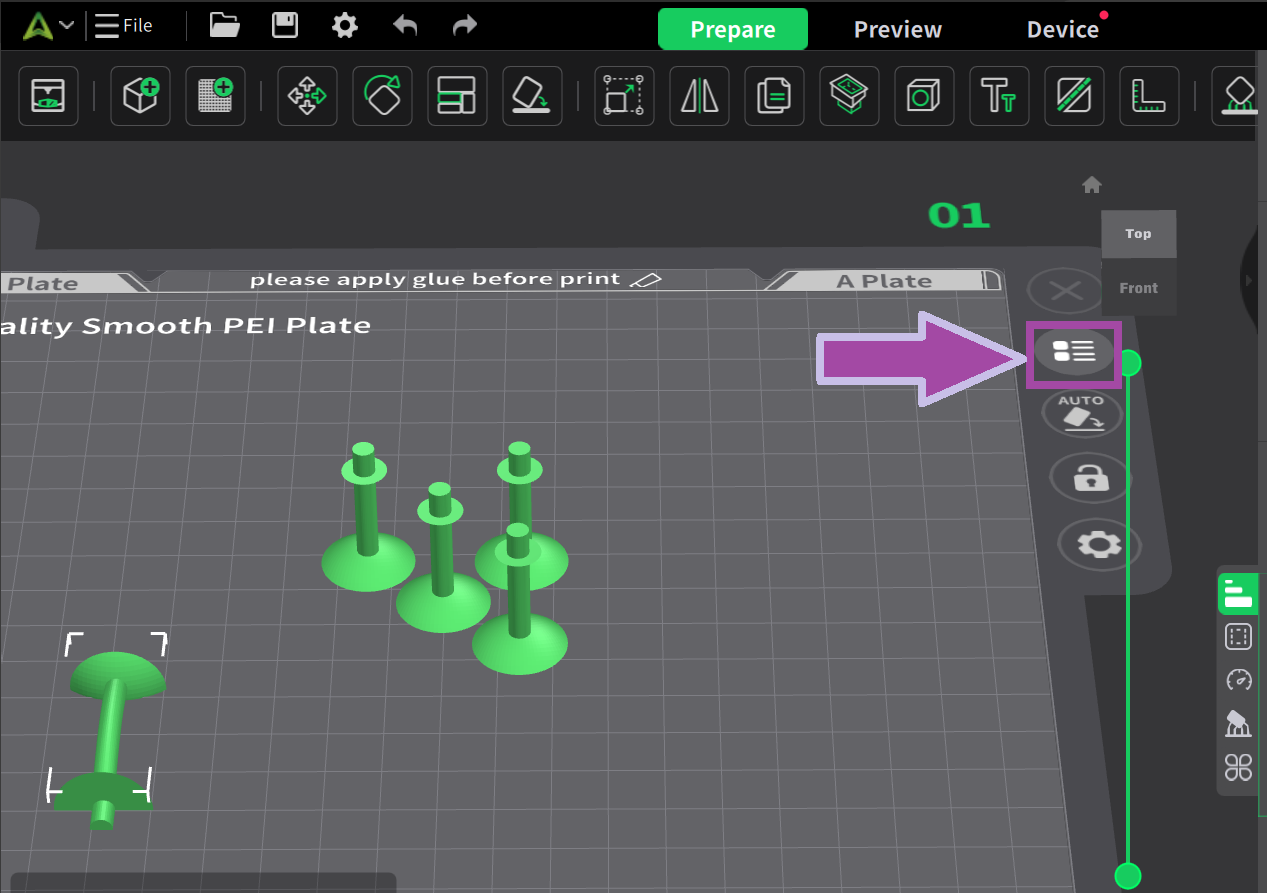
Once the file is imported, click on the “ Auto Layout ” option as shown below. Sometimes our imported file will be out of the plate, and this feature will help to place our part with the plate.
Then click on the auto “ Pick Botton ” option.
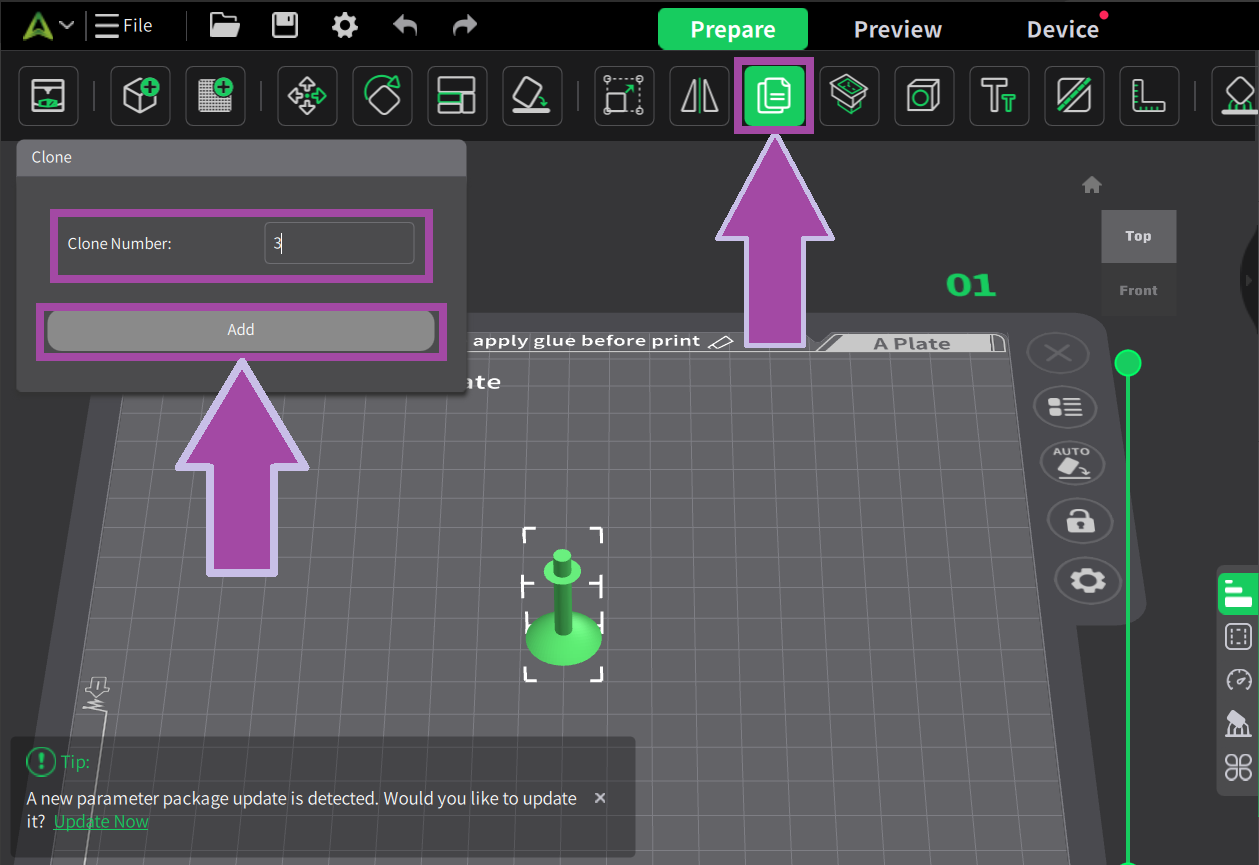
There are four single bonds for C2H4 molecules. So, let’s clone the bond.
Select the “ Clone ” option or press “ Alt + C ” and enter “ 3 ” as the clone number, select the part that needs to be cloned, and press “ Add ”.
Now let’s slice the double bond. Go to “ File ” select “ Import ” and then select “ Model File ”.
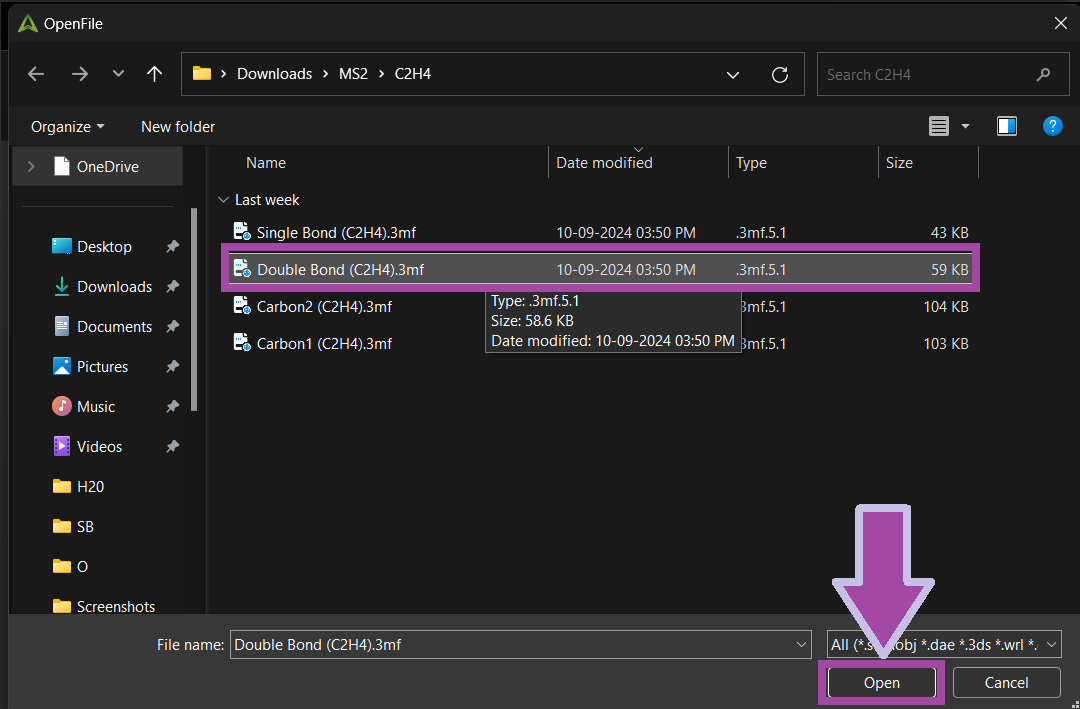
If any error occurred as shown below, don’t worry. It’s because the part is out of the plate. All we need to do is drag and drop the part inside the plate area.
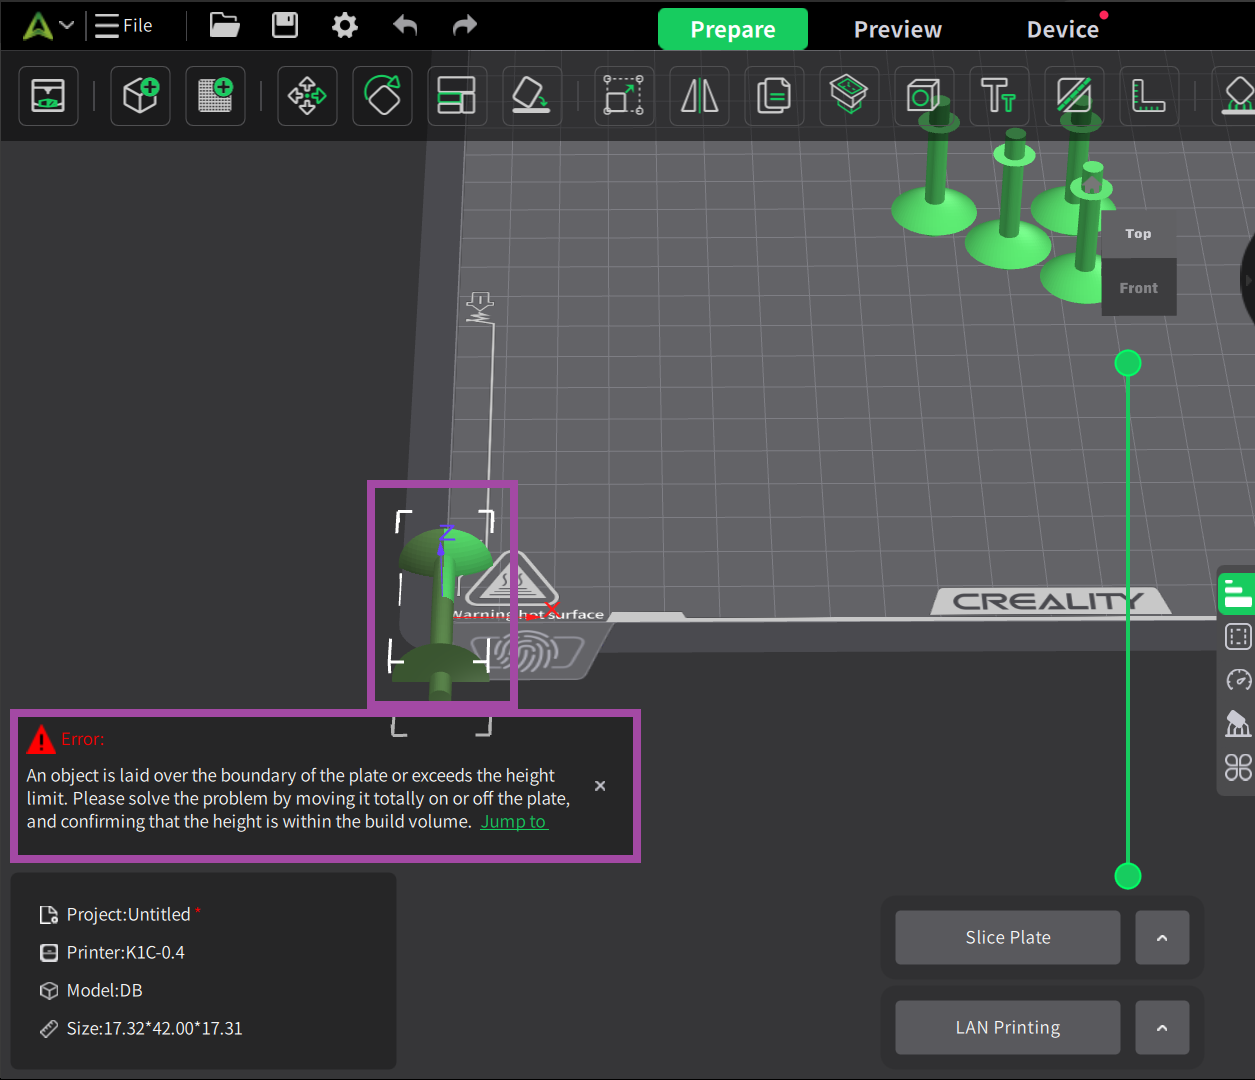
As you can see, the error message disappeared.

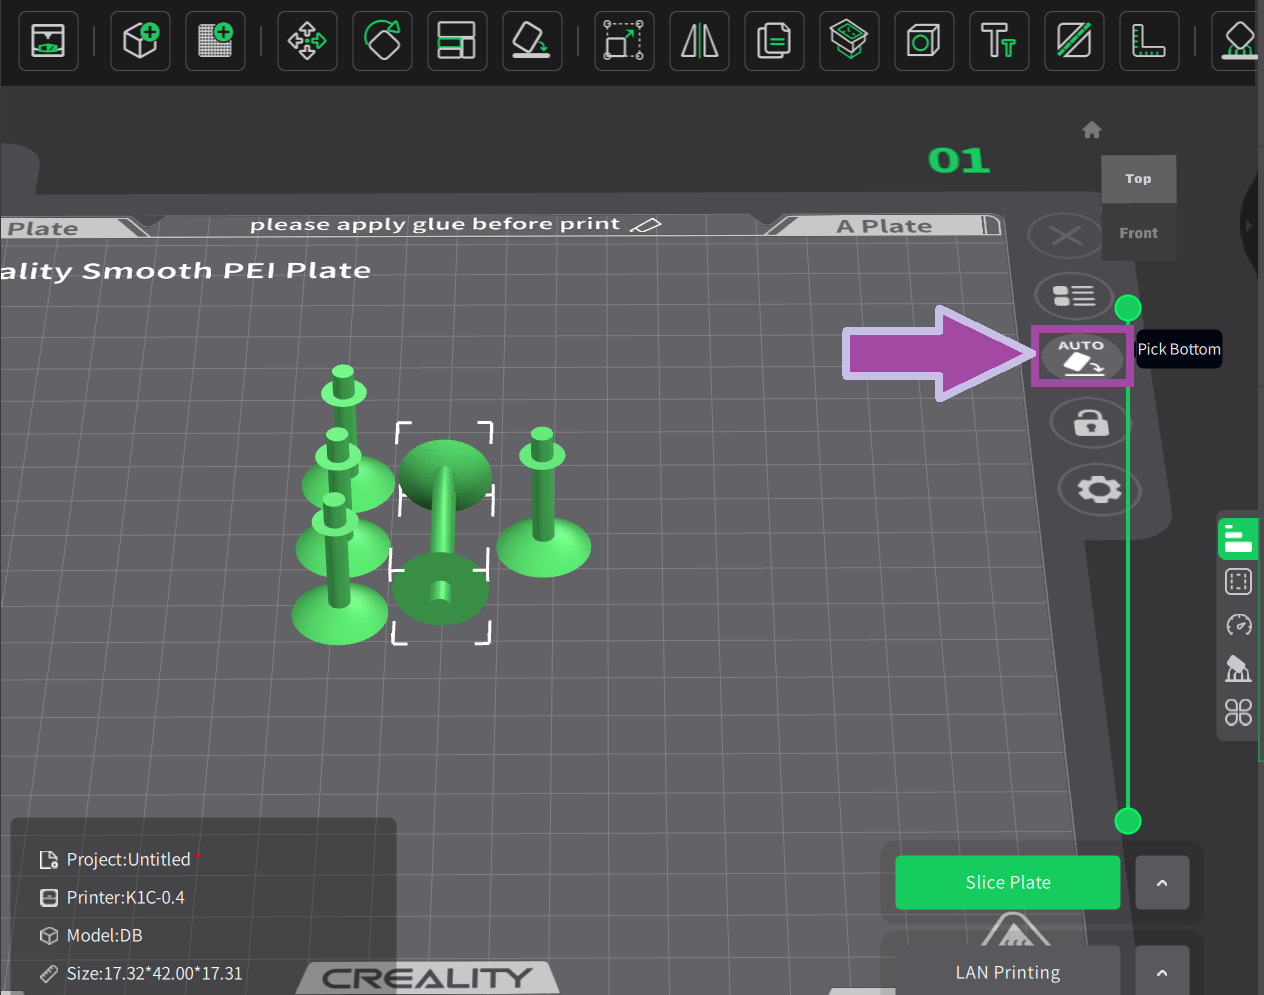
Click on the “ Auto Layout ” option as shown below.
Then select the “ Auto Pick Bottom ”
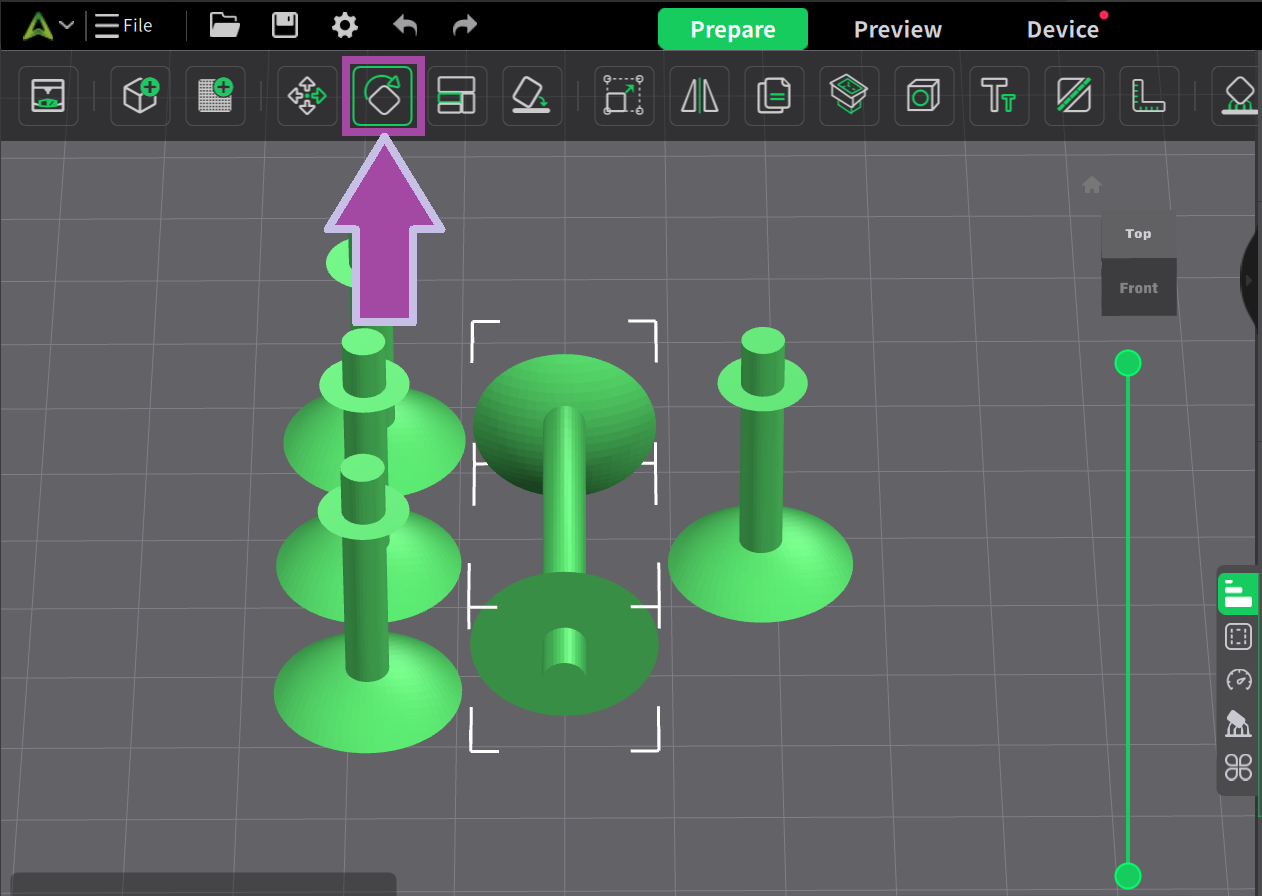
To rotate the double bond, click on the option shown below. Then select the double bond.
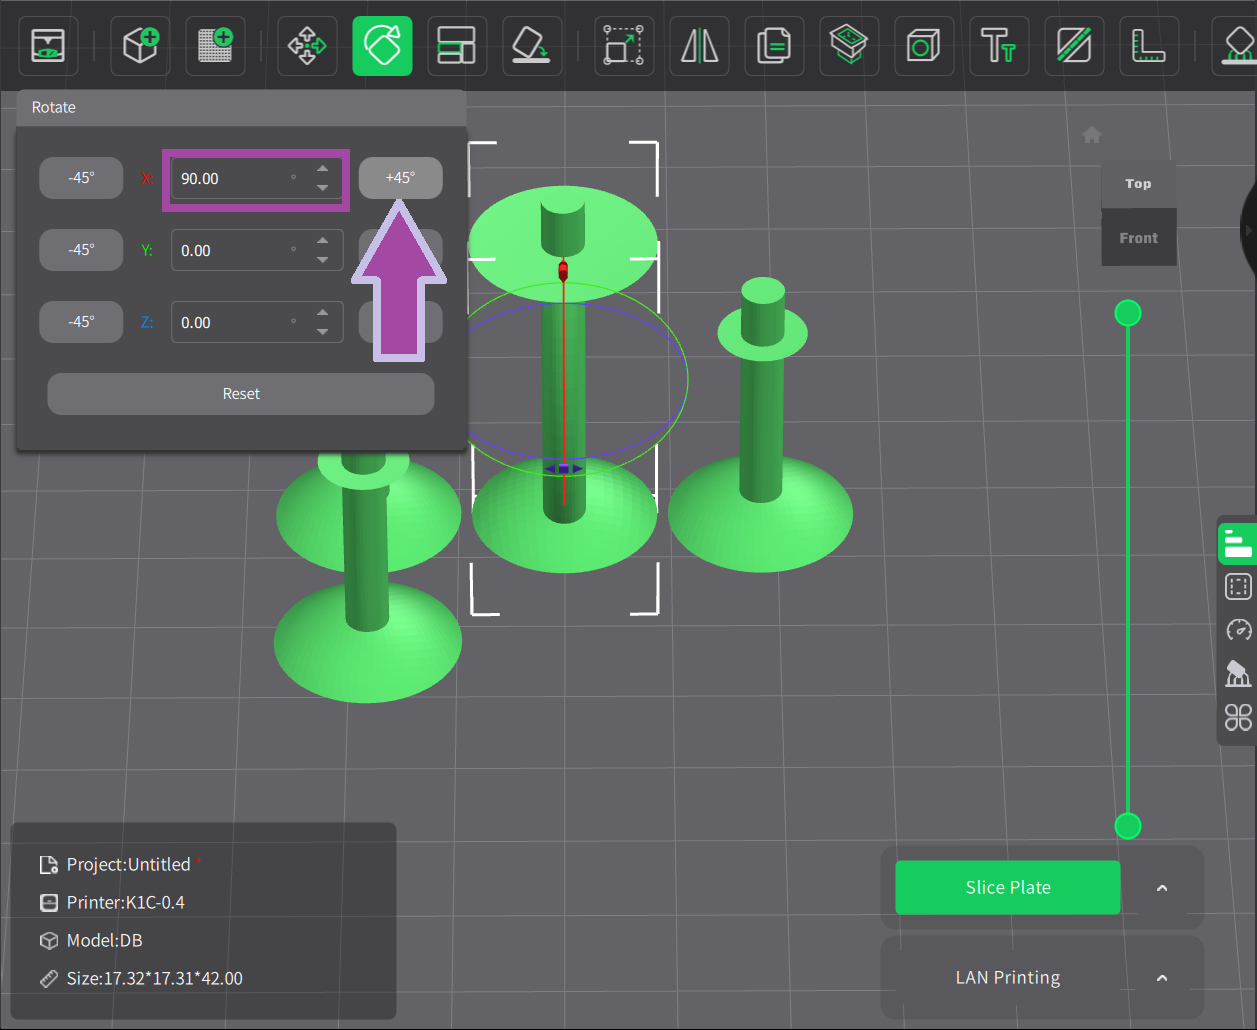
To rotate the double bond 90 degrees around the X-axis, click on the " +45 " twice.
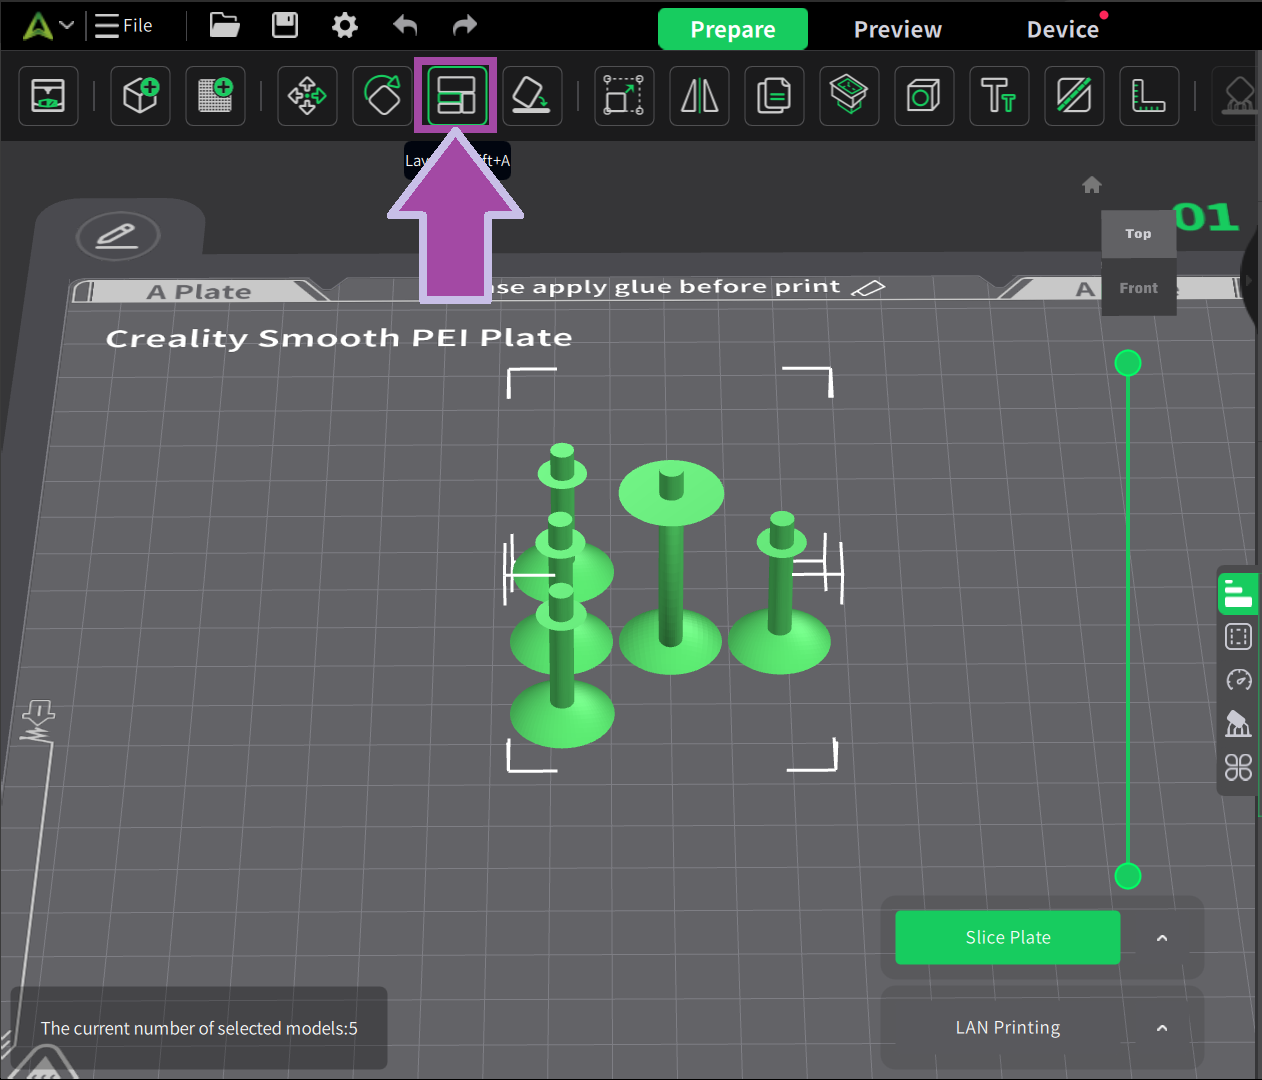
Arranging all the parts is not necessary. However, it may be useful for the rest of the models, so let's learn how to arrange the parts. Click on “ Layout ” as mentioned below. then select all the parts.
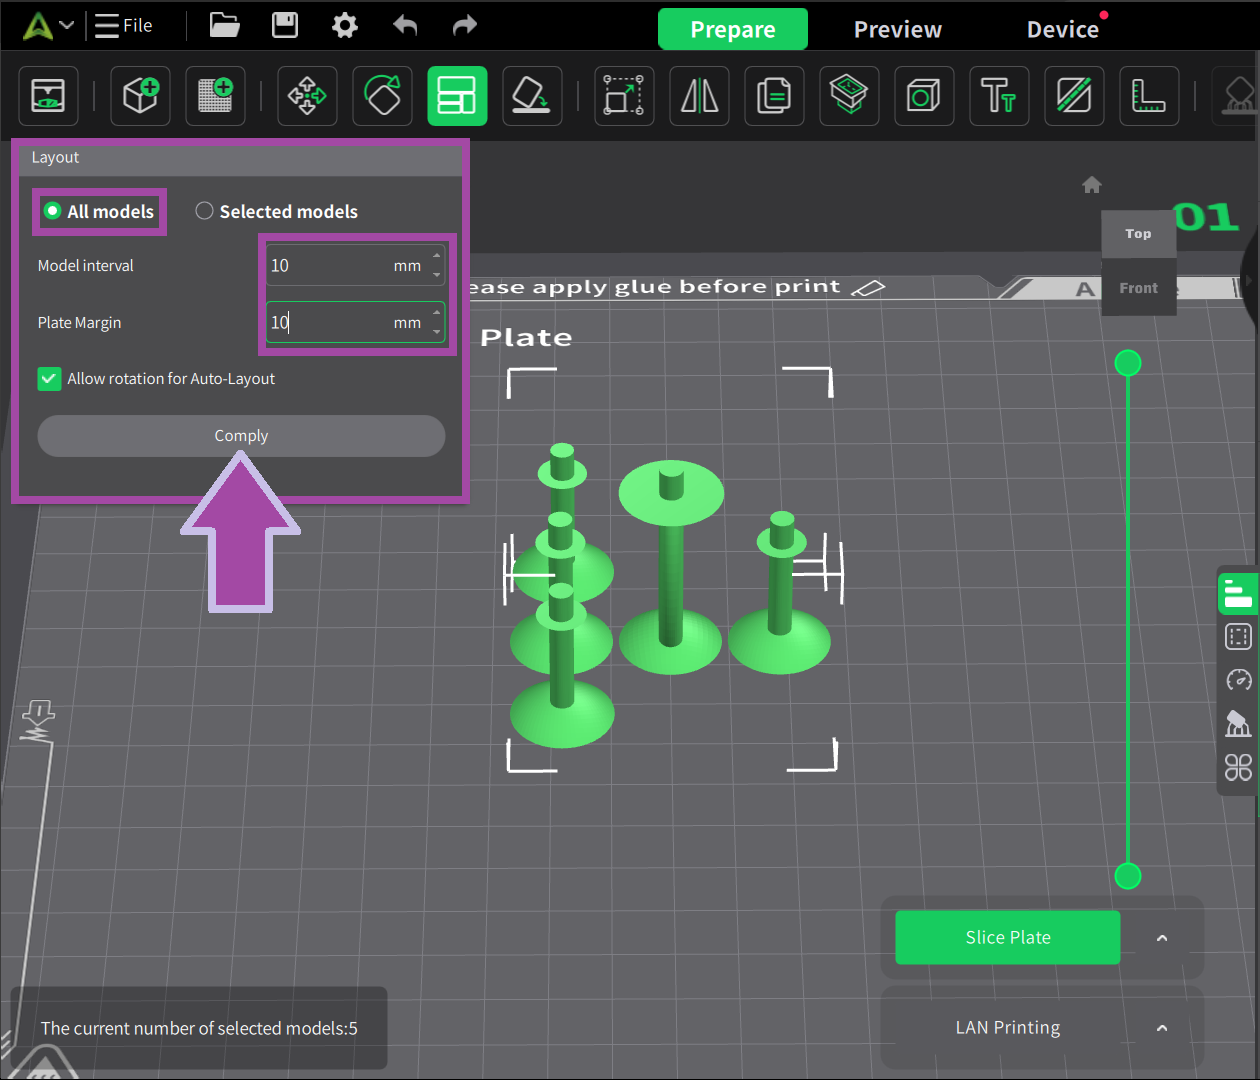
Then select “ All models ” and type “ 10mm ” for both “ Model interval ” and “ Plate Margin ". Then click on the “ Comply ” button.
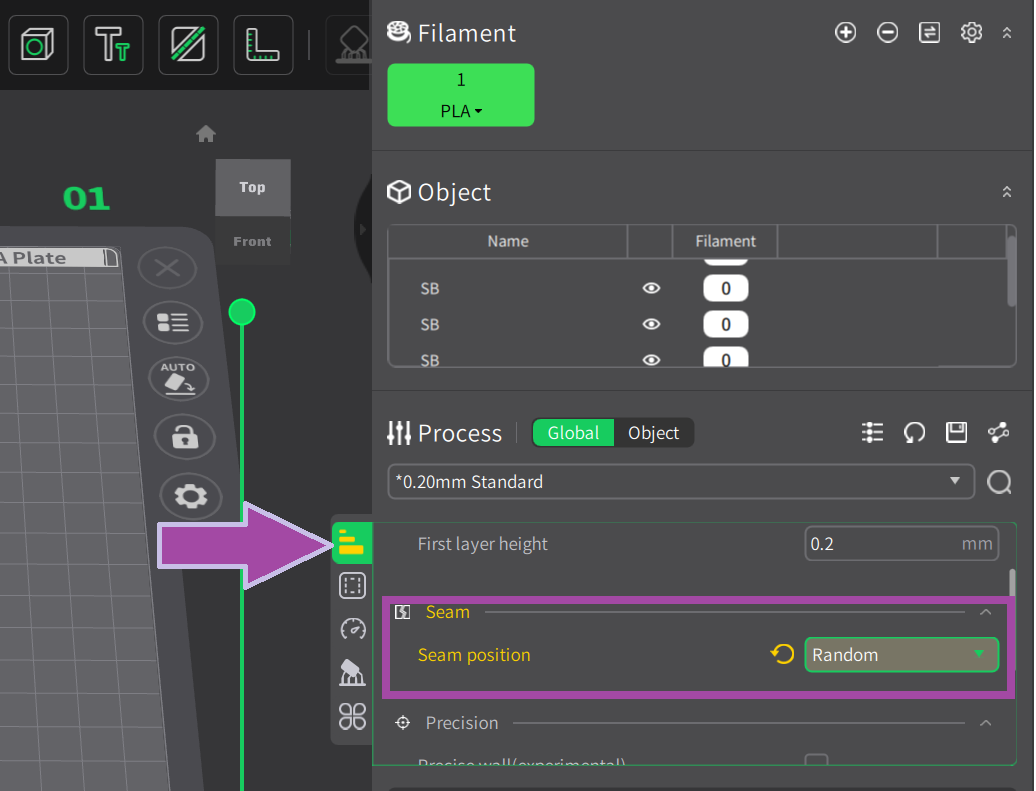
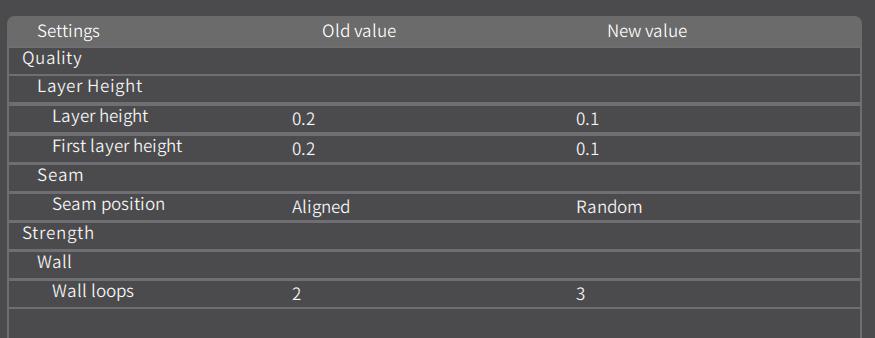
Now we need to set the quality parameters for our model. By default, the “ Quality ” tab will be opened. If not, select the “ Quality ” icon mentioned below. Set the “ Seam position ” to “ Random ”.
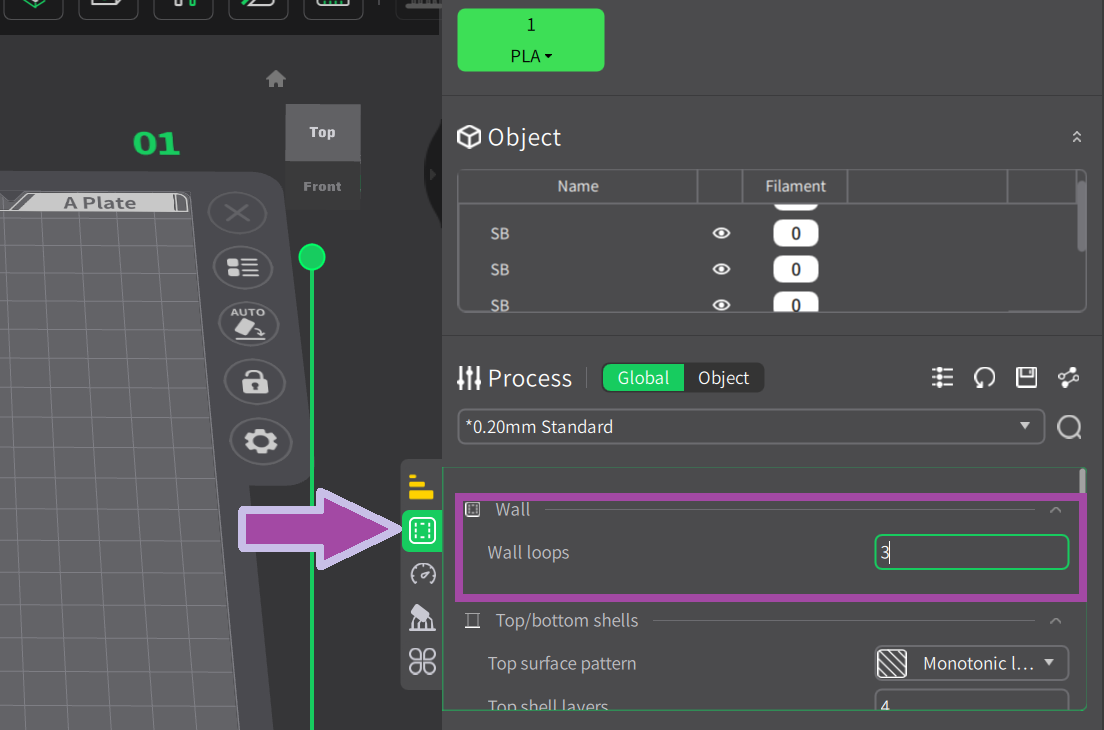
Select the “ Strength ” icon and set the “ Wall lopps ” to “ 3 ”.
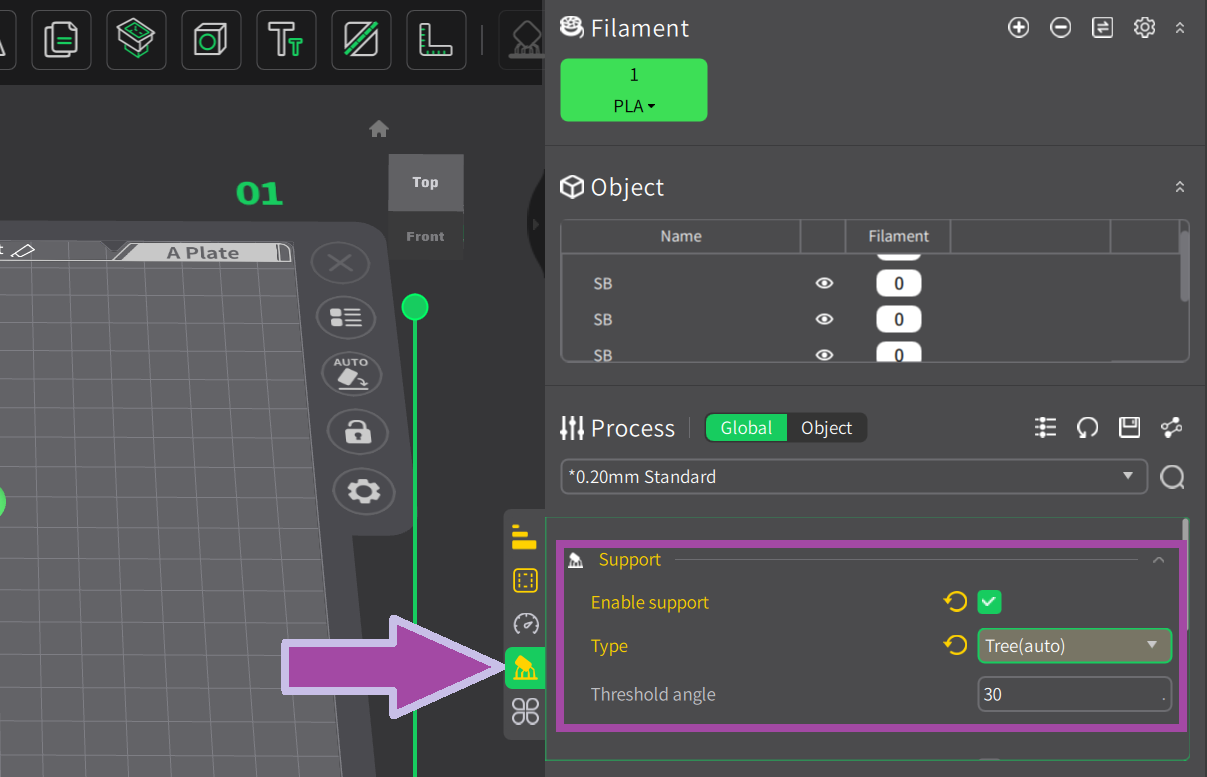
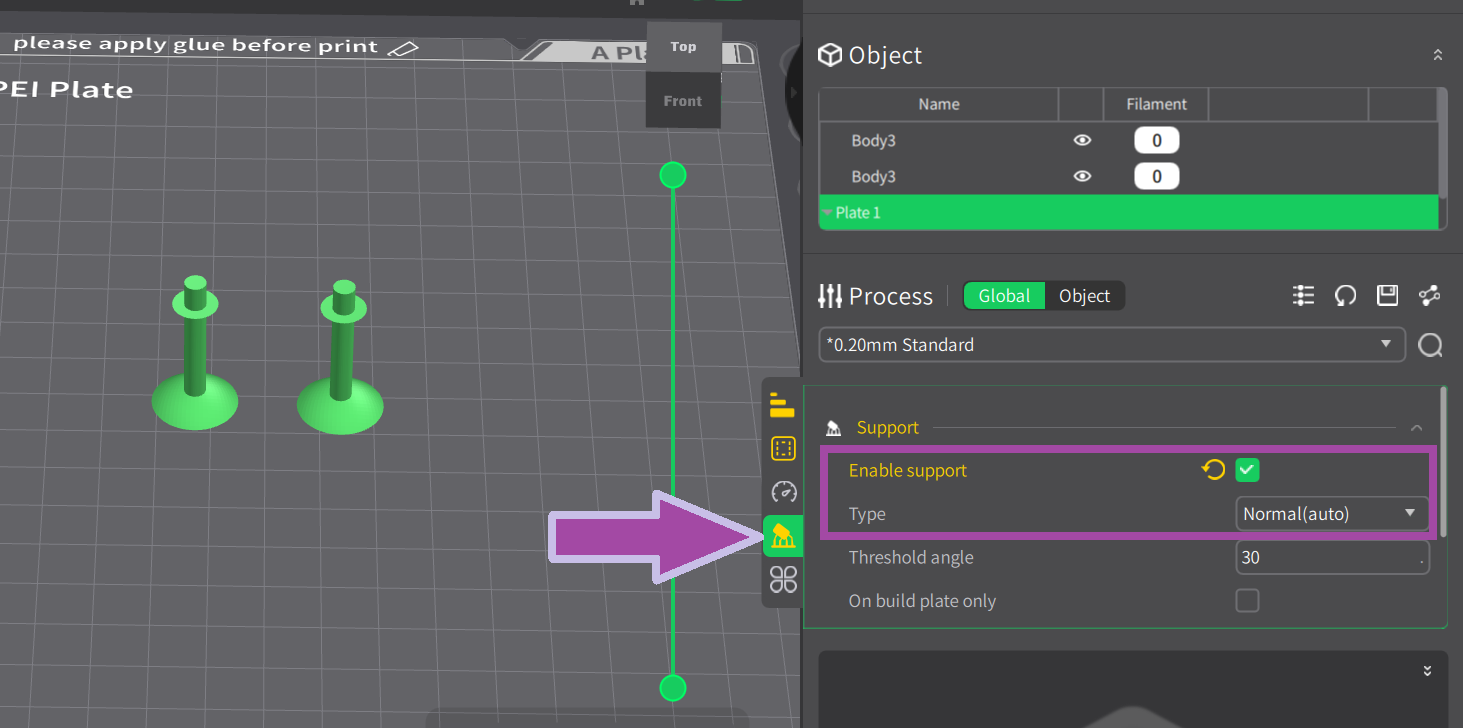
Now, select the “ Support ” tab and tick the “ Enable support ” check box, and from the “ Type ”, select “ Tree(auto) ”
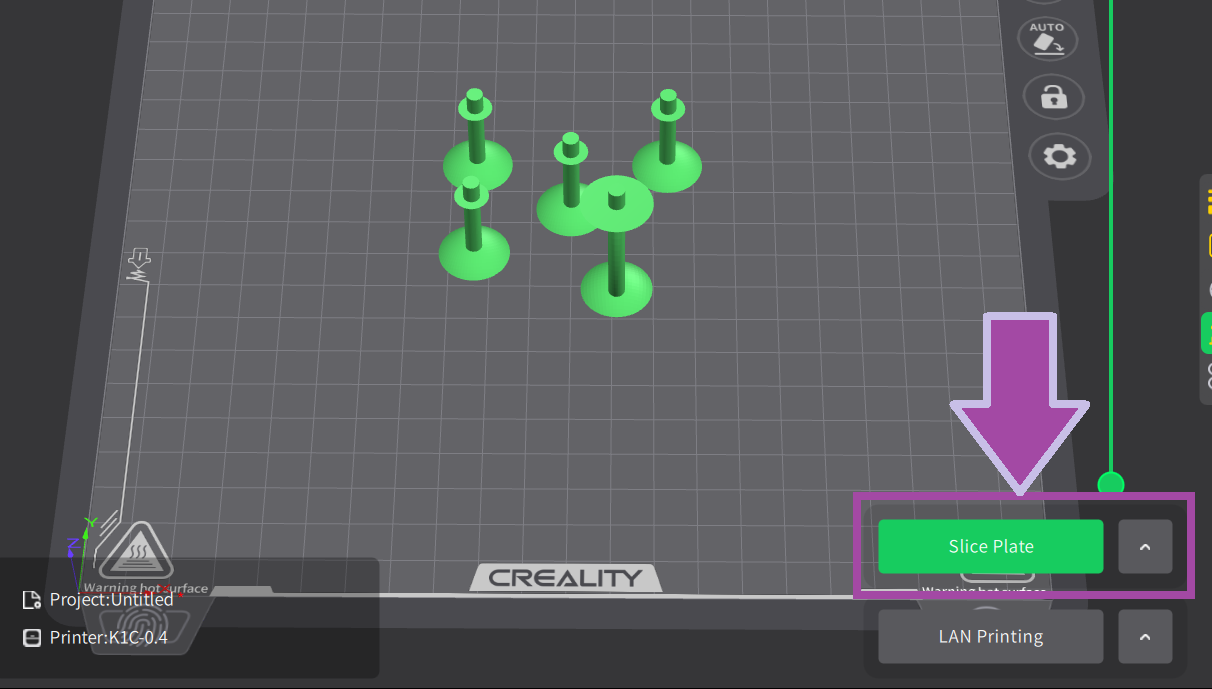
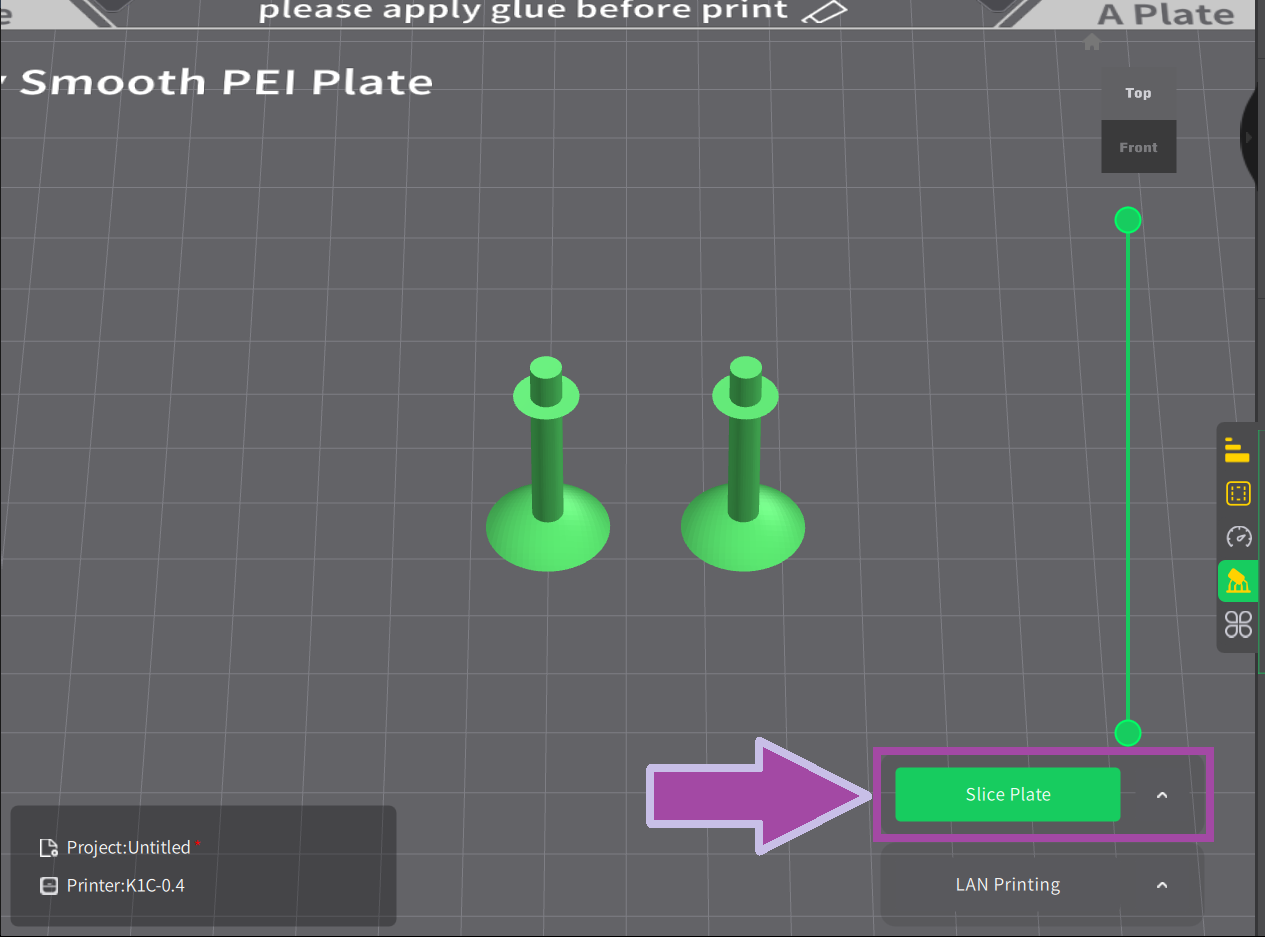
Now, click on the “ Slice Plate ” option.
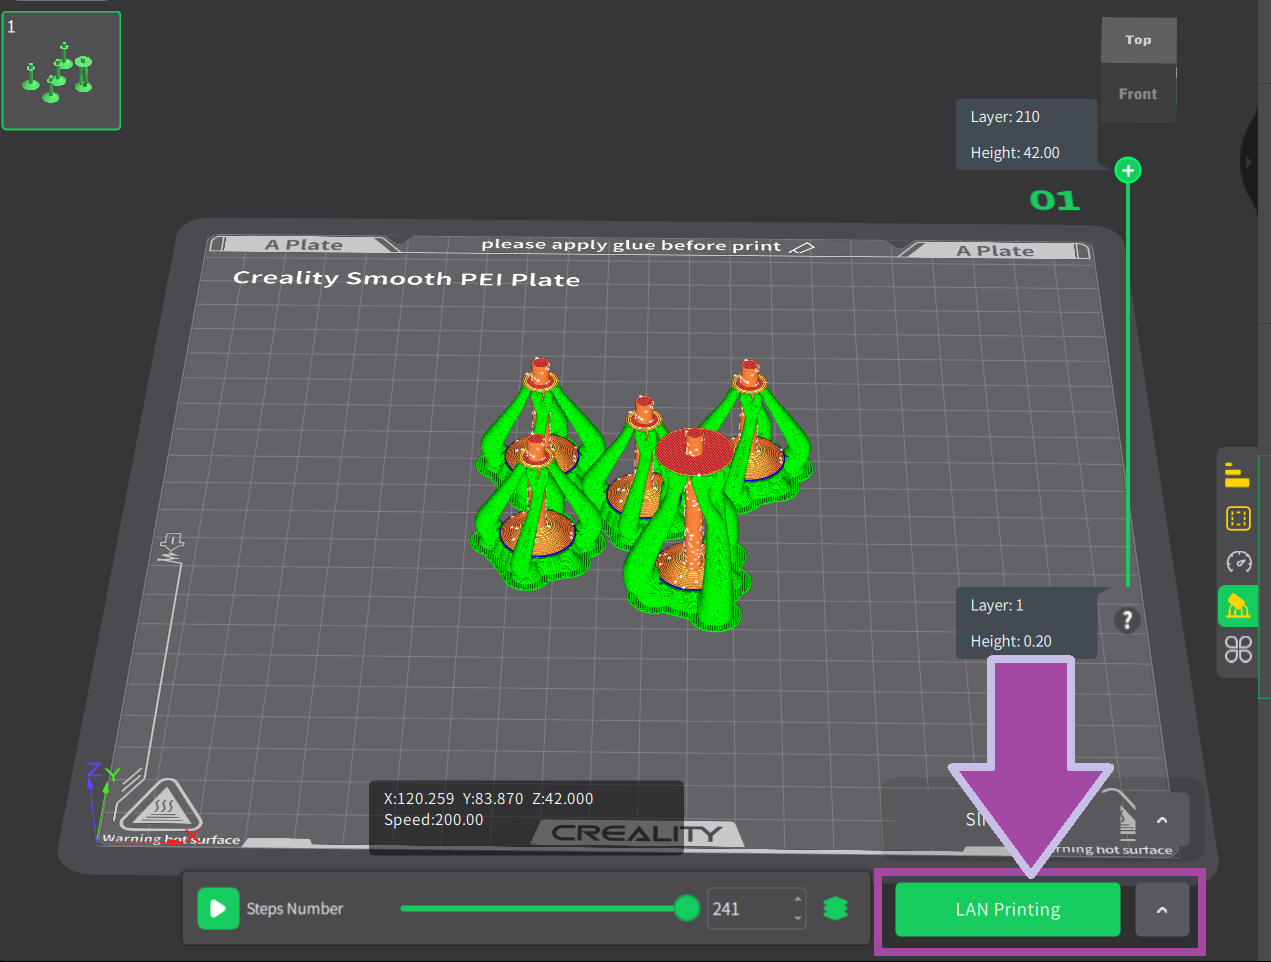
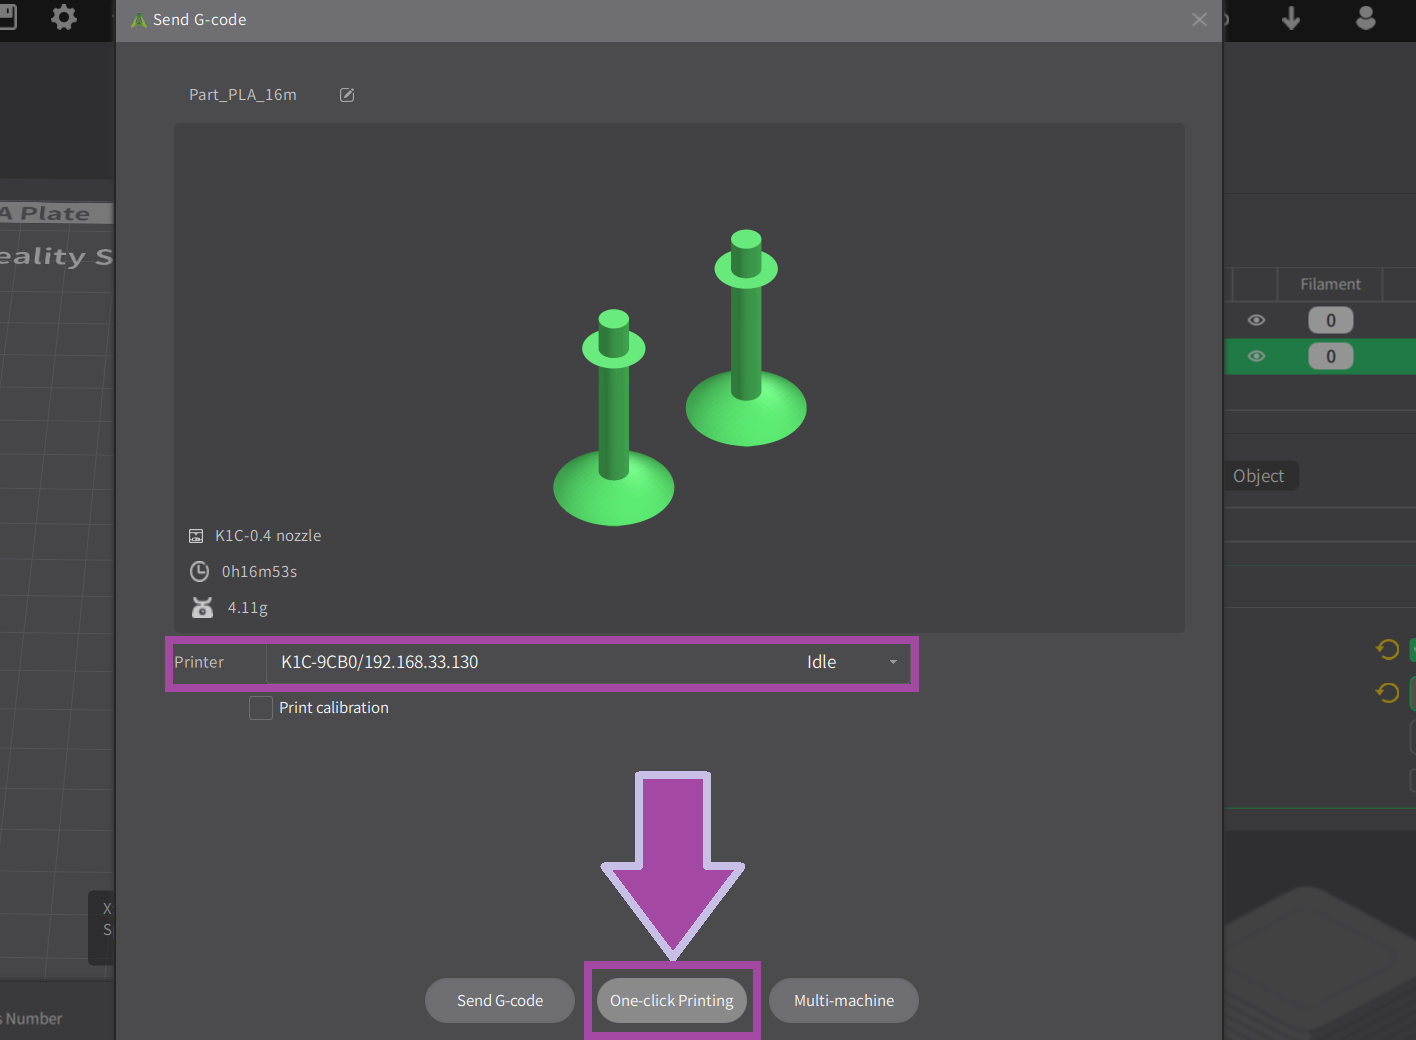
Now let’s print the part by selecting the “ LAN Printing ” option.
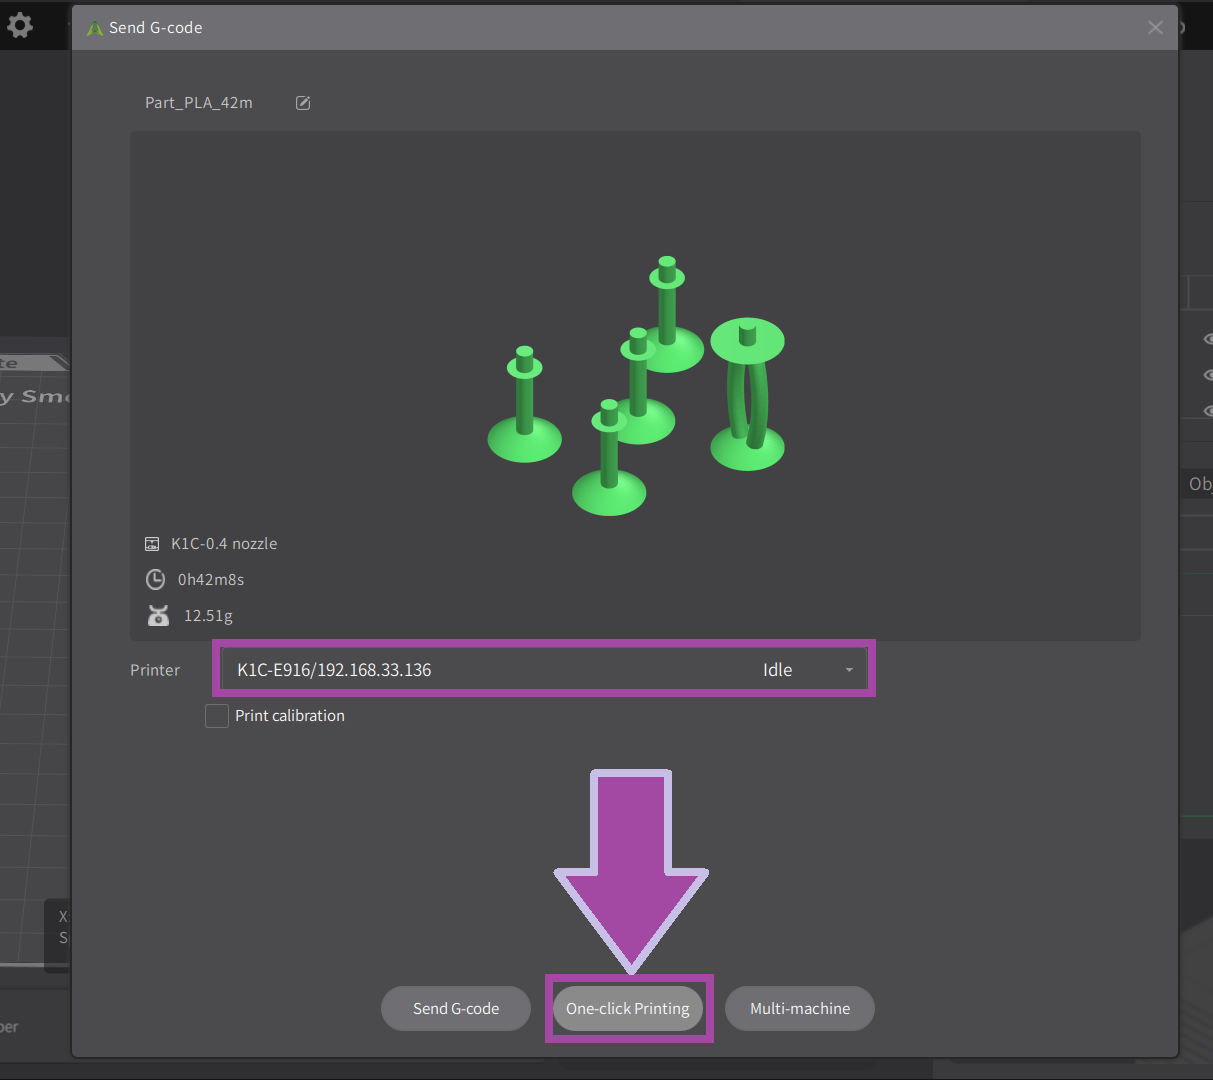
Make sure the printer plate is clean and apply glue stick to the plate to help the print adhere to the bed, prevent warping and curling, and make it easier to remove the finished print.

Select your printer and click on “ One-click Printing ” as shown below. The “ One-click Printing ” option will directly send the G-code and start printing.
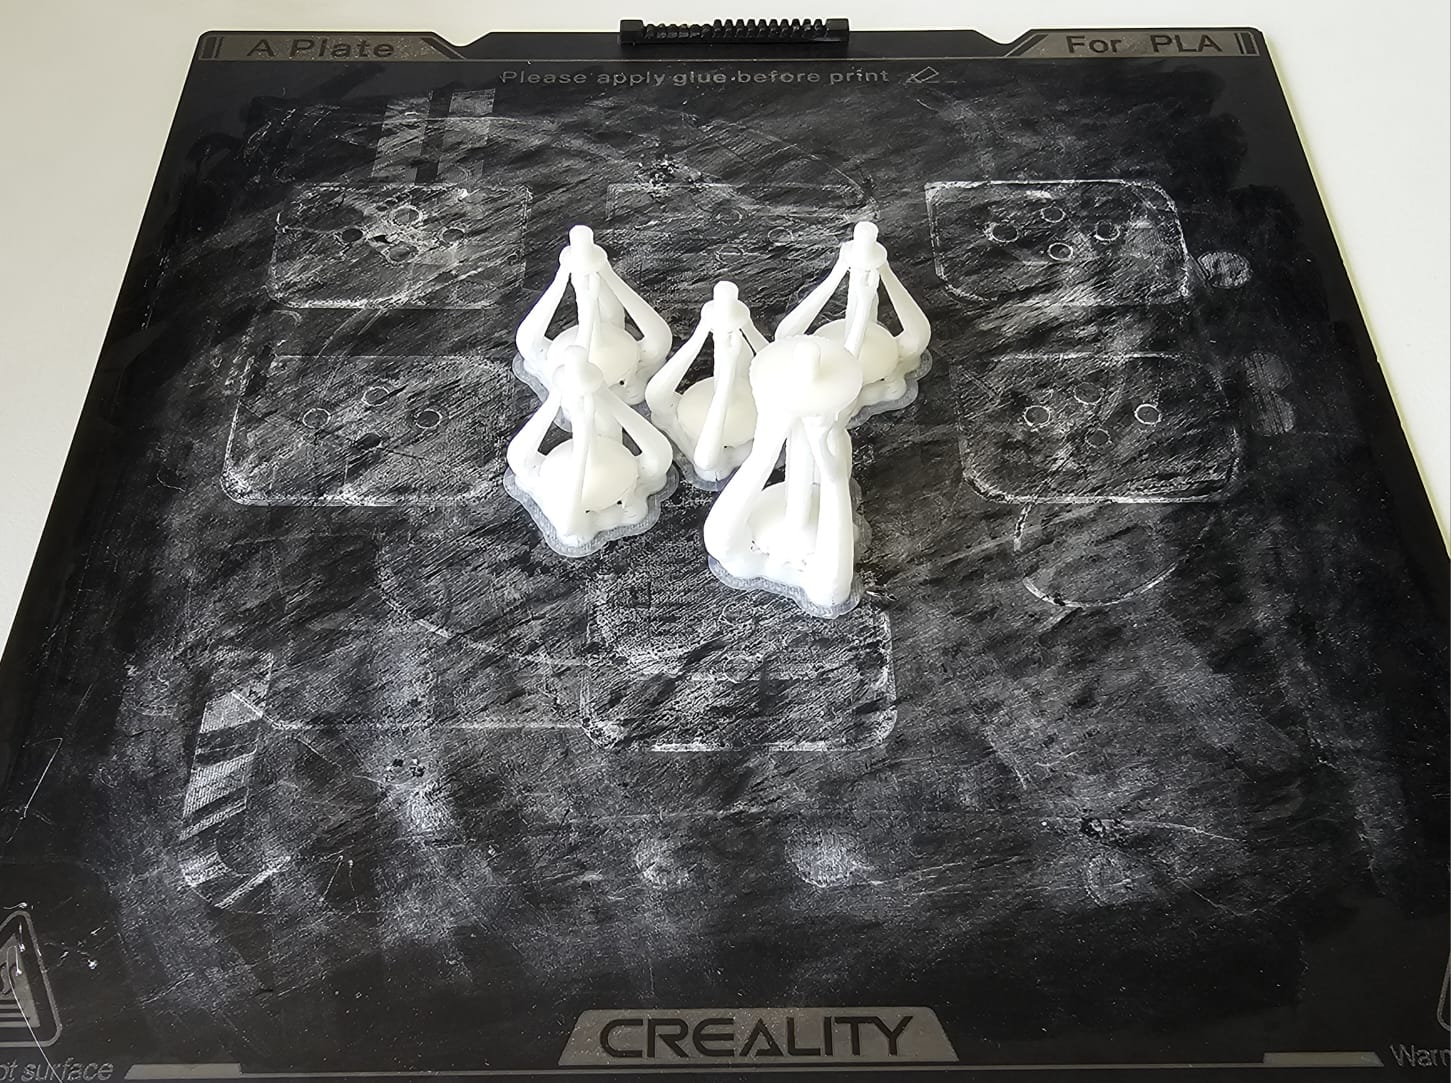
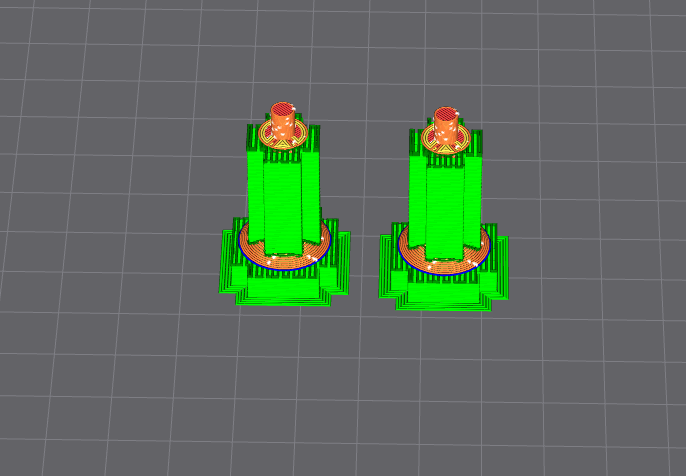
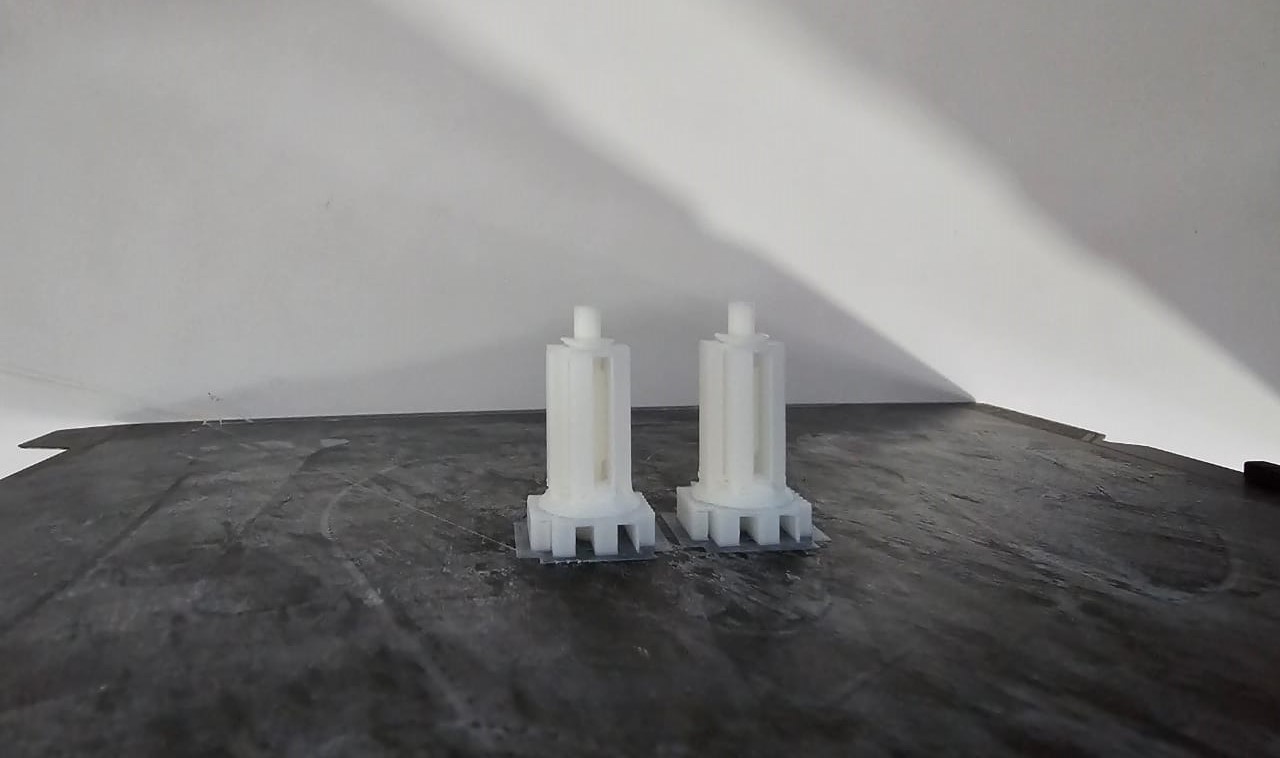
The image below shows the printed single and double bonds.
Now it’s time to print the carbon atoms. Let’s change the filament color to black.
To learn: How to change the filament color? Follow the video mentioned below.
The steps for slicing and printing the carbon and hydrogen atoms are almost the same as above. However, to learn how to slice and print the carbon and hydrogen atoms, follow the video mentioned below.
The slicer settings and the new values for both the carbon and hydrogen atoms are the same and are mentioned below.
Download the 3MF file of the carbon atoms from the “ Resources and Downloads ” section.
Make sure to set the layer height to 0.1 mm for the carbon and hydrogen atoms.
The image below illustrates the printed carbon atoms.

You can download the hydrogen atoms' 3MF file from the the “ Resources and Downloads ” section.
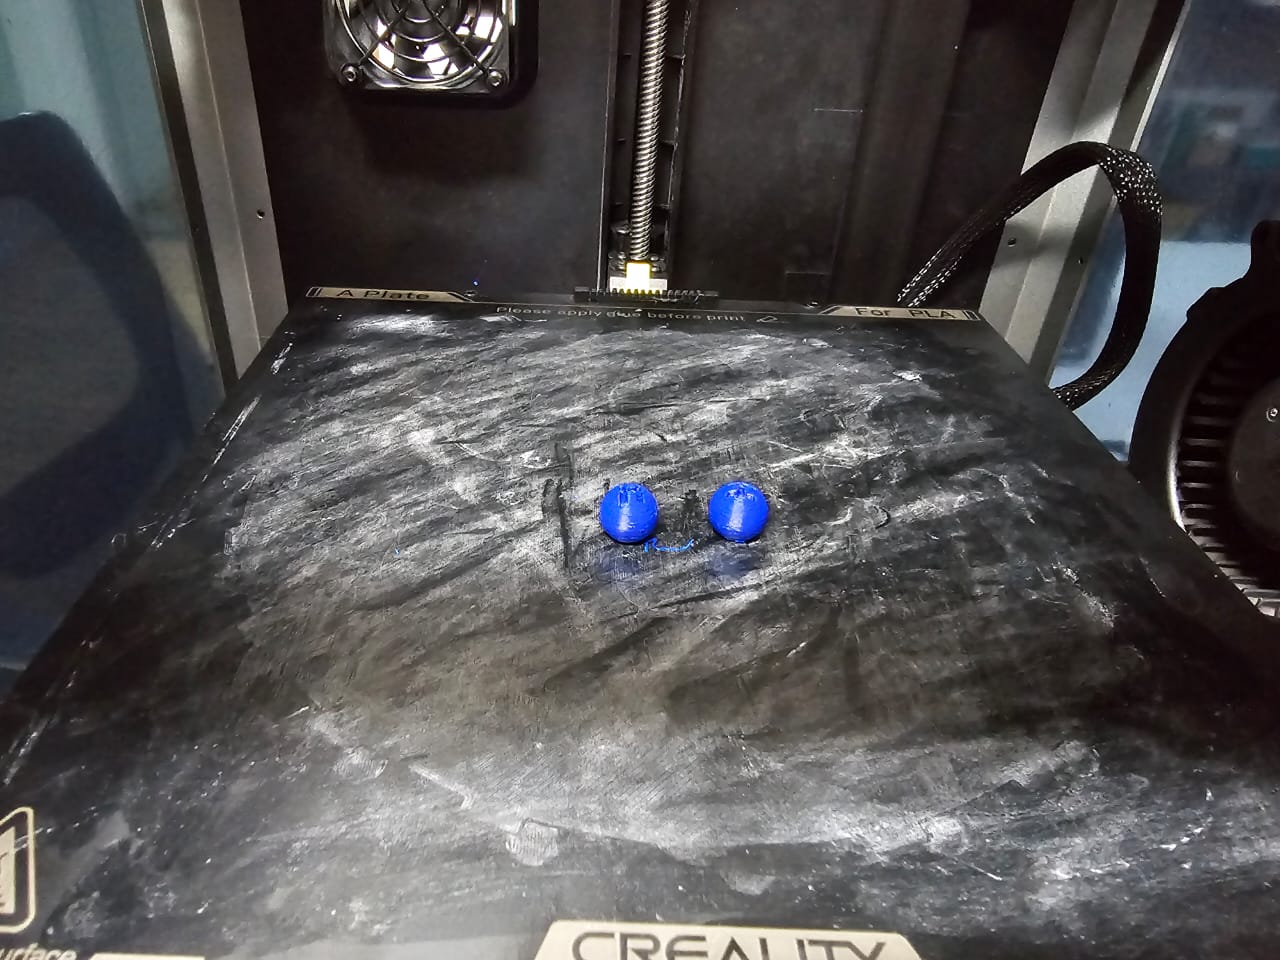
The image below illustrates the printed hydrogen atoms.
Post-processing
Now it’s time to post-process the printed parts. In the post-process, we remove all the supports, which is not in the actual design.
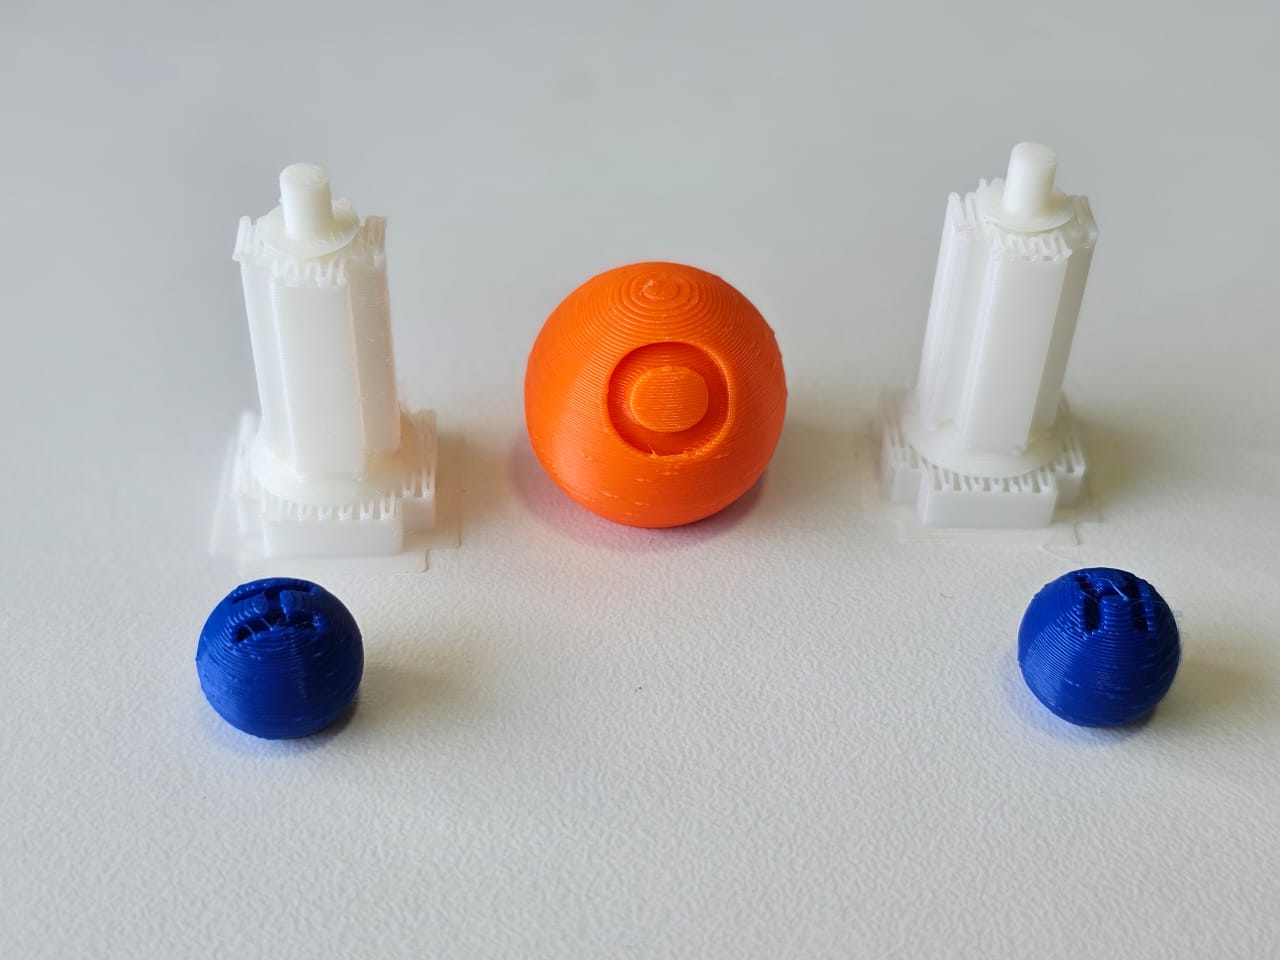
The image below shows all of the printed ethene parts.
Use the nose piler to post-process the single bonds.

The image below shows the post-processed parts.

Assembly
Let’s assemble the post-processed parts as shown below.
Activity 2: 3D-Printed H2O Molecule
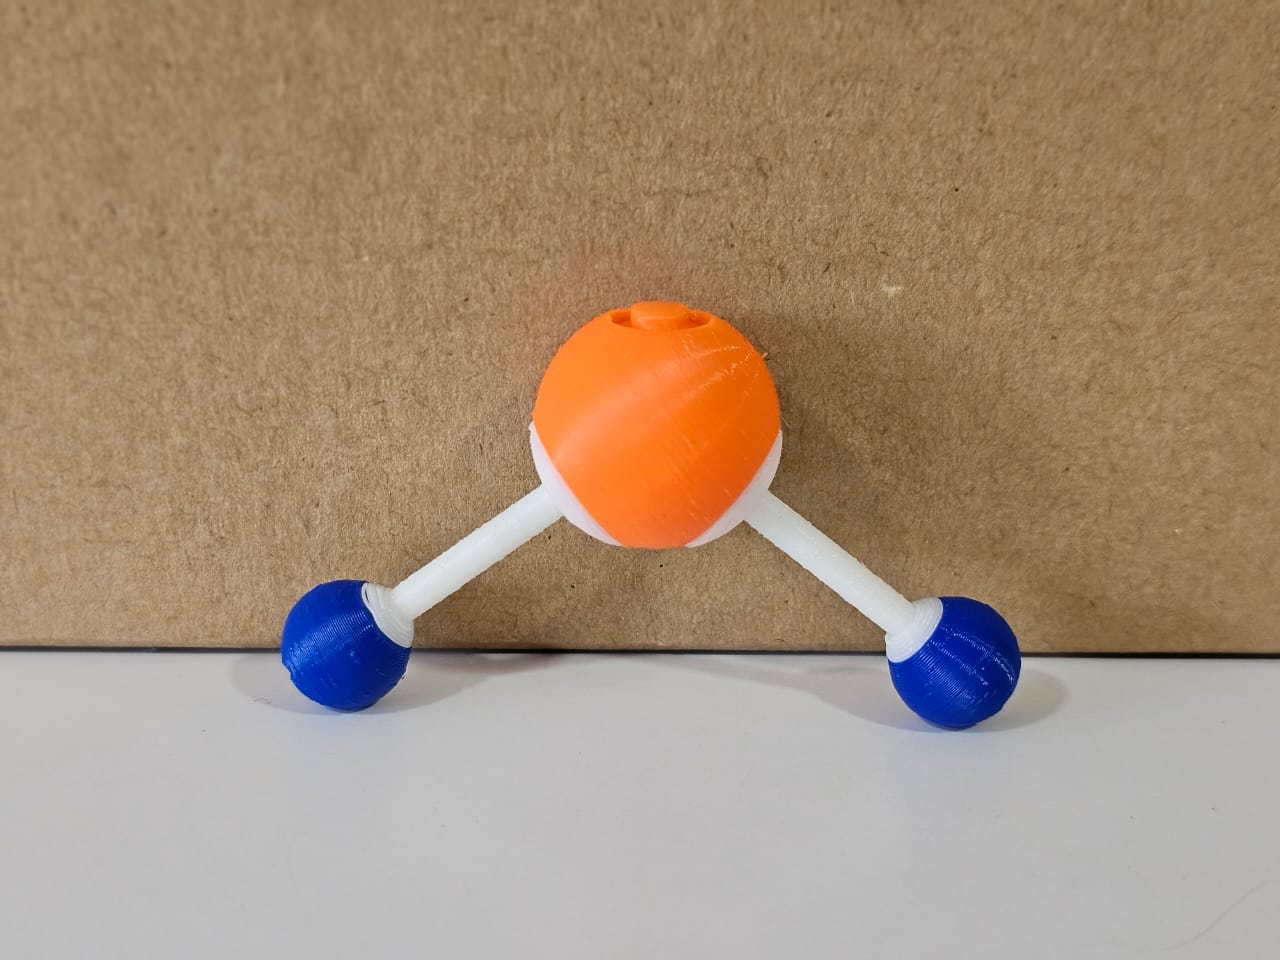
This activity aims to create 3D-printed models of the key water (H2O) molecule to help students visualize the molecular structures and understand chemical bonds as shown below.
How to Perform this Activity
There are three main methods to perform this activity.
- Based on the molecules, print the atoms and bonds.
- Based on the colors, print the atoms and bonds.
- Print all the atoms and bonds in a single color.
It is always preferable to go with either method 1 or method 2 .
Method 1 is preferred when you want to print the molecules chapter-wise, and Method 2 is preferred when you want to print and assemble all the molecules at once.
3D Printing
Make sure your 3D printer and Slicer software are ready. If not, click here .
Most likely, the filament color will be white. In the H2O molecule, the bonds are white. So, let's first print the H2O bonds.
 https://youtu.be/F8TzLyNc4OE

The single bond 3MF file can be downloaded from the 3MF file section mentioned below.
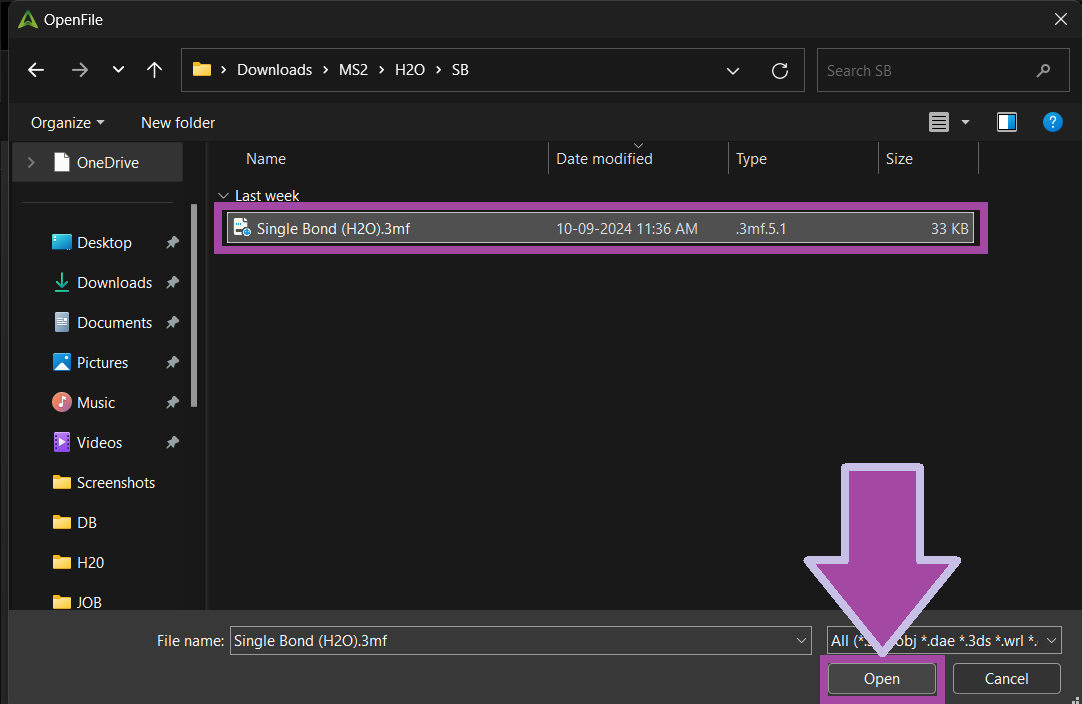
Open the “Creality Print” slicer, and from "File” select “Import” and then “Model File”.
Select the “Single Bond (H2O)” file and click “Open”.
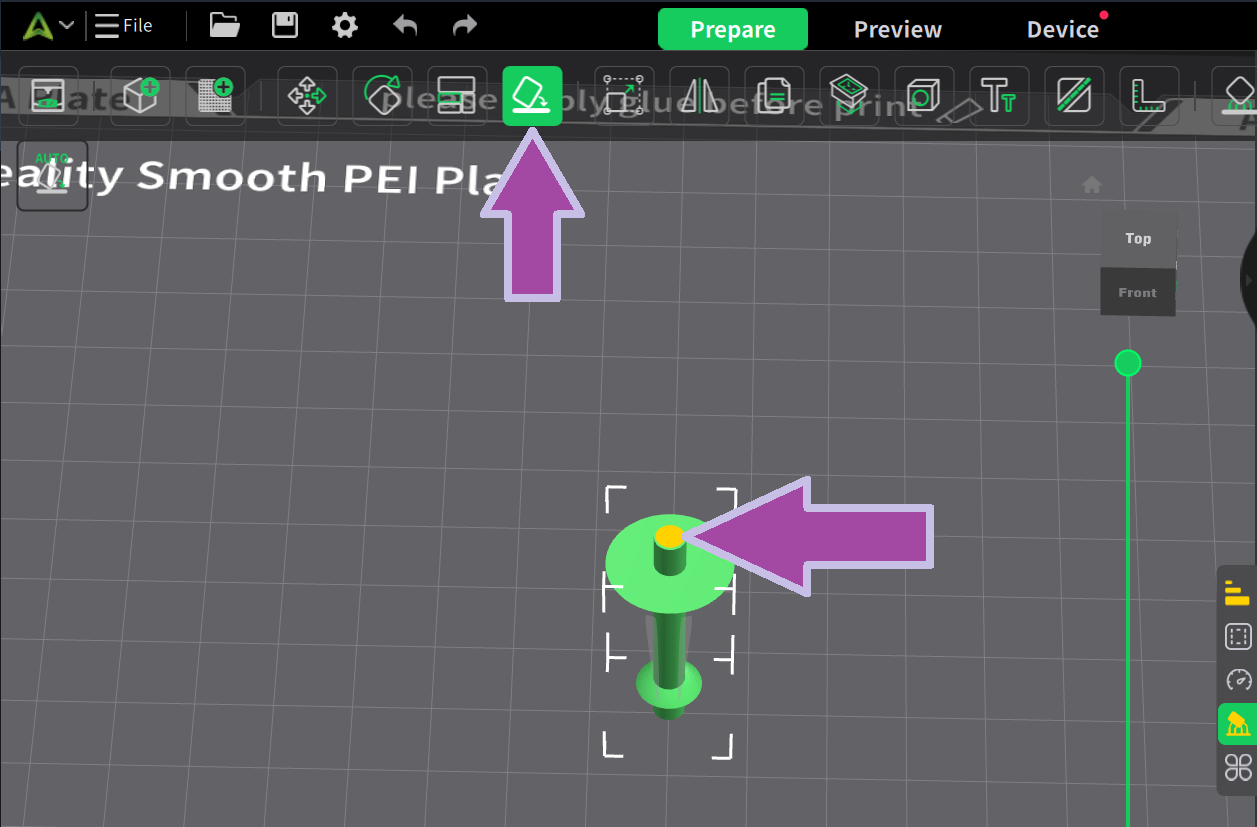
Once the file is imported, click on the “Auto Layout” option as shown below. Sometimes our imported file will be out of the plate, and this feature will help to place our part with the plate.

Then click on the auto “Pick Botton” option.

The auto-"Pick Bottom” feature picked the bottom automatically. However, we want the top part to go to the bottom. To do that, select the manual “Pick Bottom” option mentioned below and click the yellow highlighted part.
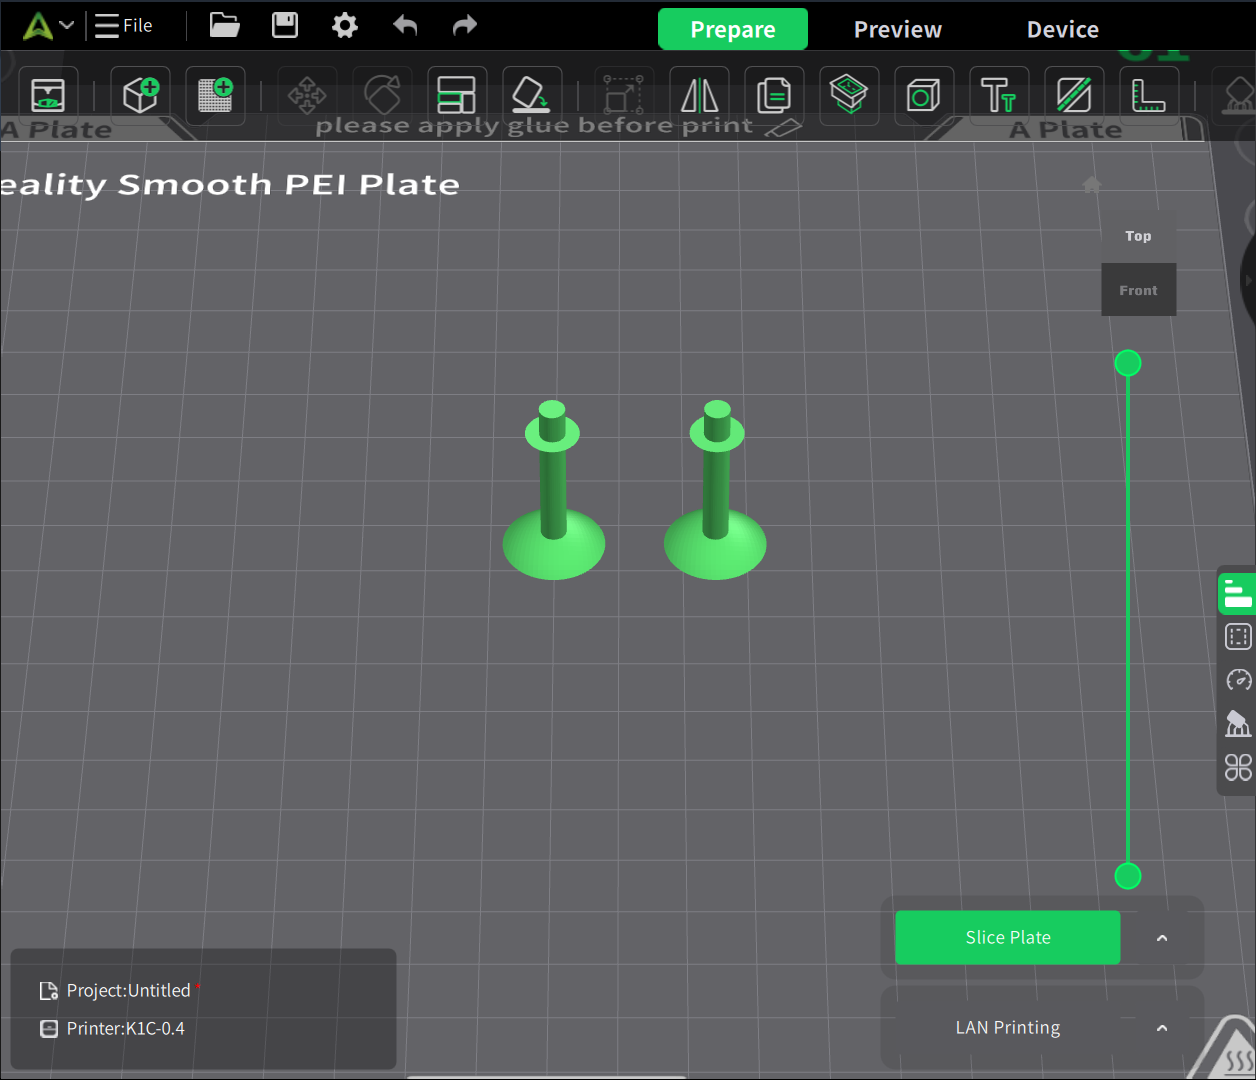
There are two single bonds for H2O molecules. So, let’s clone the bond.
Select the “Clone” option or press “Alt + C” and enter “1” as the clone number, select the part that needs to be cloned, and press “Add”.

The image below shows the single bond with the cloned part.
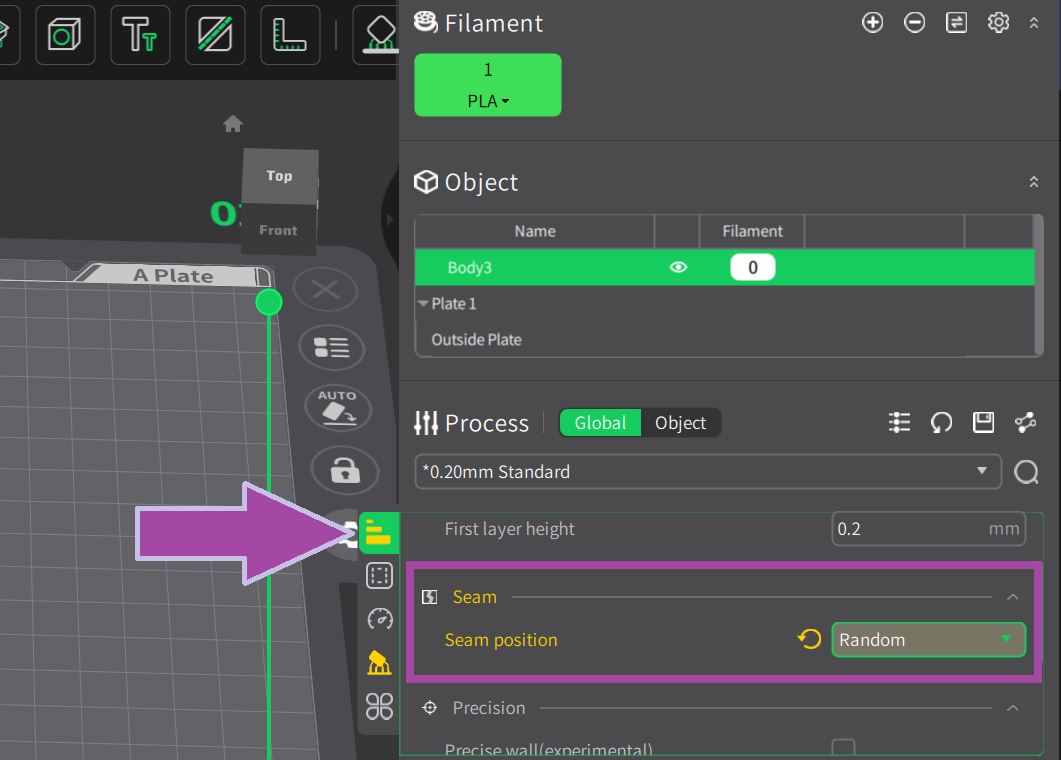
Now let’s set the quality parameters for our model. By default, the “Quality” tab will be opened. If not, select the “Quality” icon mentioned below. Set the “Seam position” to “Random”.
Now, select the “Support” tab and tick the “Enable support” check box.
Now, click on the “Slice Plate” option.
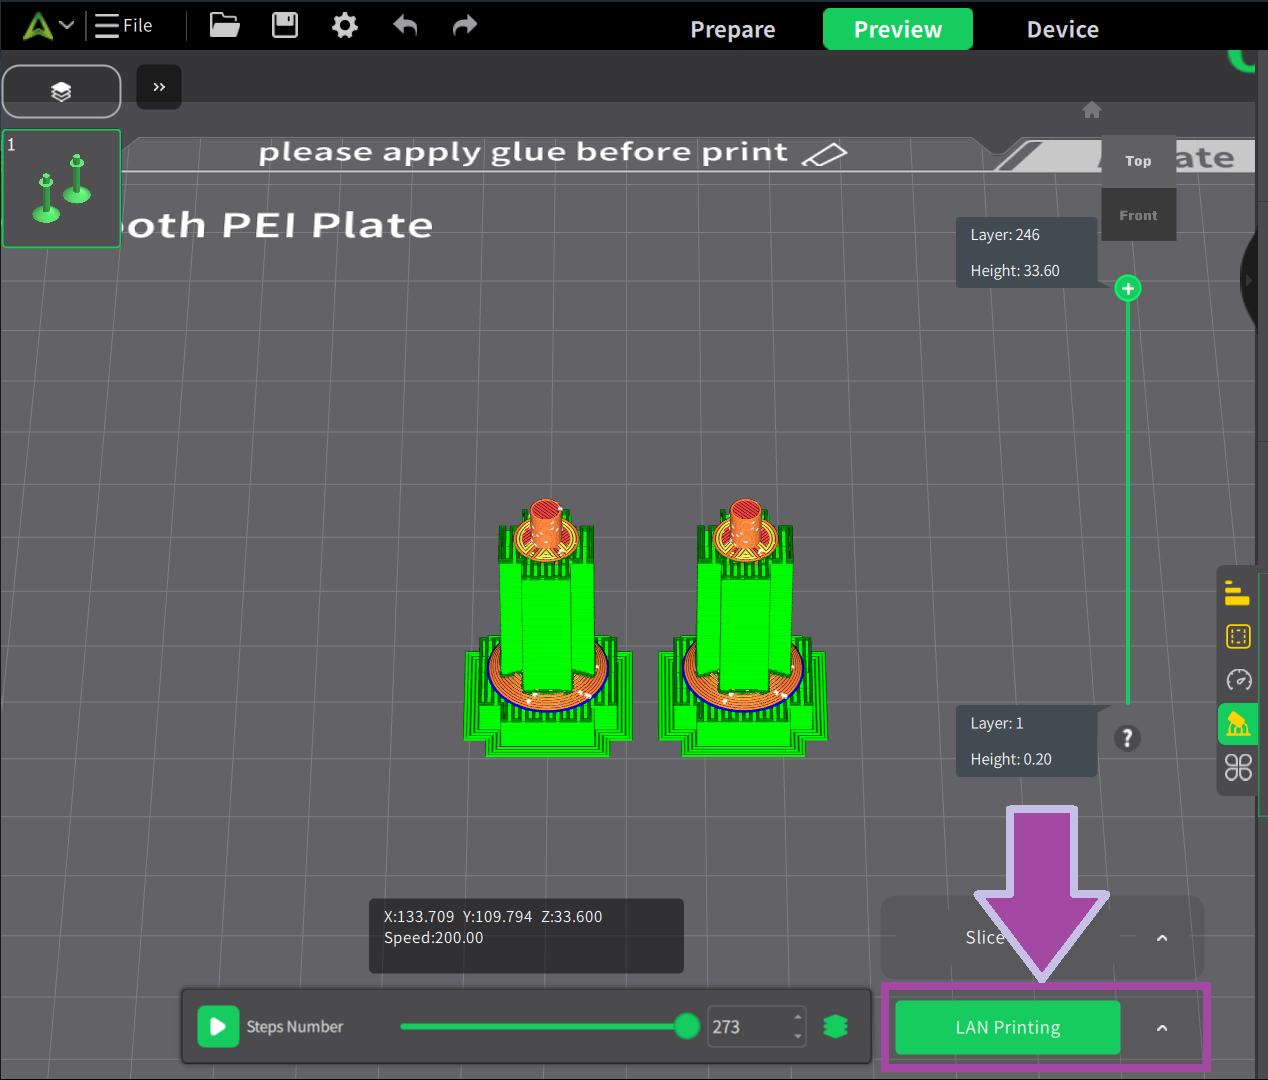
The image below illustrates the sliced part.
Now let’s print the part by selecting the “LAN Printing” option.
Make sure the printer plate is clean and apply glue stick to the plate to help the print adhere to the bed, prevent warping and curling, and make it easier to remove the finished print.
Select your printer and click on “One-click Printing” as shown below. The “One-click Printing” option will directly send the G-code and start printing.
The image below shows the printed part.
Now it’s time to print the oxygen atom. Let’s change the filament color.
To learn how to change the filament color, click here.
Download the 3MF file of the oxygen atom from the 3MF file section.
Make sure to set the layer height to 0.1 mm.
https://youtu.be/PqZSahGUVJI

The image below illustrates the printed oxygen atom.

You can download the Hydrogen 3MF file from the section on 3MF files listed below.
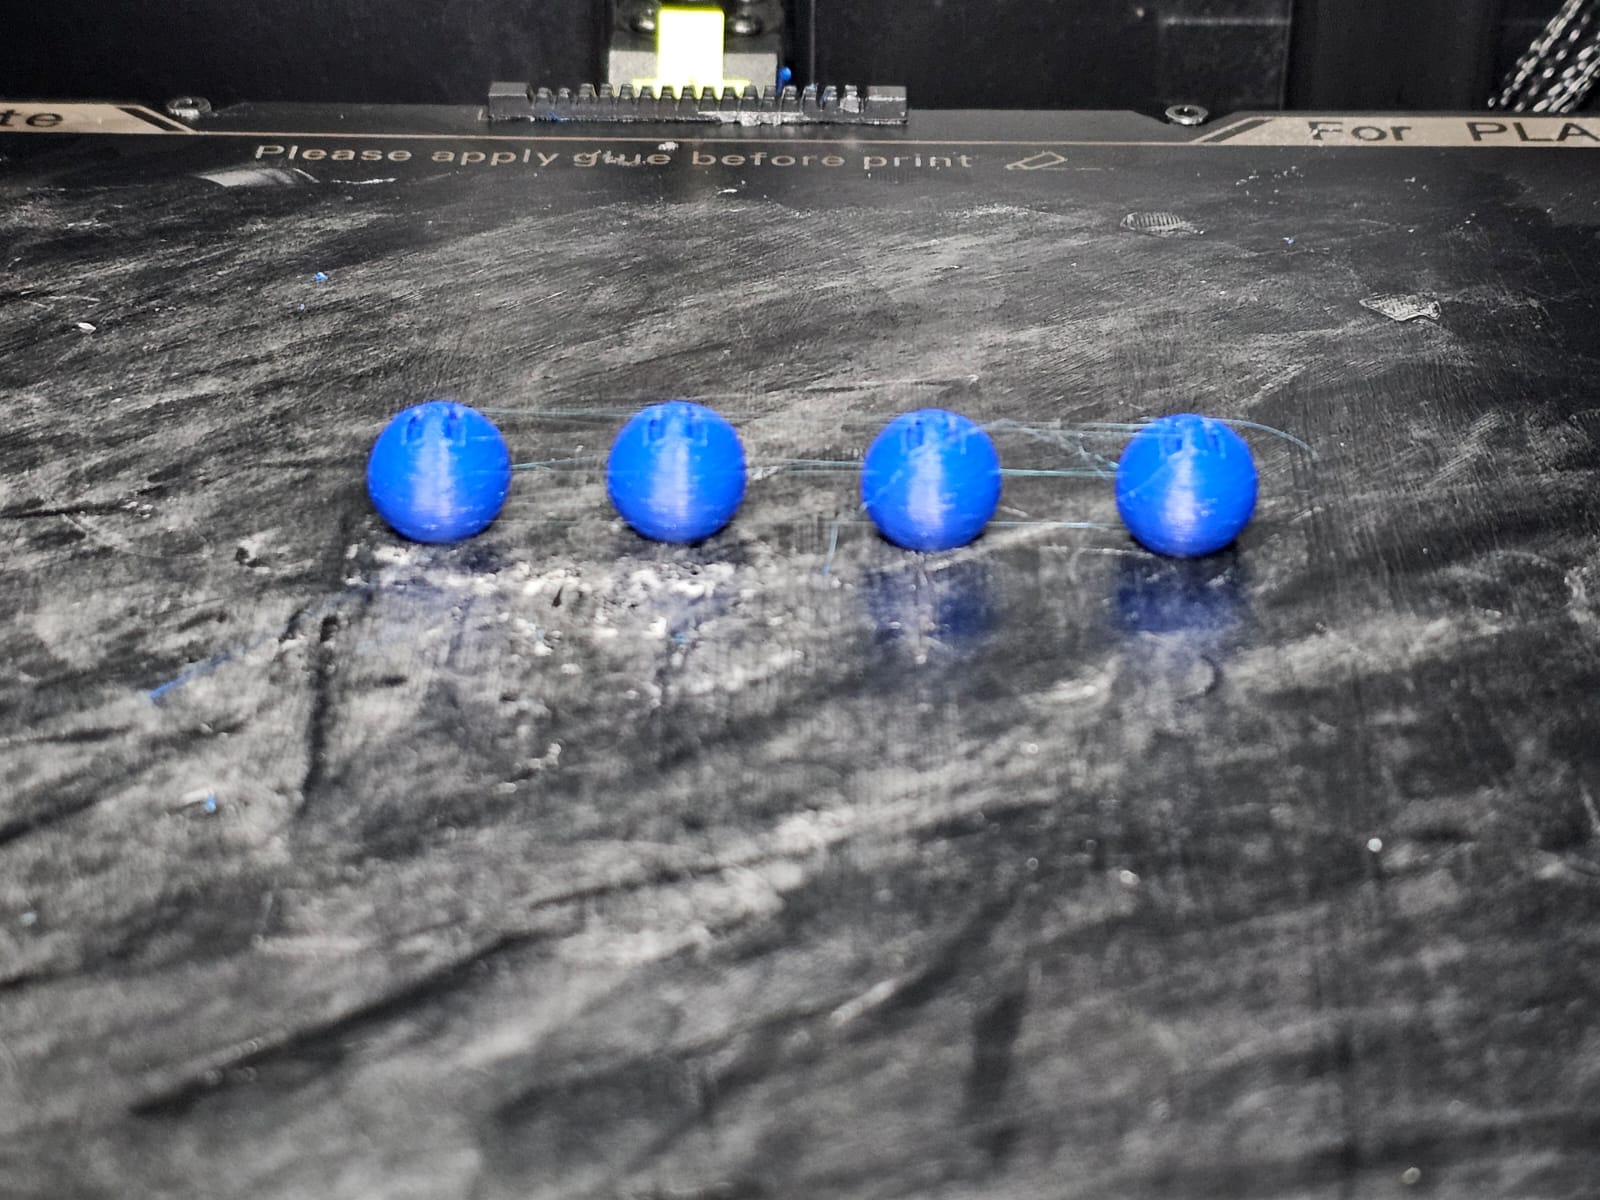
The image below illustrates the printed hydrogen atoms.
Post-processing
Now it’s time to post-process the printed parts. In the post-process, we remove all the supports, which is not in the actual design.
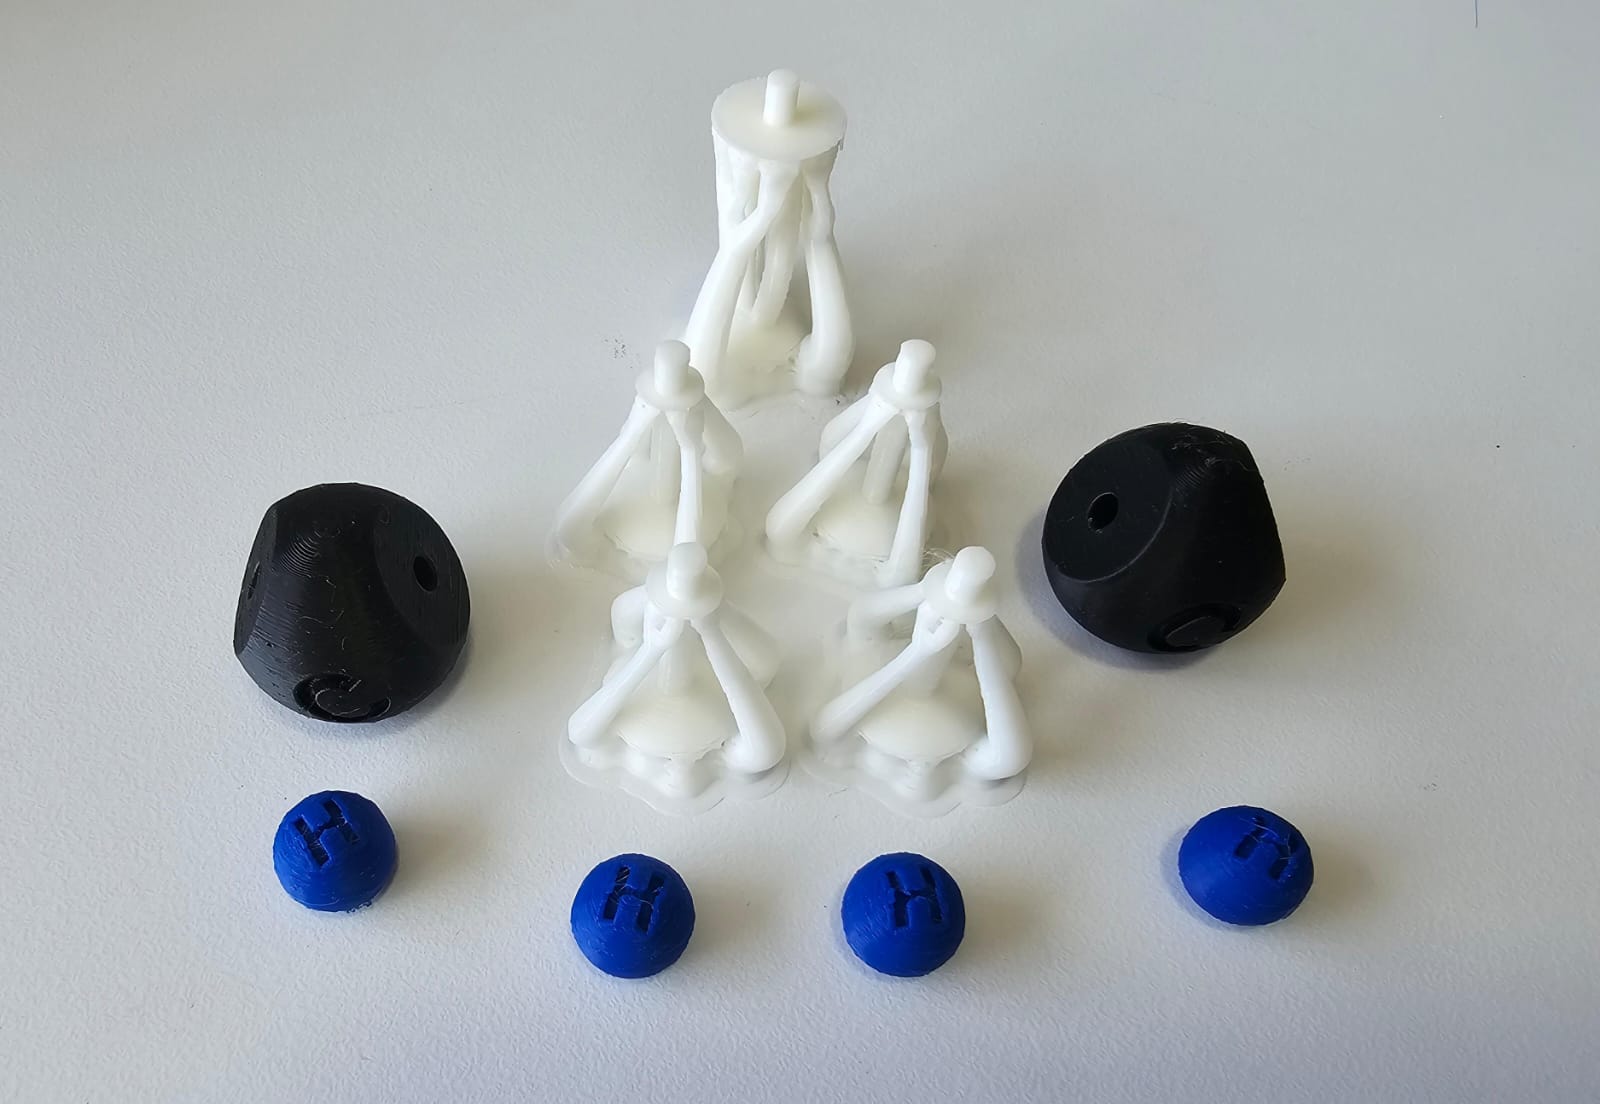
The image below illustrates all the printed H2O parts.
Use the nose piler to post-process the single bonds.
To post-process the oxygen and hydrogen atoms, use a screw diver.

Assembly
Let’s assemble the post-processed parts as shown below.
Molecular Structure Checklist
-
H2O (Water)
-
CO2 (Carbon Dioxide)
-
CH4 (Methane)
-
C2H6 (Ethane)
-
C2H4 (Ethene)
-
C4H10 (Butane)
-
C6H6 (Benzene)
-
NH3 (Ammonia)
-
CaCl2 (Calcium Chloride)
3D-Printed Molecular Structures

Resources and Downloads
 https://drive.google.com/drive/folders/11-aMumVKsjtSXye6cR739tBQWoaKiwsQ?usp=sharing
| METHOD 1 | METHOD 2 |
|---|---|
| 📁 H2O (Water) | 📁 Carbon (C6H6) |
| 📁 CO2 (Carbon Dioxide) | 📁 Carbon (C2H6) |
| 📁 CH4 (Methane) | 📁 Carbon (C2H4) |
| 📁 C2H6 (Ethane) | 📁 Carbon (CH4) |
| 📁 C2H4 (Ethene) | 📁 Carbon (CO2) |
| 📁 C4H10 (Butane) | 📁 Oxygen (H2O) |
| 📁 C6H6 (Benzene) | 📁 Oxygen (CO2) |
| 📁 NH3 (Ammonia) | 📁 Hydrogen (Common) |
| 📁 CaCl2 (Calcium Chloride) | 📁 Nitrogen |
| 📁 Chloride | |
| 📁 Calcium | |
| 📁 Single Bonds | |
| 📁 Double Bonds |