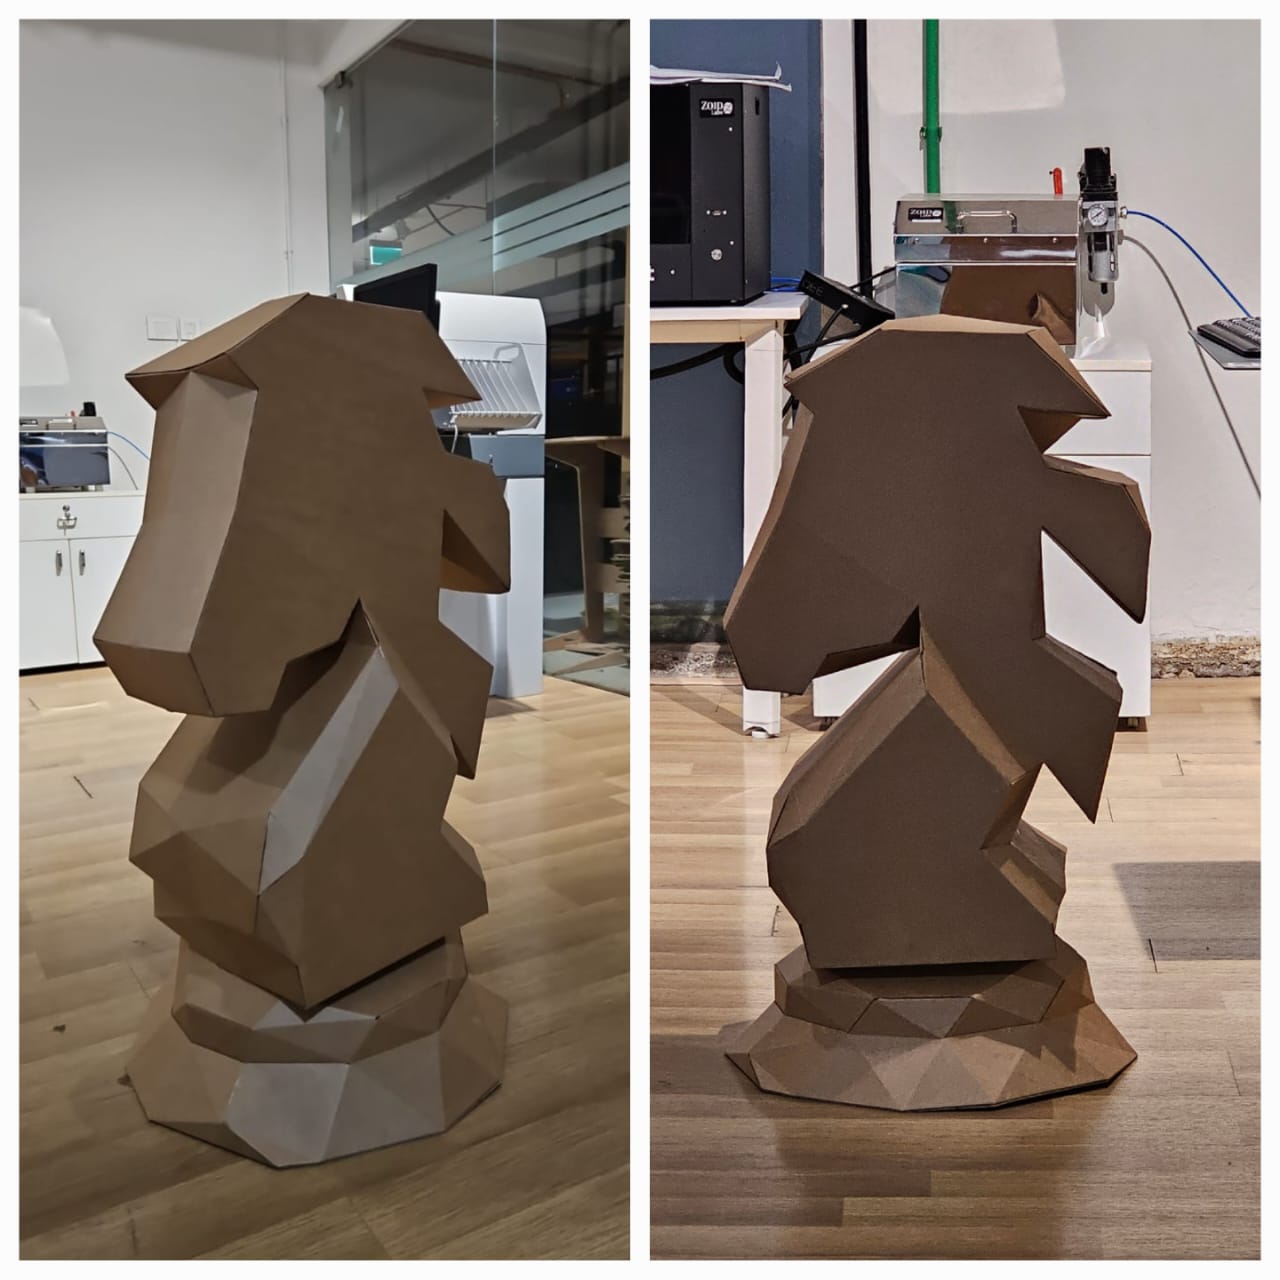
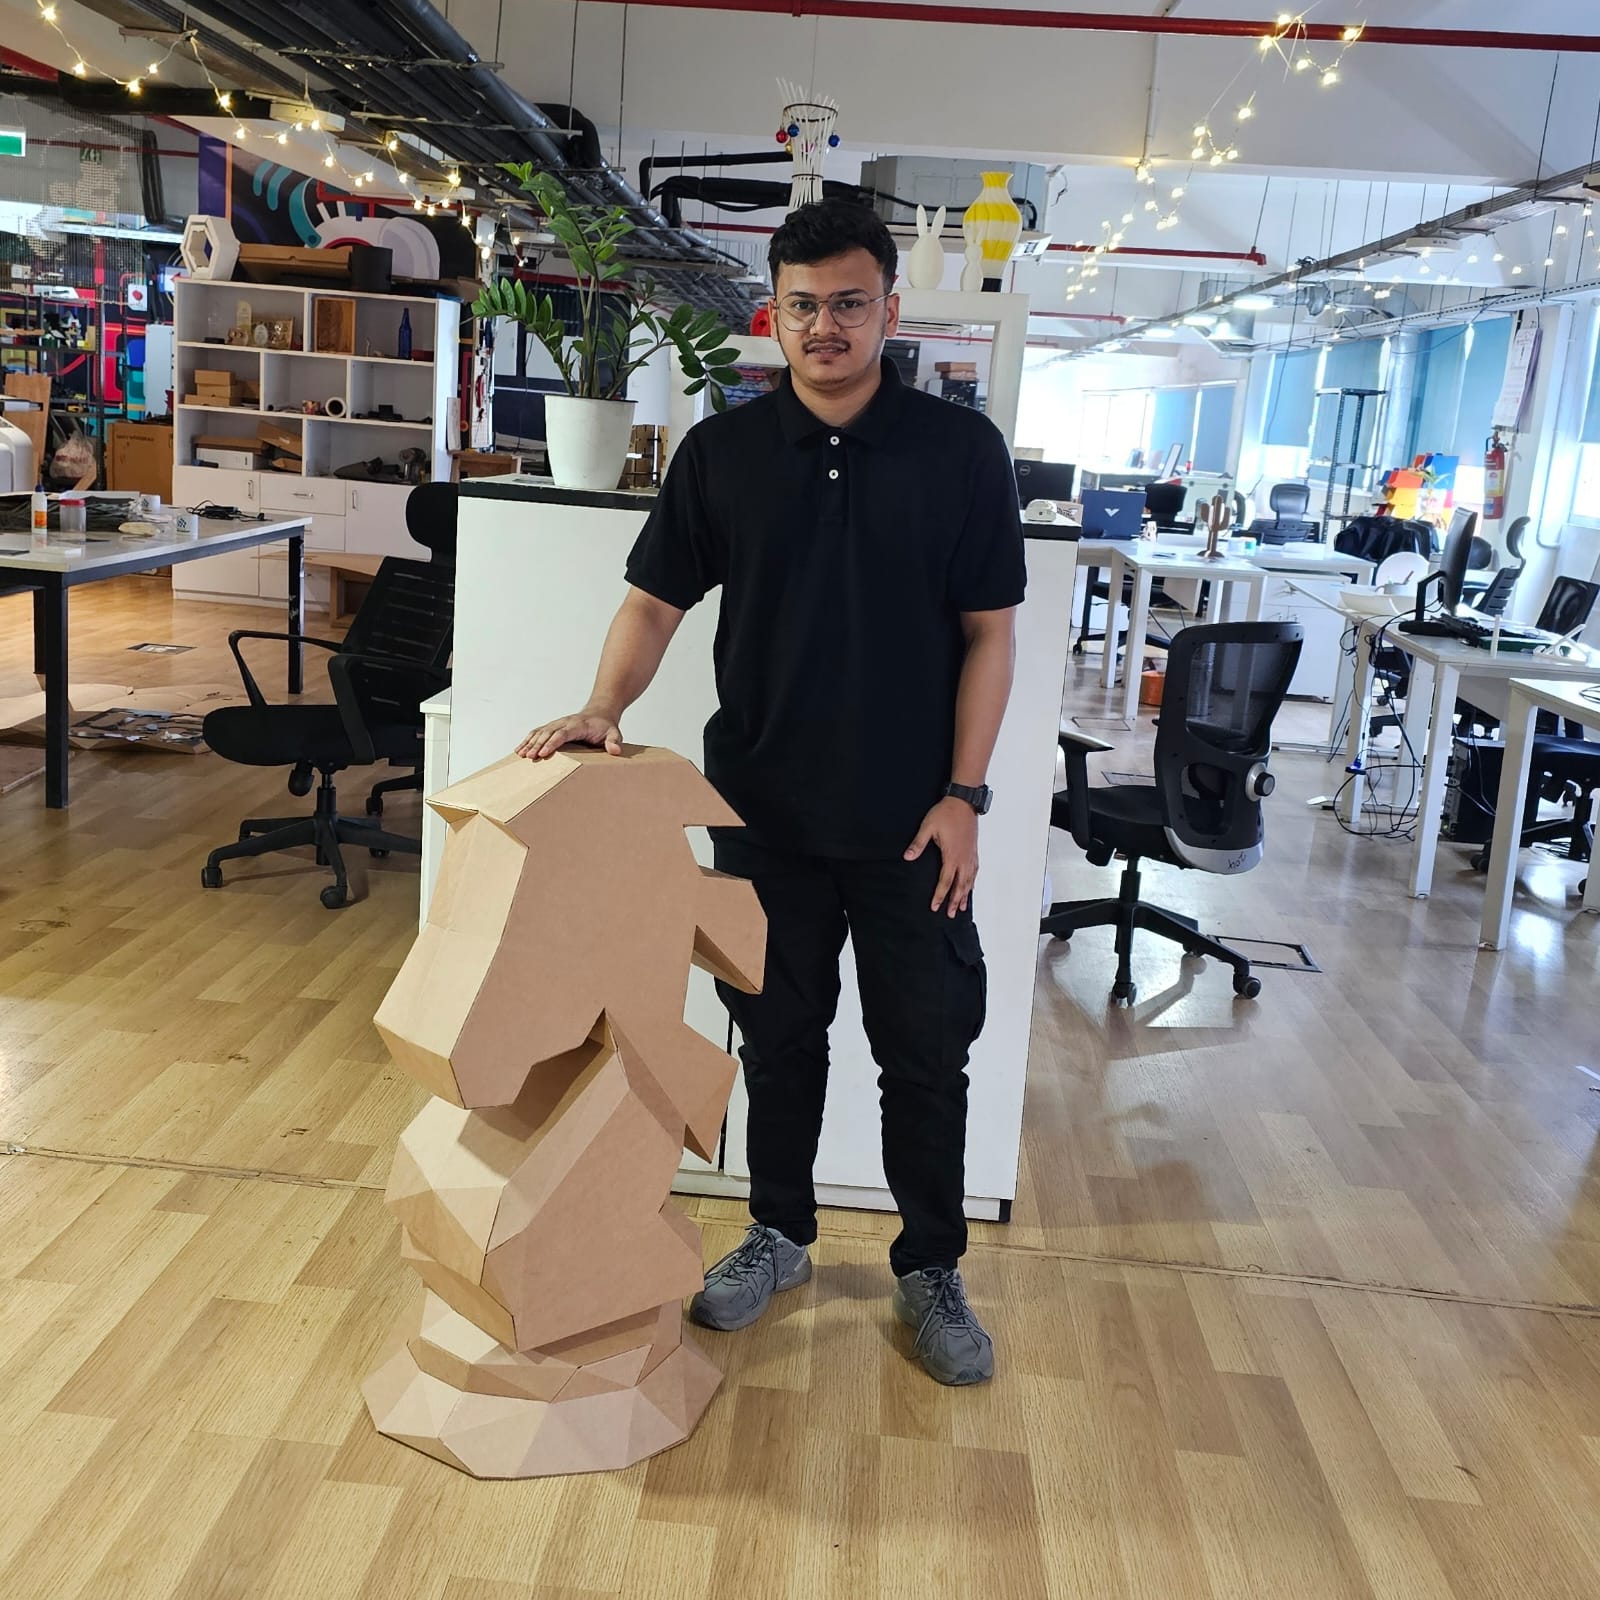
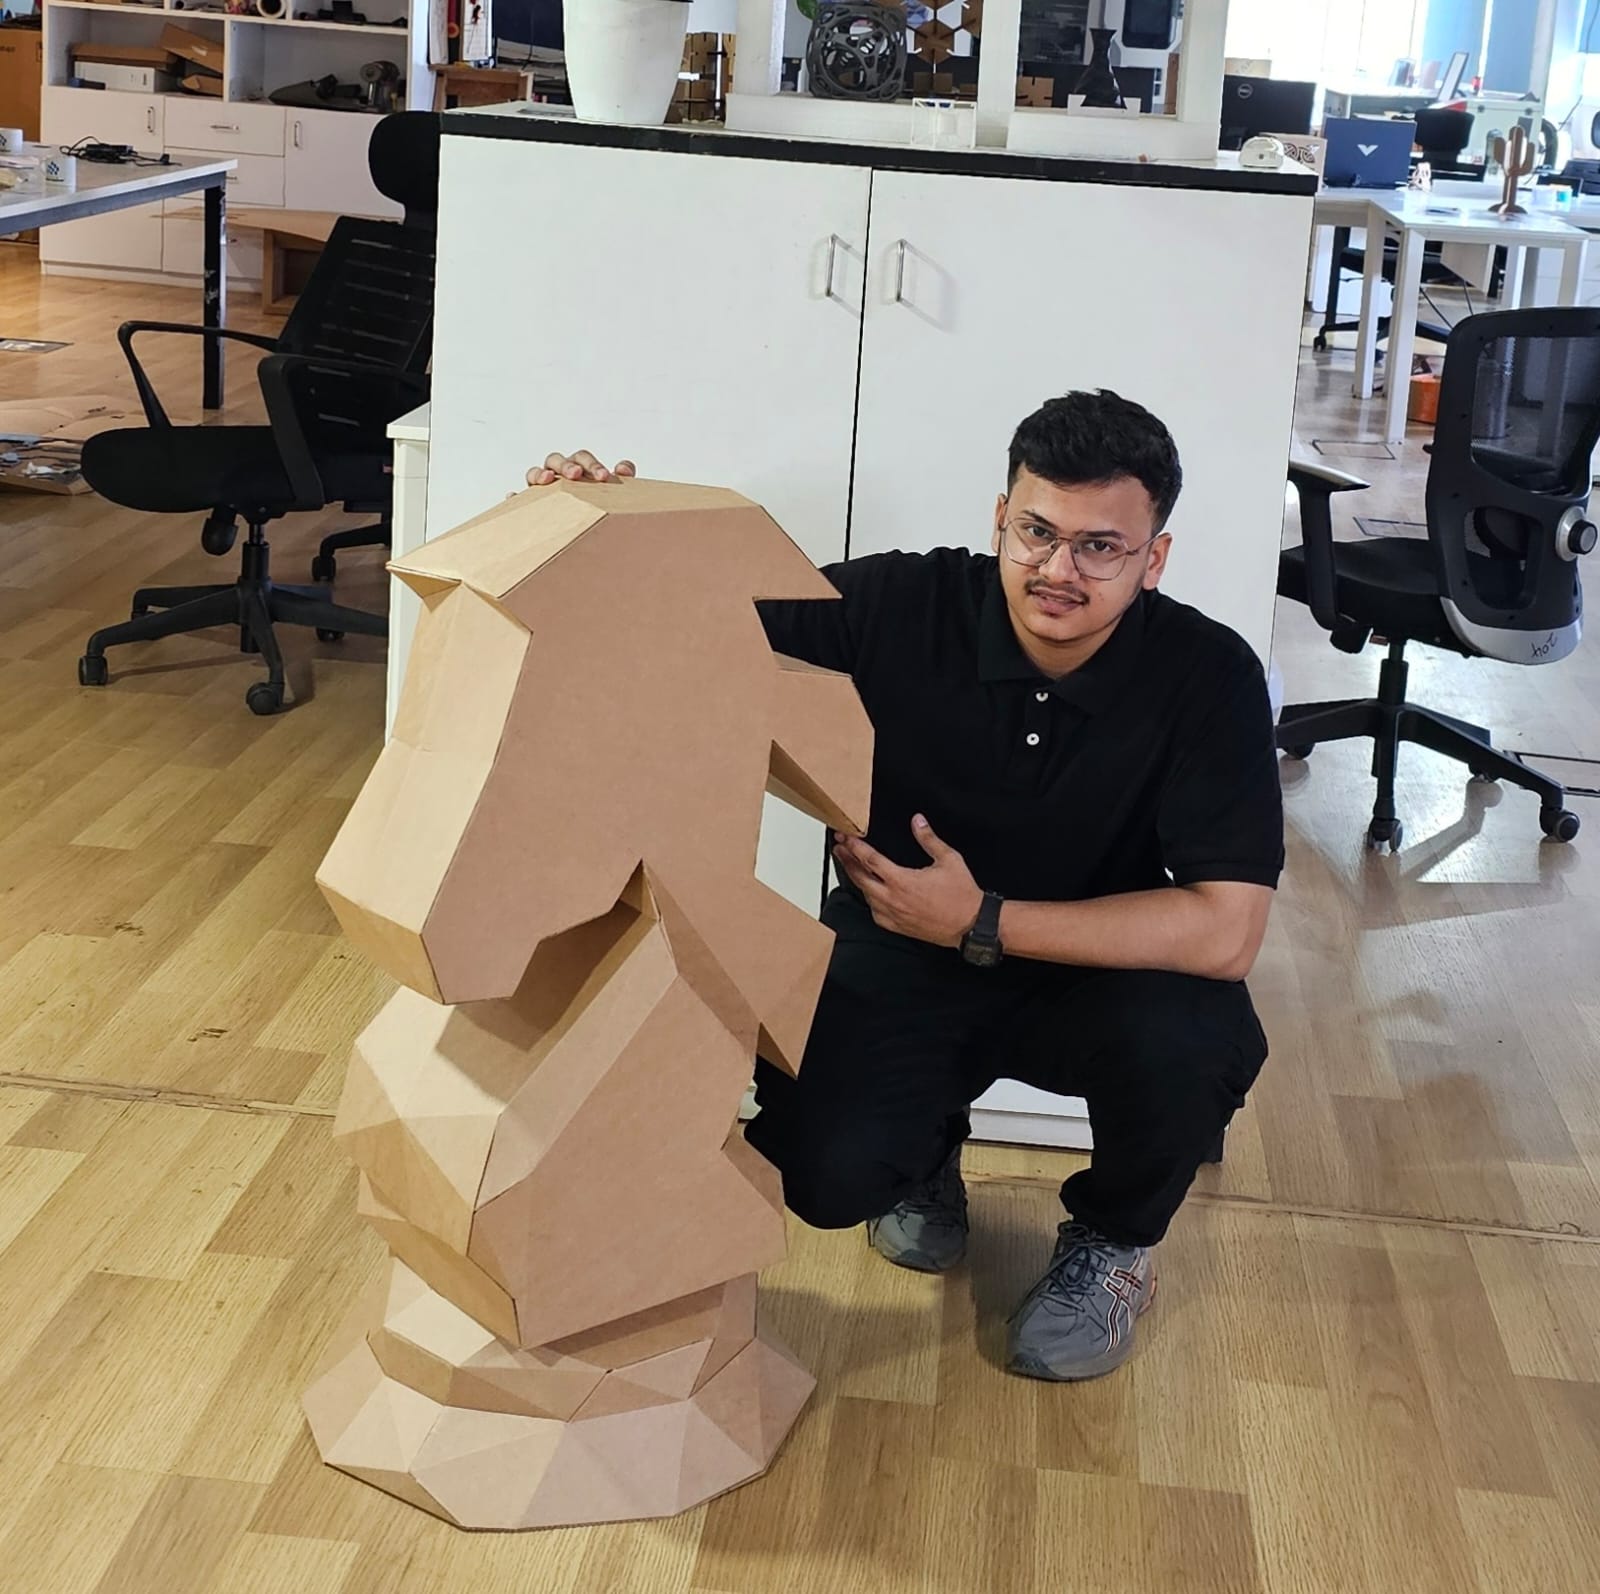
PolyForm Knight is a project involved designing and fabricating a life-sized chess knight piece with a height of 900 mm.
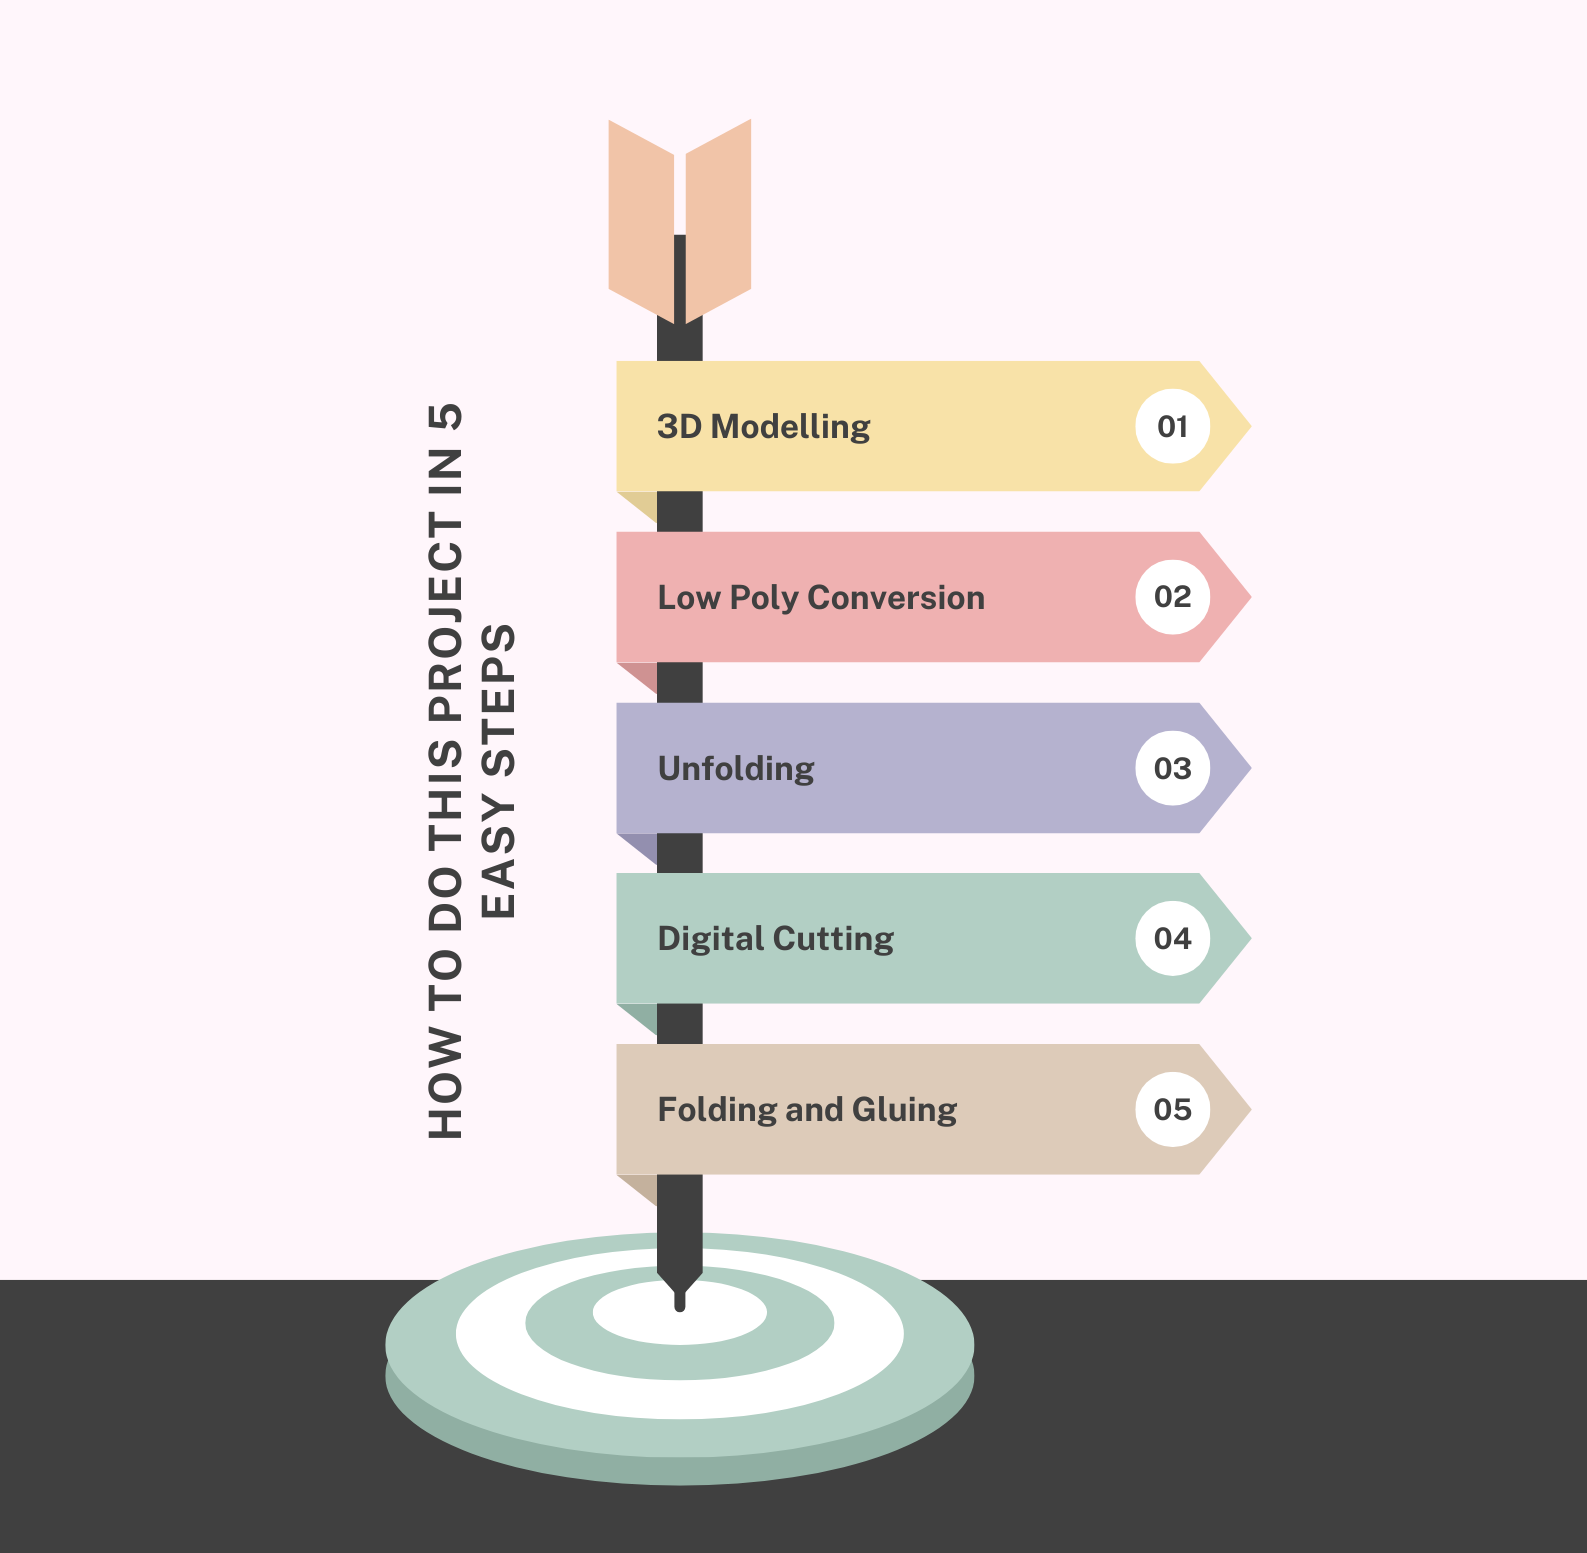
The process utilized 3D modeling, low-poly conversion, unfolding, and laser cutting techniques, resulting in a visually striking low-poly model constructed from E-flute cardboard.
The objective of this project is to explore the possibility of making life-size models using eco-friendly material.
Table of Contents
Hero Shots
Work Plan
Objective
To design and fabricate a visually striking, life-sized chess knight piece with a low-poly aesthetic.
To practice and enhance proficiency in 3D modeling, low-poly conversion, and digital fabrication workflows.
To experiment with E-flute cardboard as a lightweight, durable, and eco-friendly material for large-scale models.
To develop hands-on skills in assembling complex 3D structures from 2D cut patterns.
Overview
This project involved designing and fabricating a life-sized chess knight piece with a height of 900 mm. The process utilized 3D modeling, low-poly conversion, unfolding, and laser cutting techniques, resulting in a visually striking low-poly model constructed from E-flute cardboard.
Tools and Software used
Fusion 360 : 3D modeling of the chess knight.
Blender : Low-poly conversion and mesh optimization.
Pepakura Designer : Unfolding the 3D model into 2D patterns.
Zund Digital Cutter : Precision cutting of E-flute cardboard.
Glue : Assembly of parts into the final structure.
3D Papercrafts
3D Papercrafts is the art and technique of creating three-dimensional models and sculptures using paper or cardboard. It involves designing or downloading a 3D model, simplifying it into a low-poly or geometric form, and then unfolding it into 2D patterns using specialized software like Pepakura Designer . These patterns are printed or cut out, and the pieces are assembled using adhesives to form the final 3D structure.
3D Papercrafts is popular for its accessibility (requiring simple materials like paper, glue, and scissors) and versatility, allowing creators to build anything from decorative sculptures and props to educational models and prototypes. It's a fun, creative activity that combines design, craftsmanship, and patience!
Check out the link below to know more about 3D papercrafting.

Pepakura
Pepakura is a popular software developed by Tamasoft that is used to create 3D paper craft models from digital designs. It takes 3D model files, such as those created in software like Blender, Maya, or 3ds Max, and "unfolds" them into flat 2D patterns. These patterns can be printed, cut, and assembled to recreate the original 3D model using paper, cardstock, or similar materials.
Follow the link below to download the Pepakura software.
Artistry
Blender
Blender is a powerful and open-source 3D creation suite used for a wide range of applications, including modeling, animation, rendering, simulation, game development, and video editing. Developed and maintained by the Blender Foundation, it is a free tool that has gained popularity among artists, designers, engineers, and game developers for its versatility and robust feature set.
Follow the link below to download the blender software.
Designing the Knight in Fusion 360
During my fab academy, I designed the negative mold for CNC milling in machinable wax using TRAK DPM RX2. Follow the link below to go to its documentation.
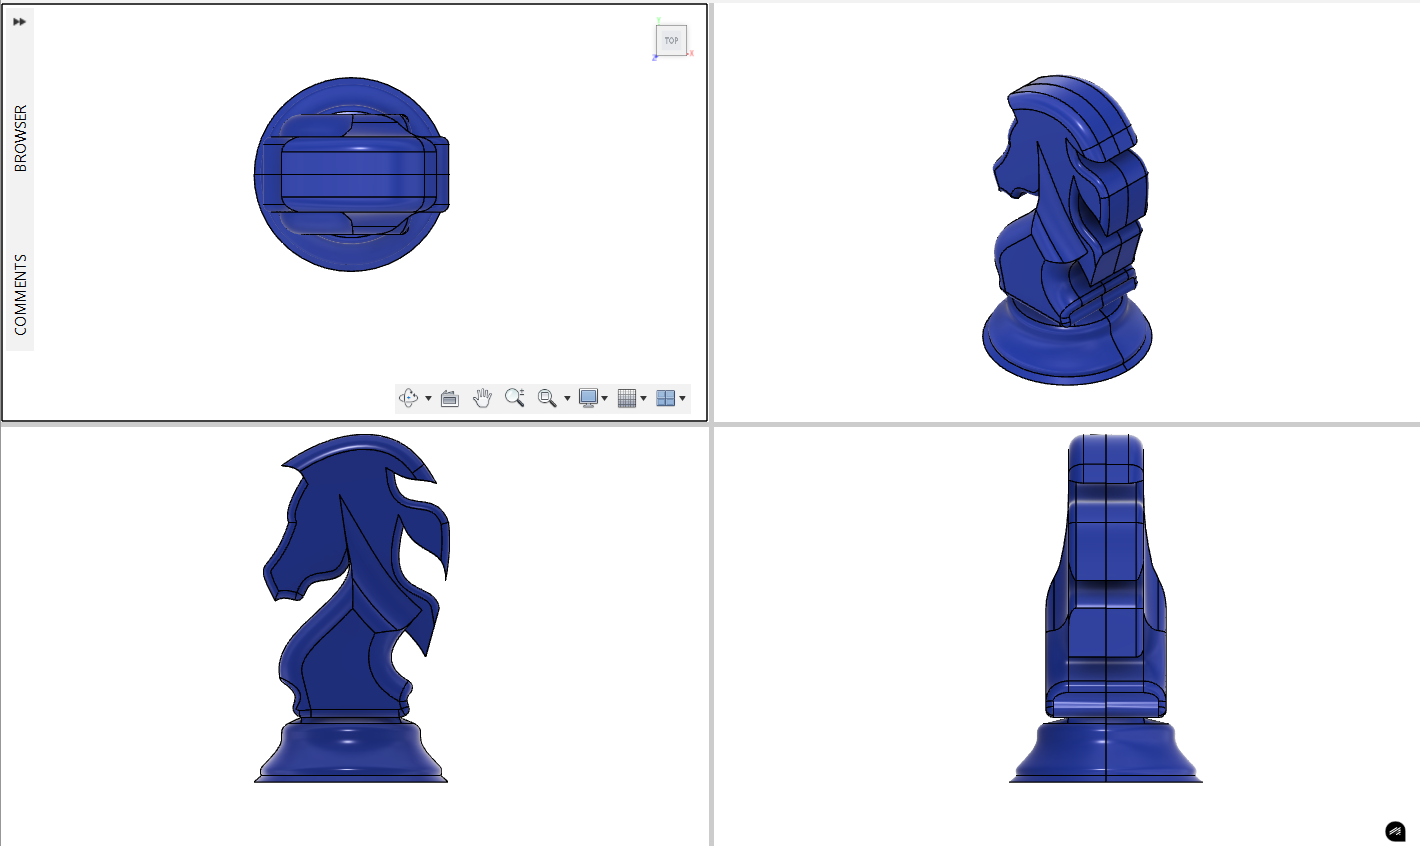
As said before, the chess knight piece was modeled in Fusion 360 and scaled to a height of 900 mm.
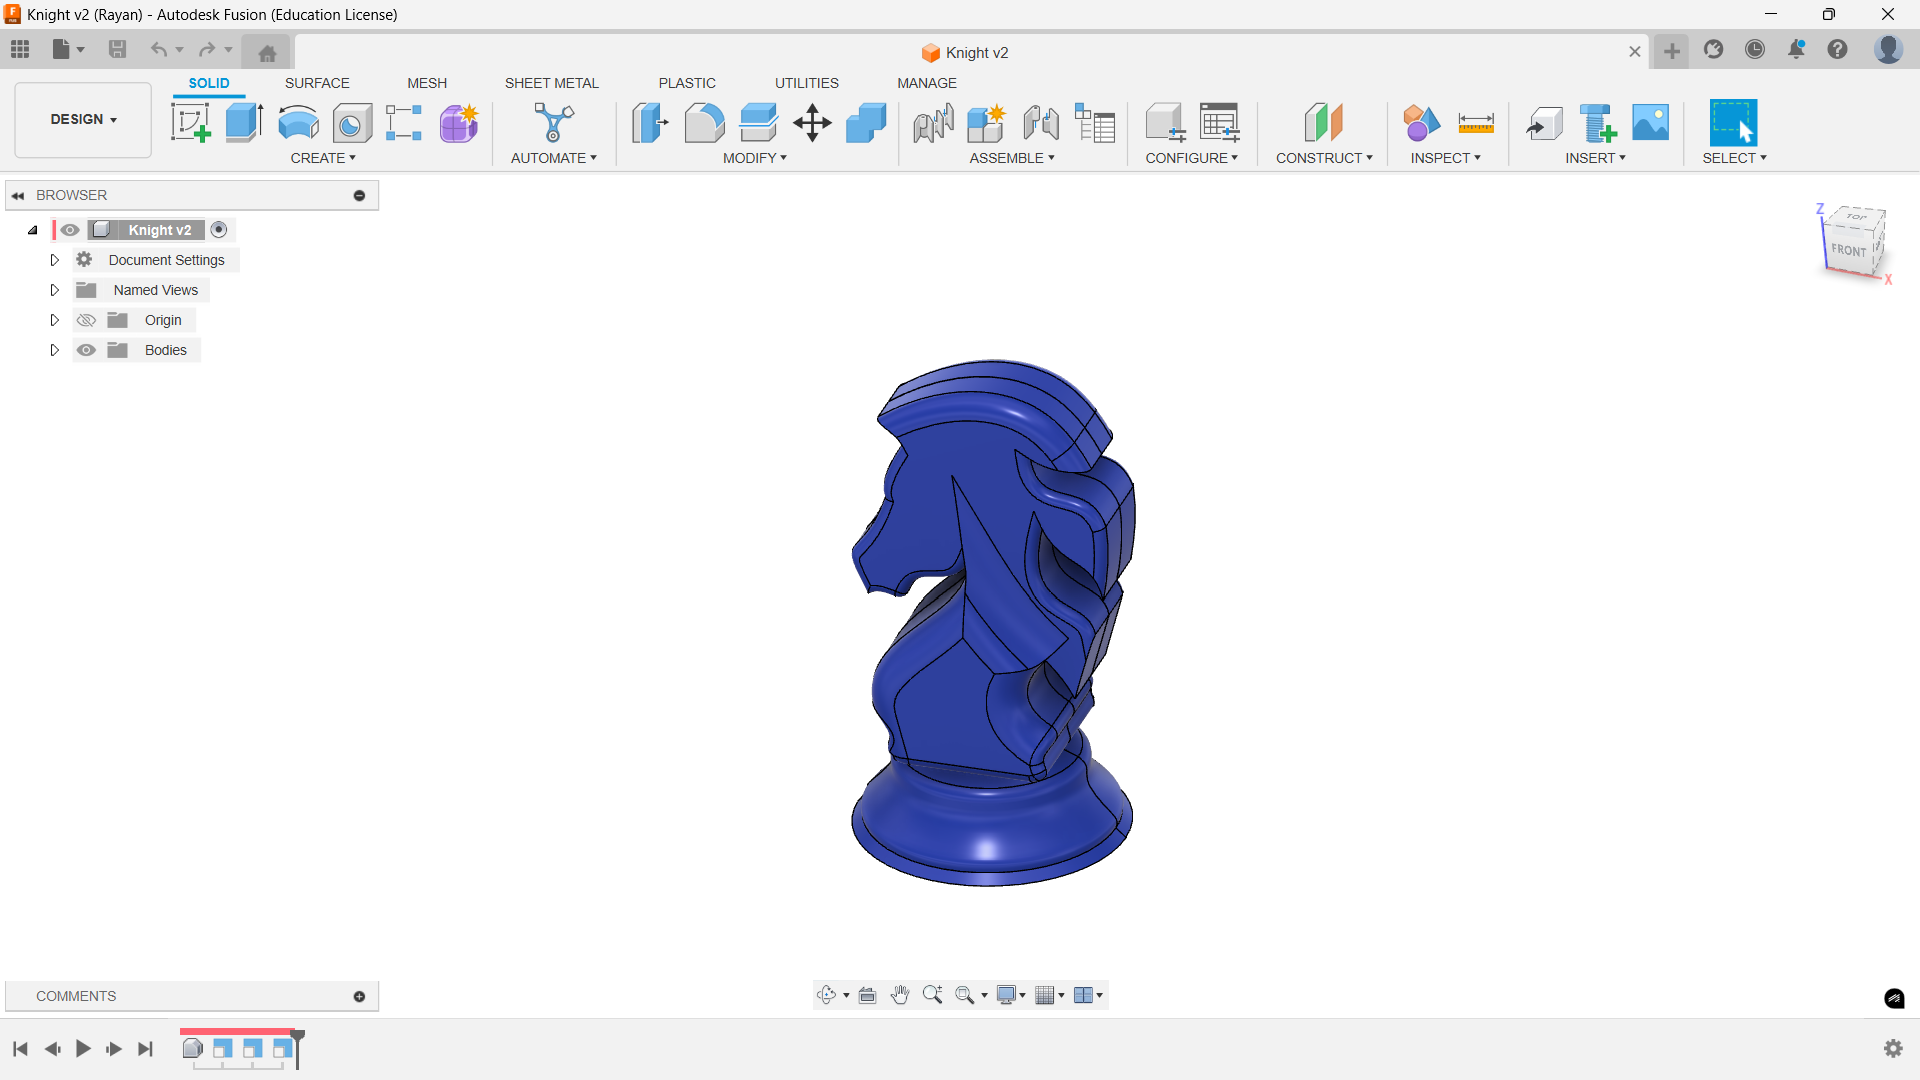
The image below illustrates the orthogonal view of the knight.
Convert to Low Poly using Blender
The design was exported to Blender , where:
- It was converted into a low-poly mesh to simplify the geometry and achieve a unique aesthetic.
- Adjustments were made to ensure structural stability and ease of assembly.
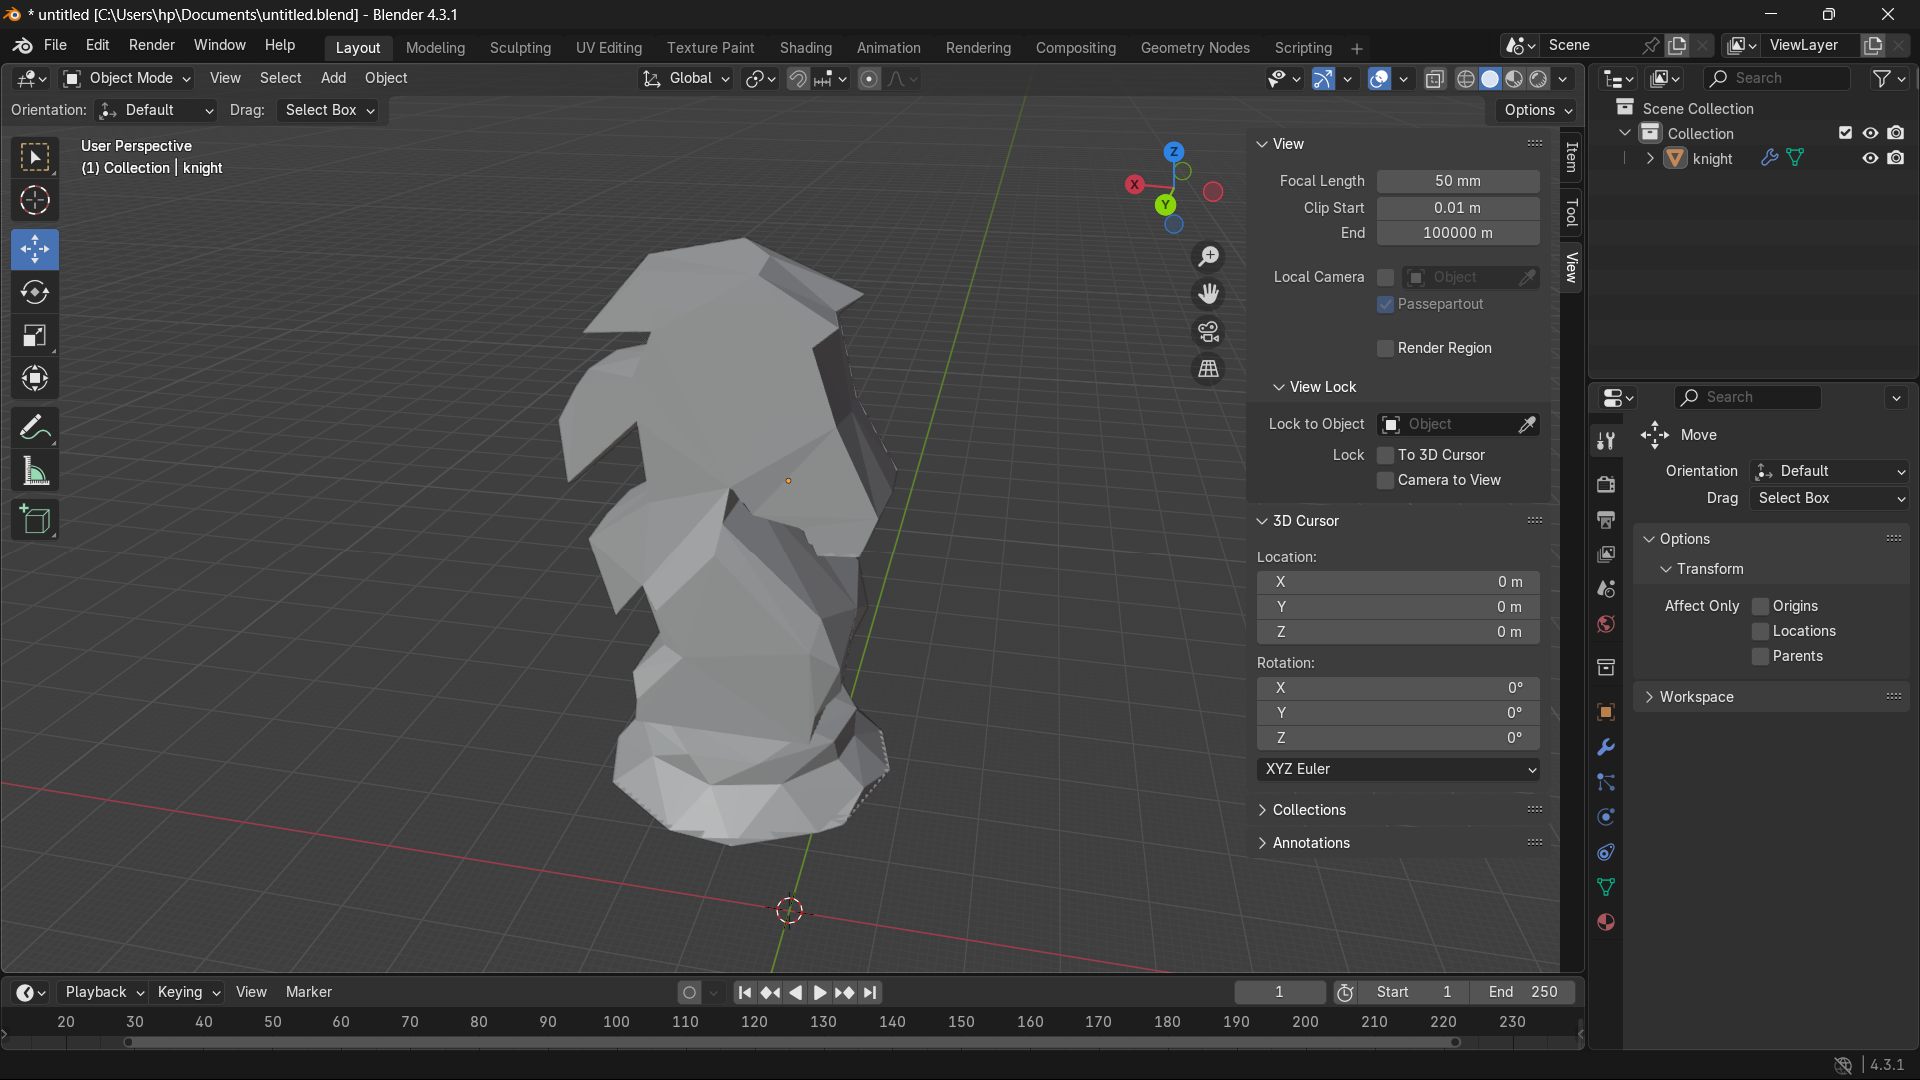
Watch the below to learn how to convert the high poly model into low poly. In this video I explained the process of converting to low poly and refining the model.
Unfolding the Low Poly Body in Pepakura
Using Pepakura, the model was:
- Unfolded into 2D patterns suitable for fabrication.
- Exported in DXF file format for further processing.
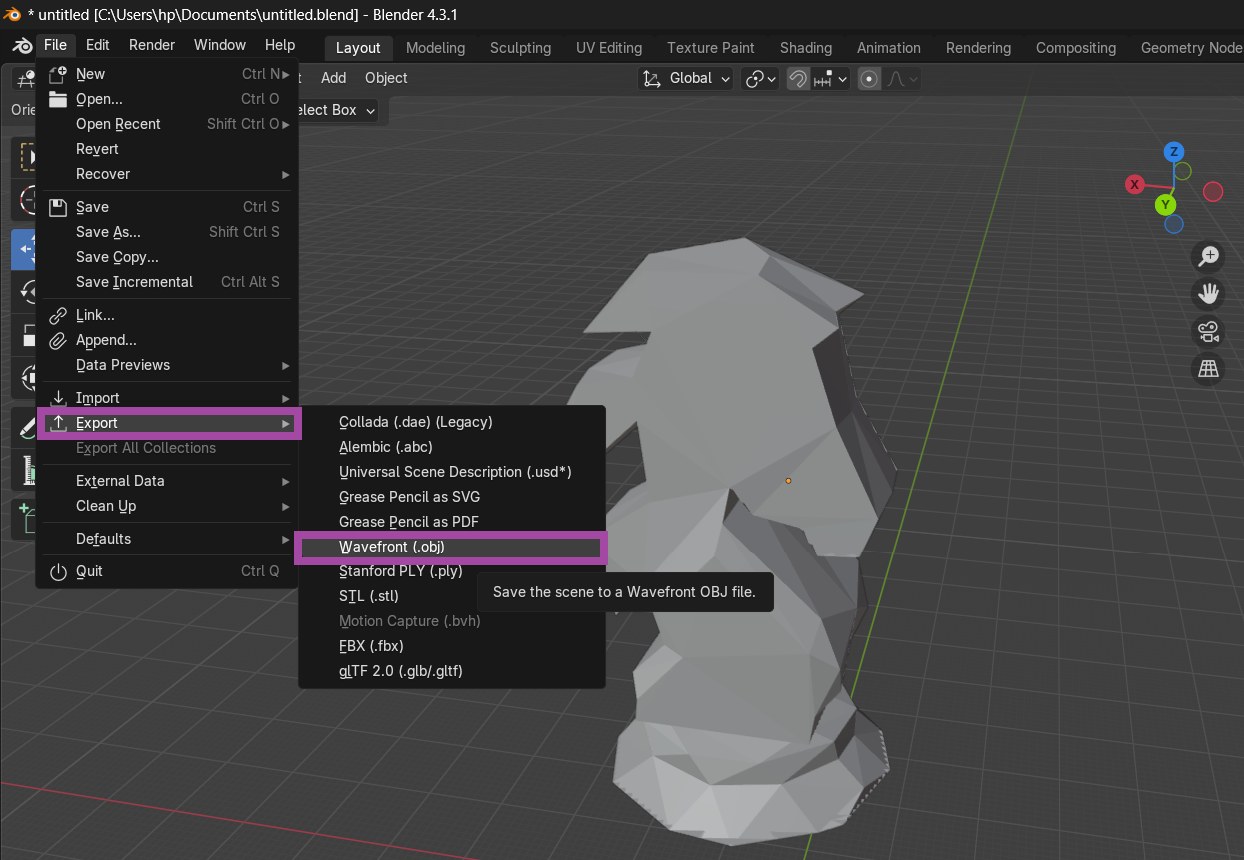
In Blender, go to “File” → “Export” → “Wavefront (.obj)”.
Make sure to export in .OBJ format. The most suitable format for the Pepakura software is OBJ format.
The low-poly mesh was imported into Pepakura Designer . Drag and drop the file into the Pepakura software as shown below, or select and open the file from the Pepakura itself.
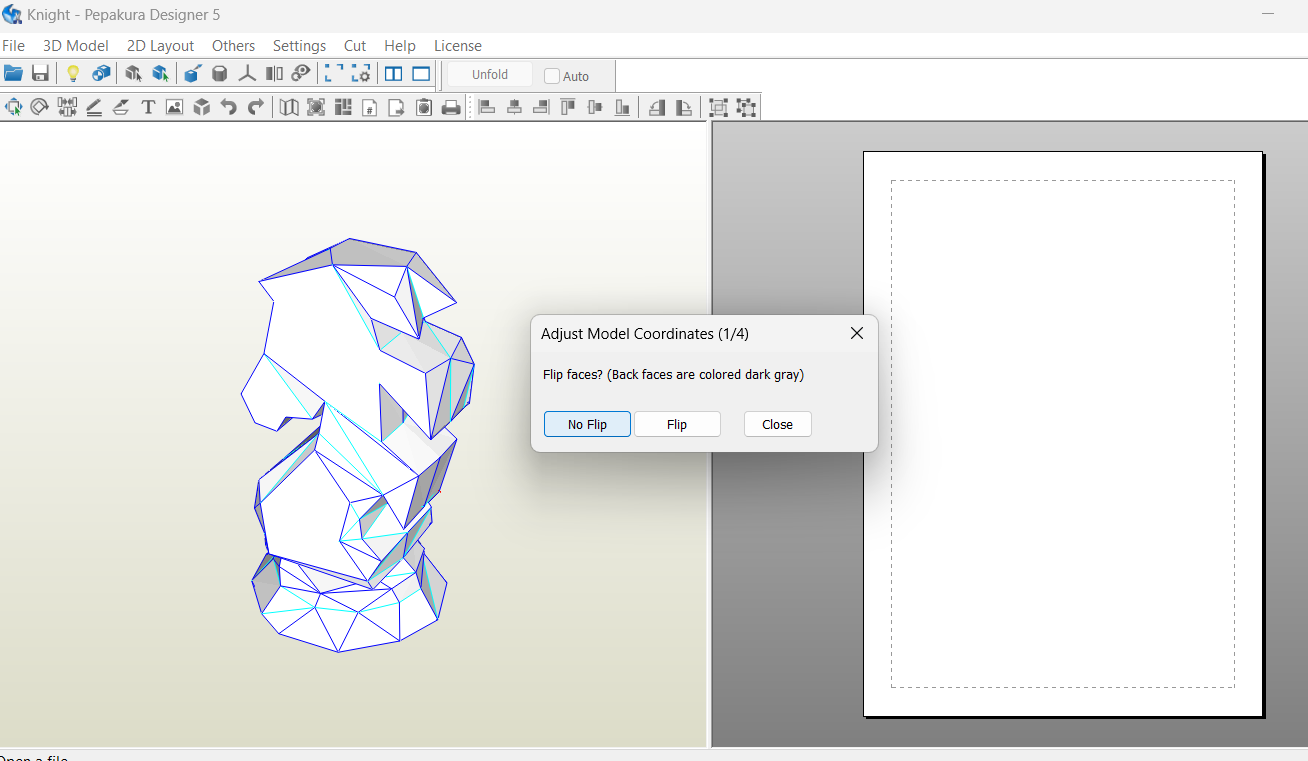
From the dialog box, I select the “No Flip” option as shown below.
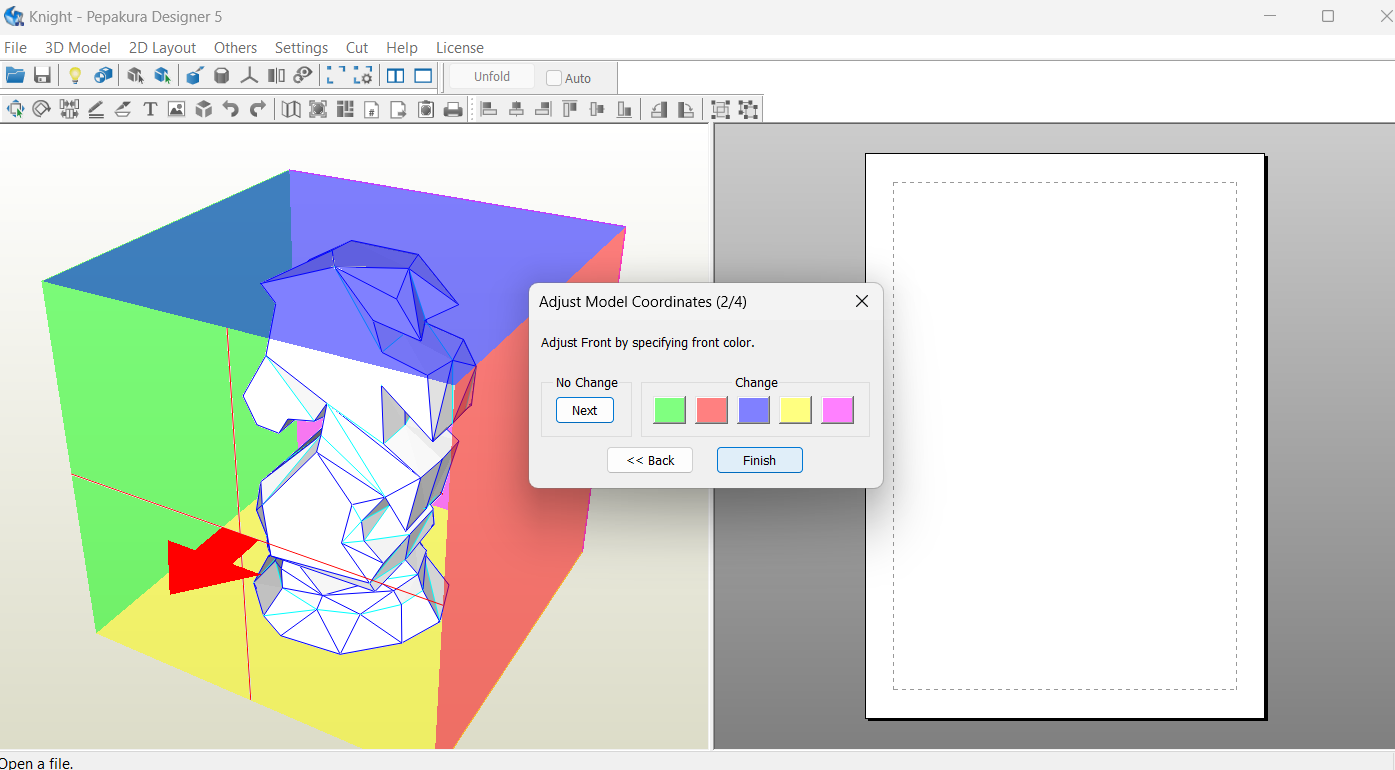
Select the color corresponding to the front face and click on “finish”.
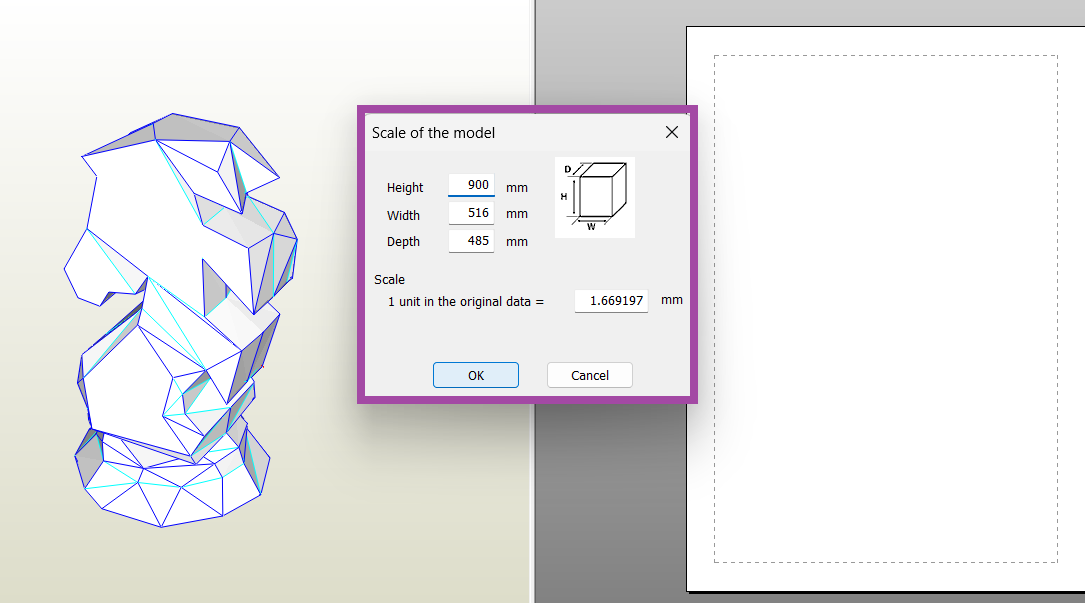
Make sure the height mentioned is our desired height. If not, enter the required height, and the rest of the dimensions are changed accordingly, and click on “OK.”.
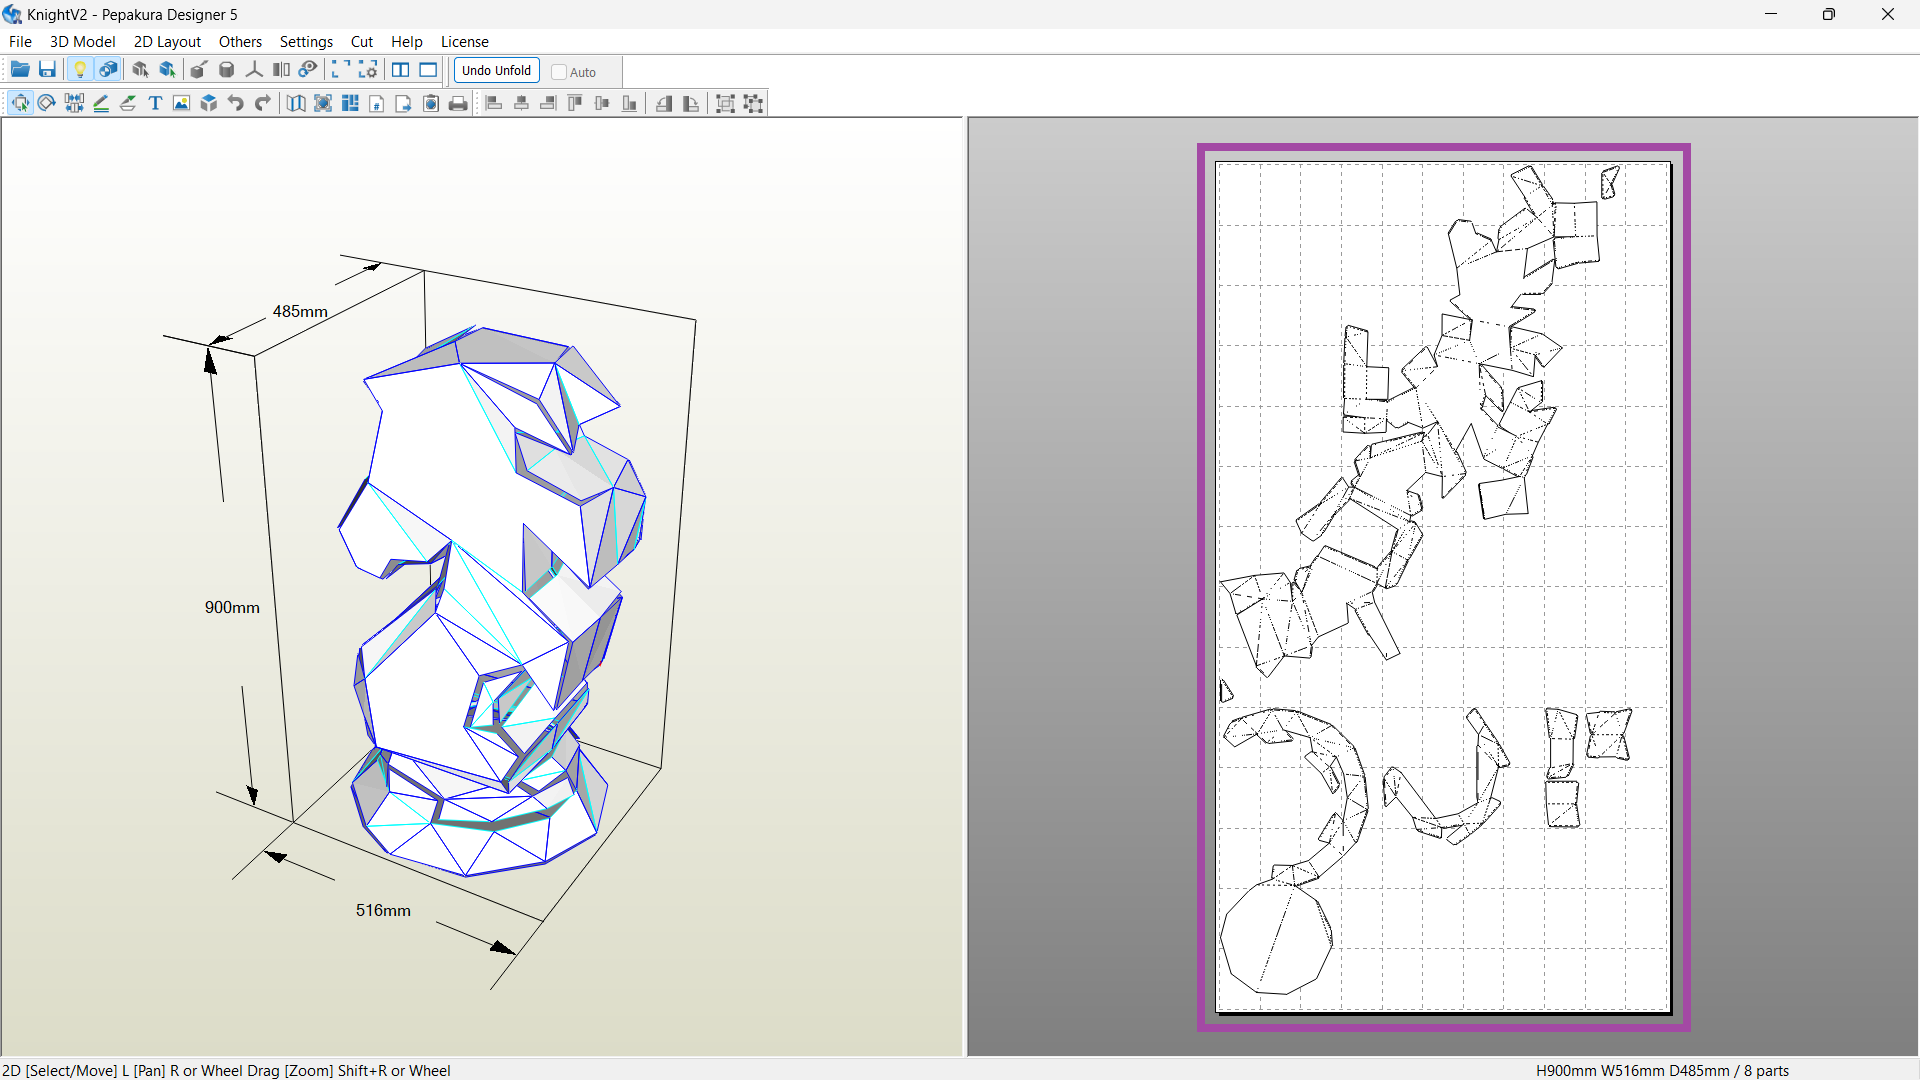
The initial setup is complete. Now let's unfold the model by clicking on “unfold” .
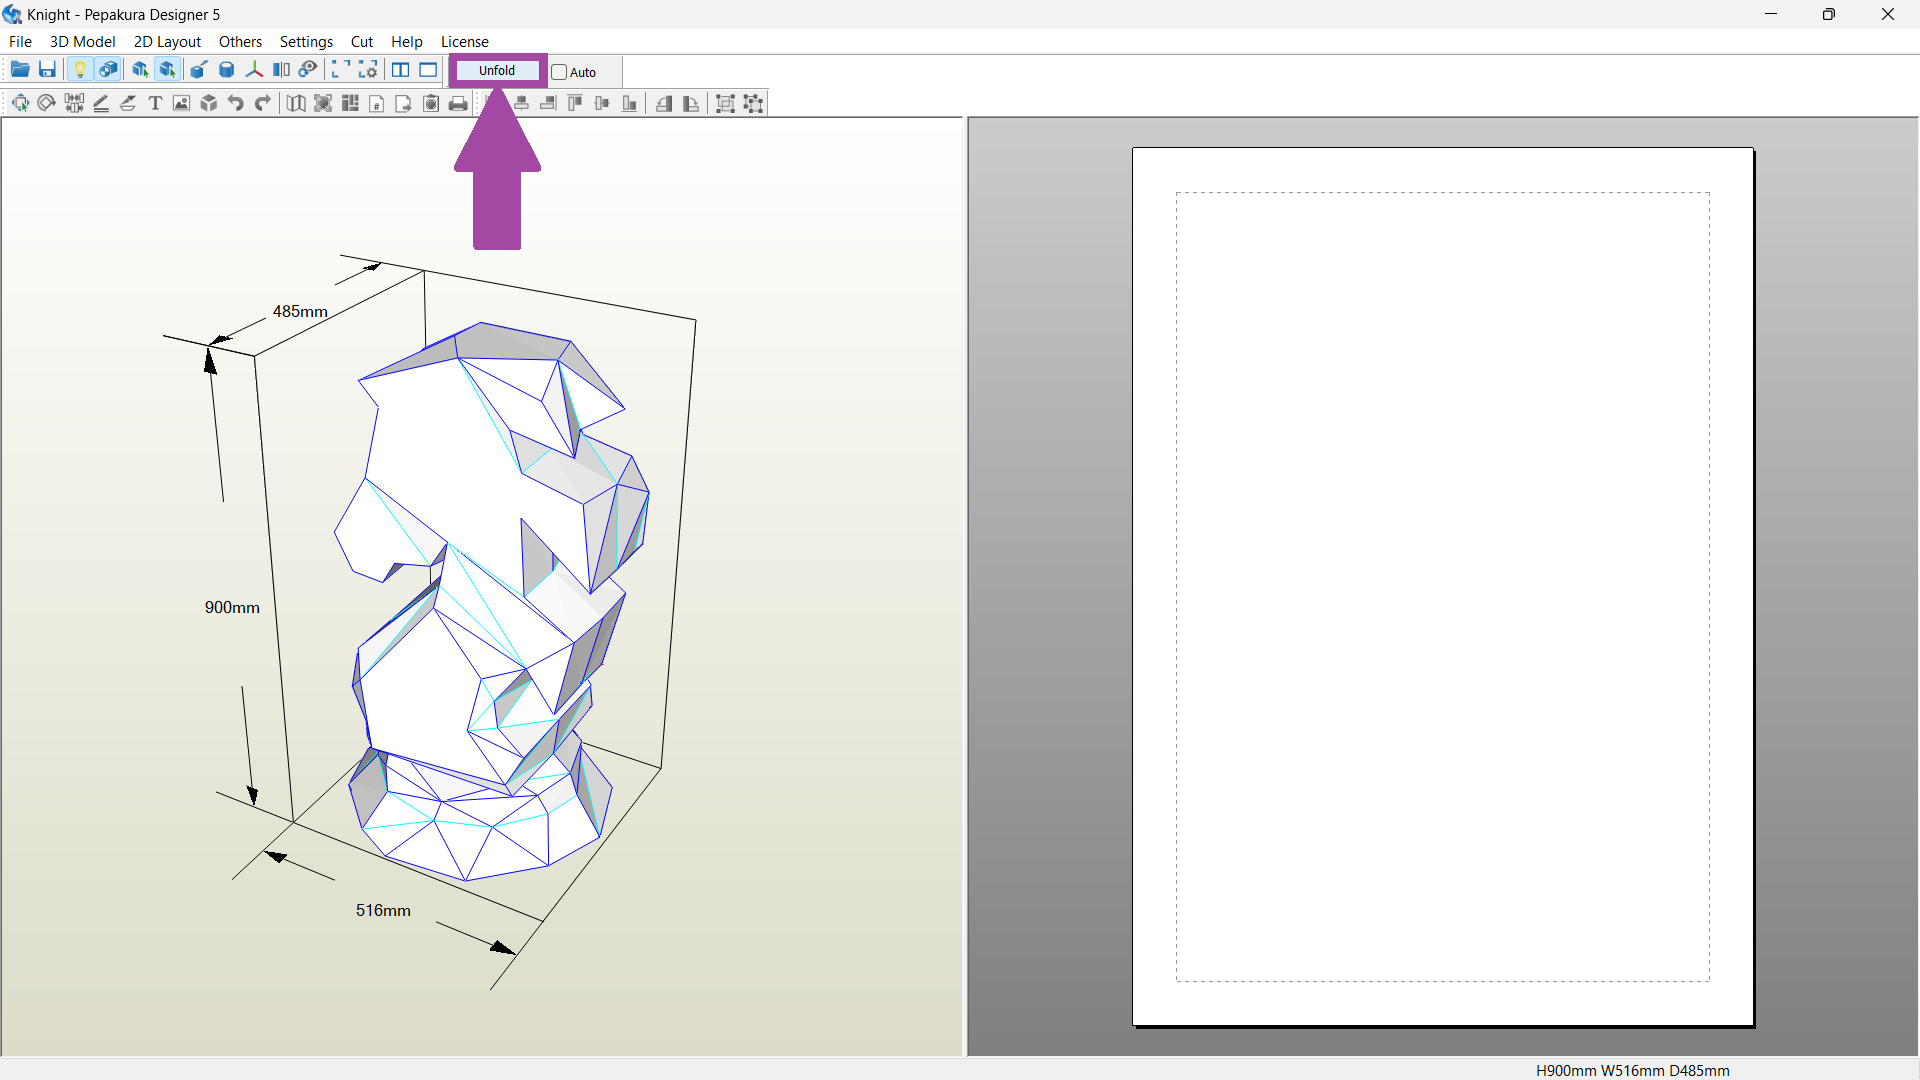
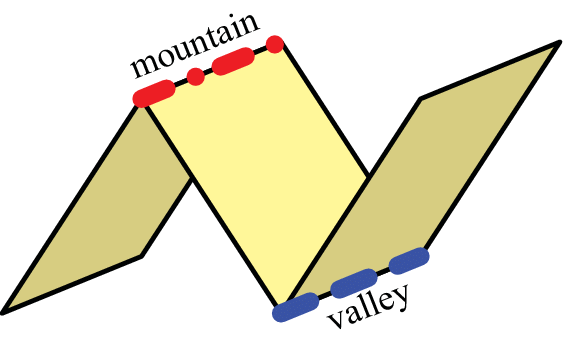
The unfolded image is shown below. In this image, all the lines are in black, and it is hard to identify which lines are cut, creased, or valley-folded. When doing the CAM in Zund, we need to select each line and add it to its corresponding operation.
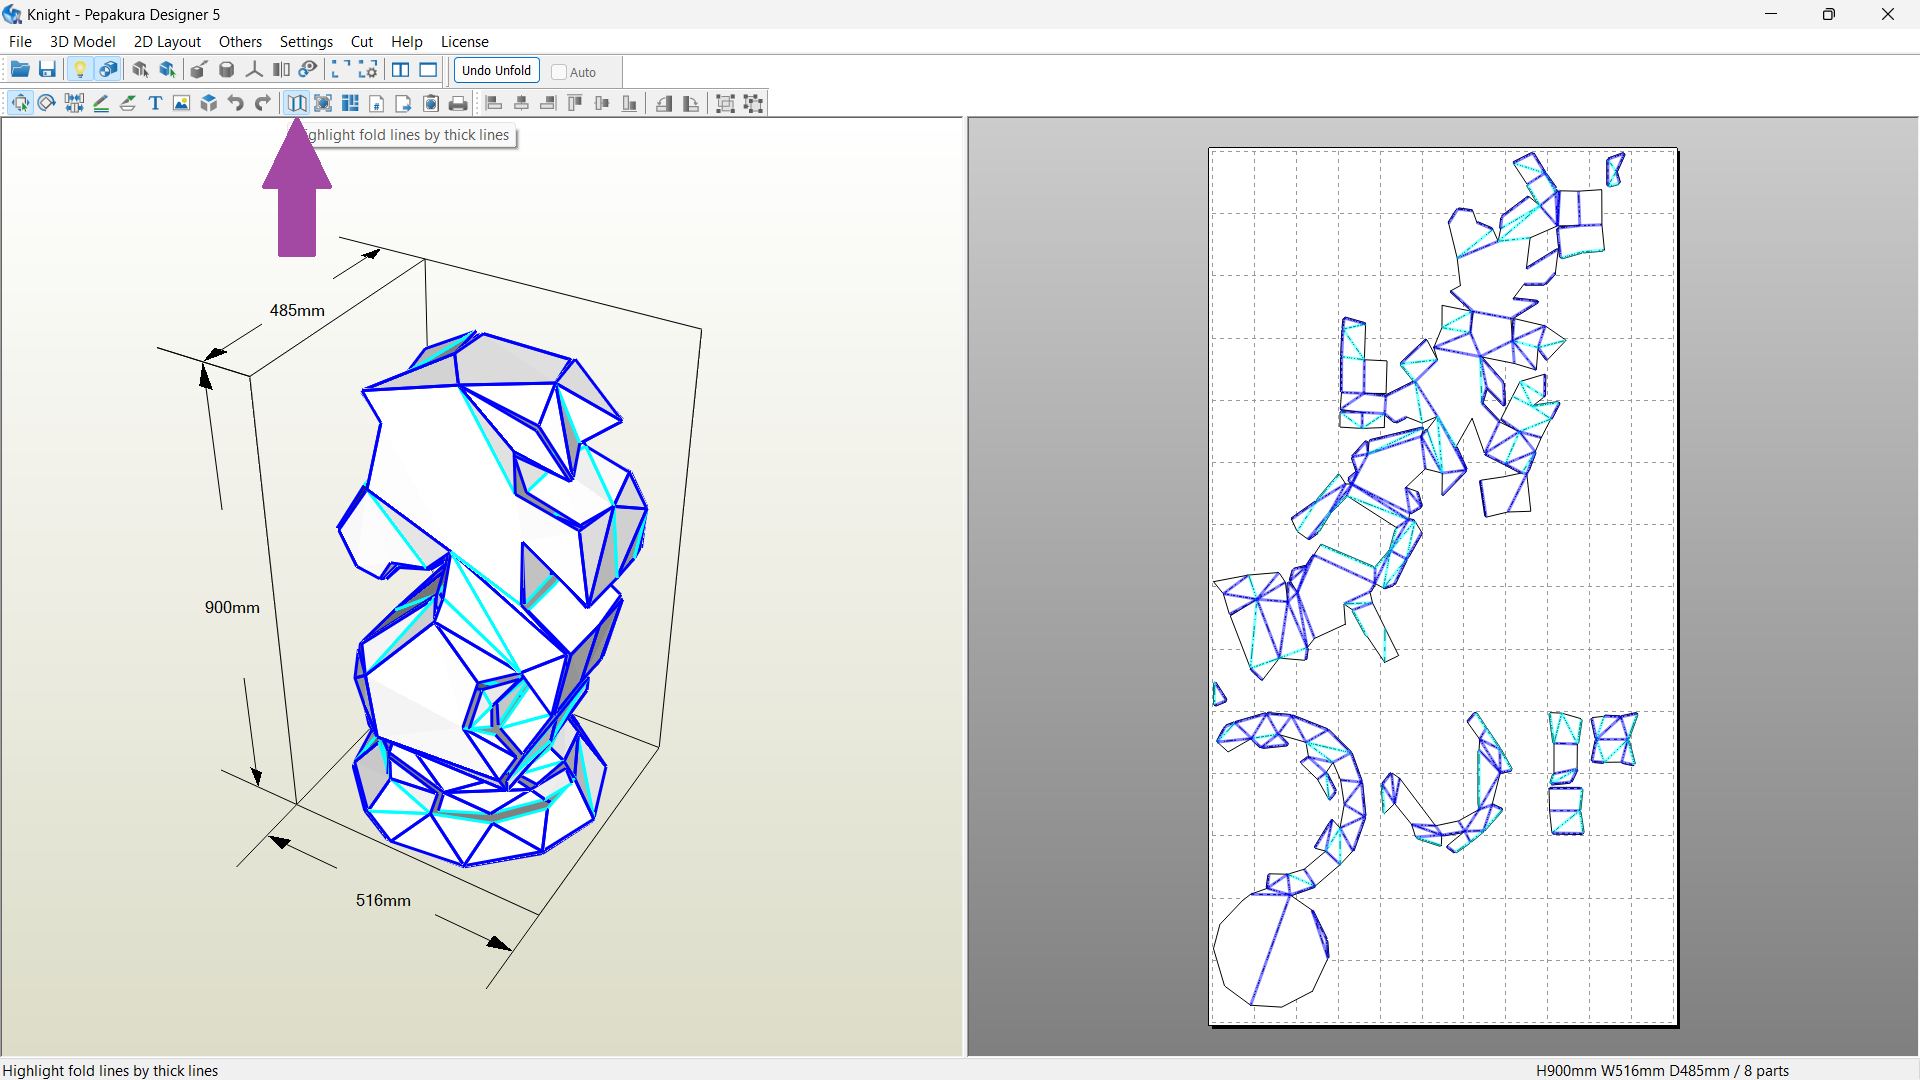
To differentiate the lines, click on the “ highlight fold lines by thick lines ” option.
Black lines → cutting lines
Dark blue lines → creasing lines or mountain lines
Sky blue lines → Indicates valley lines
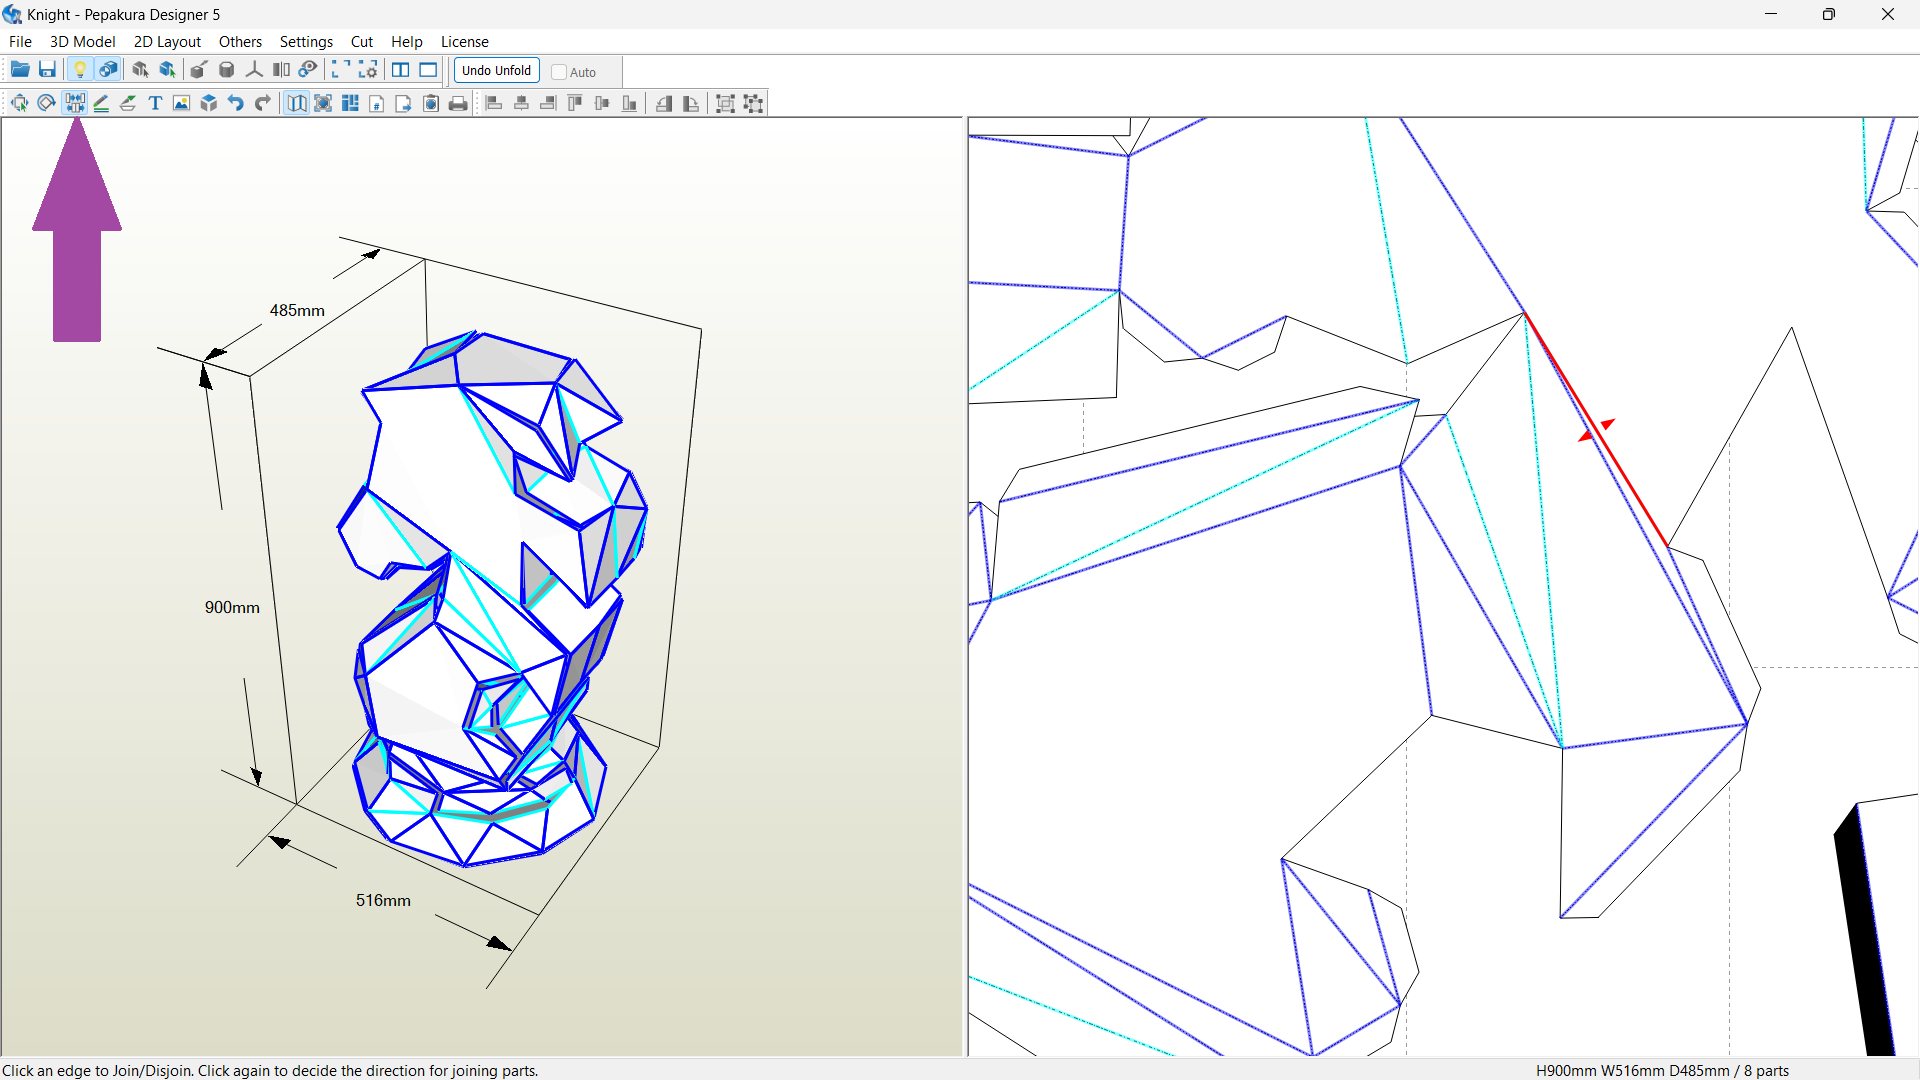
In my case, there is a piece that is very long. To disjoin the faces, select Join or Disjoin Faces (or CNRL + N ), and click the lines where we want to disjoin the the part. The image below shows the highlighted line where I want to disjoin the parts into two so that it is easy to cut in a cardboard.
By default, the flap size is 5 mm, which is enough but hard to fold and connect to the other parts, so let's increase the flap size by clicking on the “Edit Flap” or pressing “ CTRL + F ” . Then go to shapes and change the “H=5mm” to “H=15mm” , and click on the “to all” option.
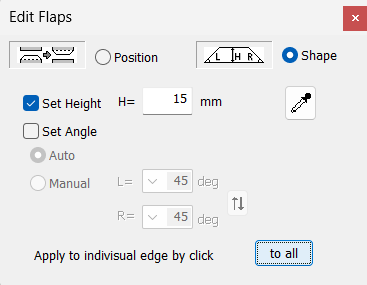
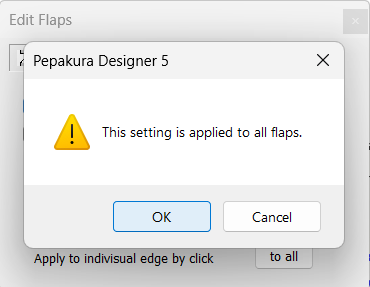
Click on “ OK ” to set the value to all the flaps.
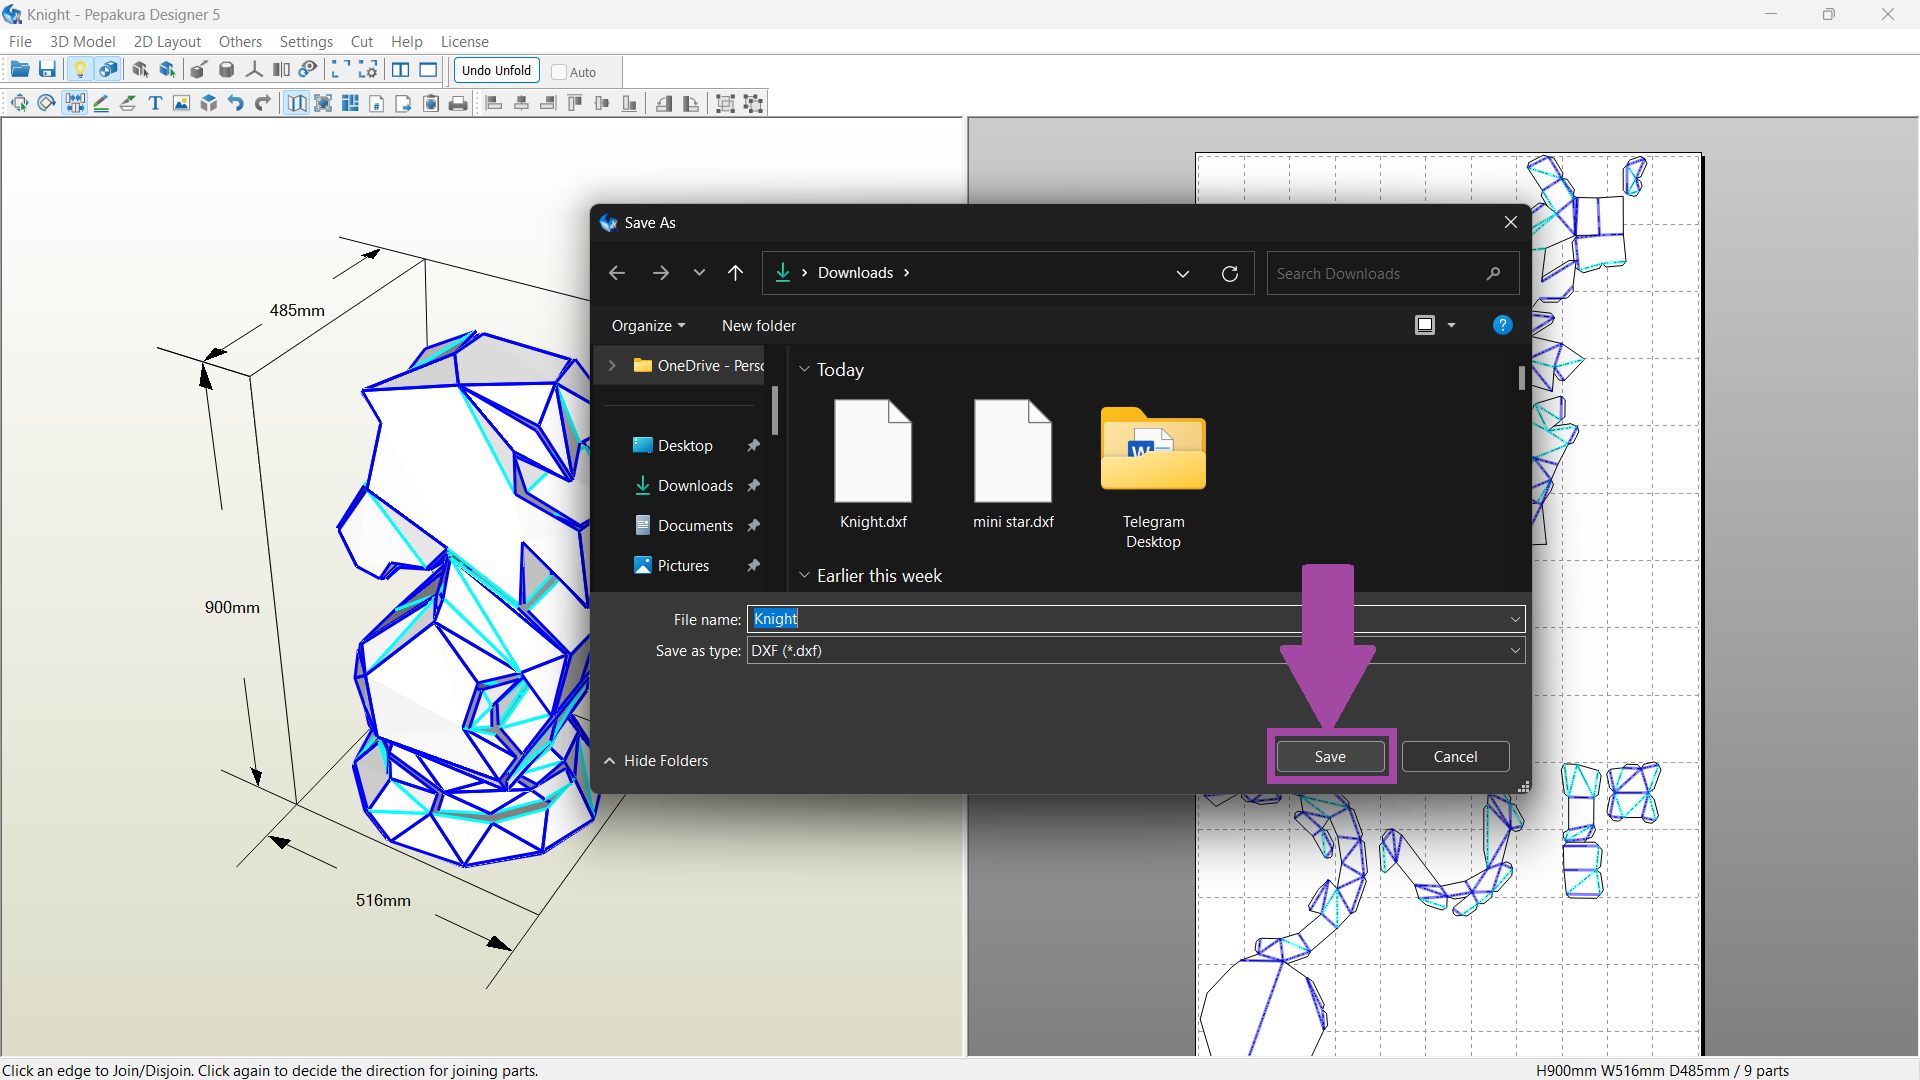
To export the file in DXF format. Go to “Files” → “Export” → “single file(dxf)” .
Watch the video mentioned below to learn the steps mentioned above.
Digital Cutting in Zund
The DXF files were loaded into the software for a Zund digital cutter .
The patterns were cut from E-flute cardboard , chosen for its lightweight, durable, and eco-friendly properties.
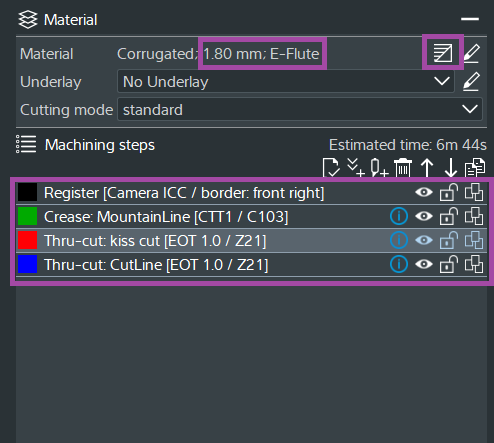
The thickness of the E flute is 1.5 mm . However, the E flute that we are having is 1.8mm .
As a result, I select the material as E-flute and change the thickness to 1.8 mm and click on “OK” .

Placed the cardboard and changed the flute direction.
The image below illustrates the details of the material, flute direction, machining steps, and the selected tools.
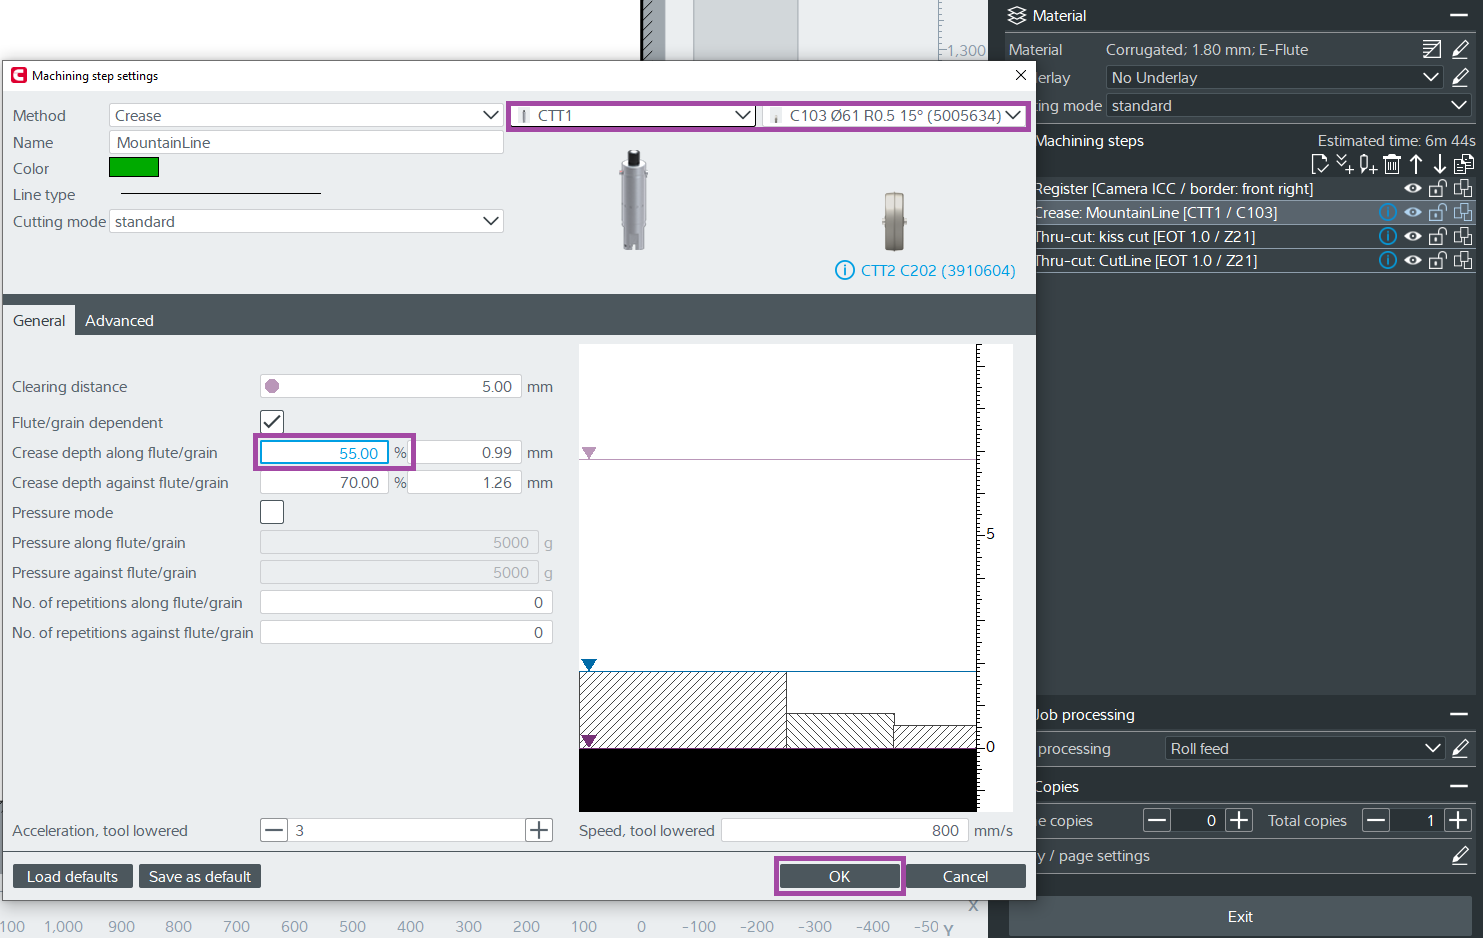
The image below shows the settings of the creasing operation.
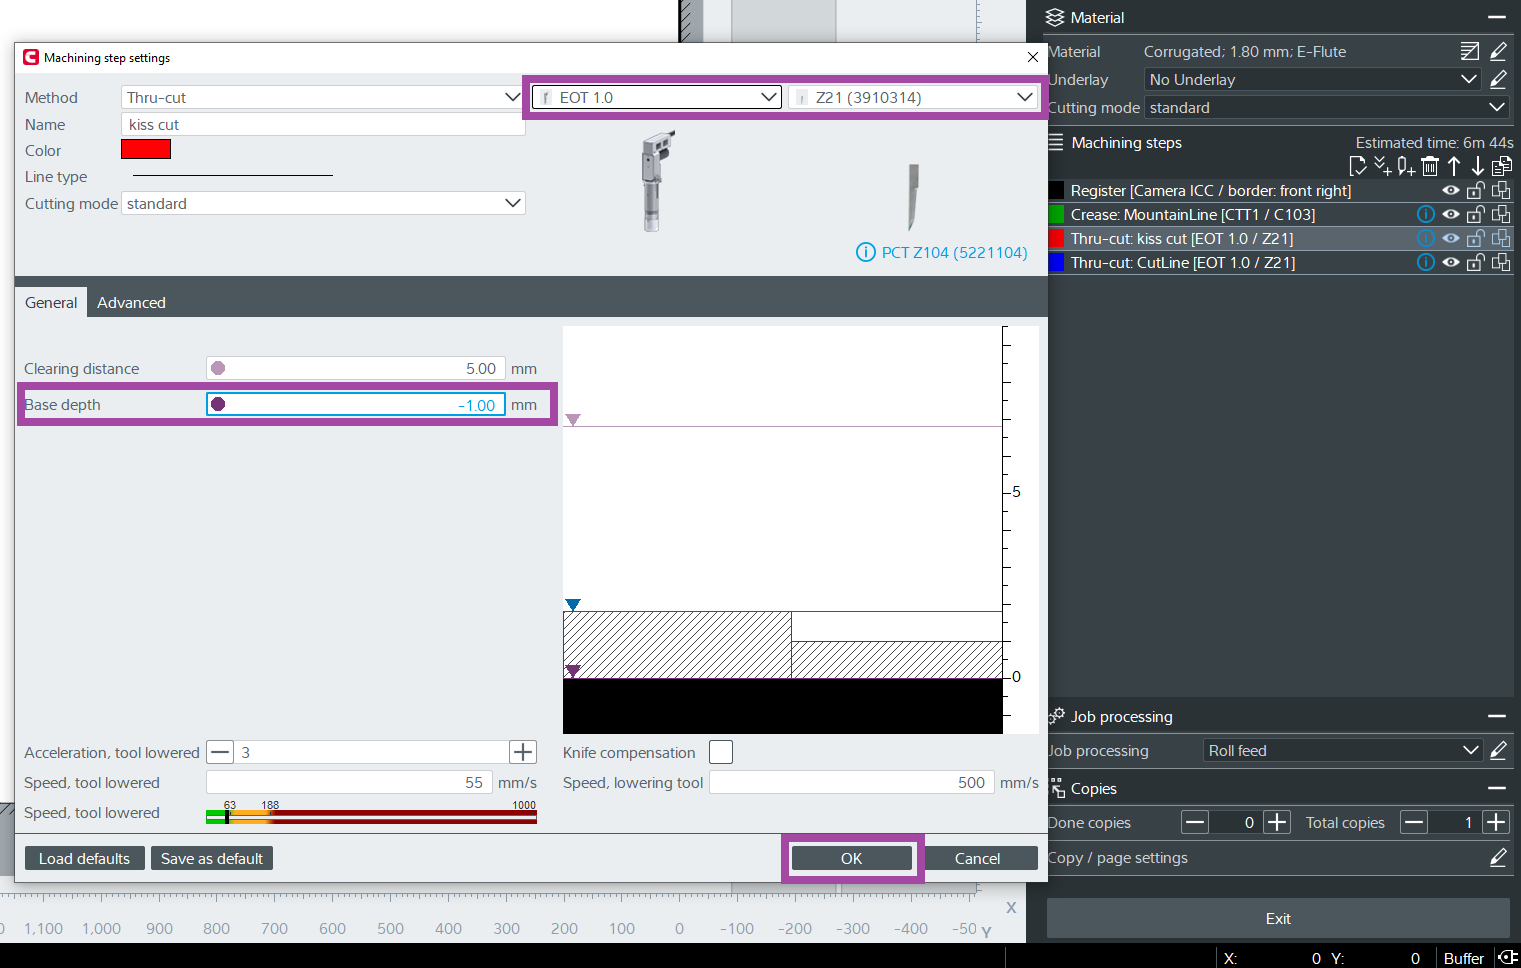
The image below shows the settings of the valley lines operation.
- For the valley lines, I used the same thru-cut operation and its tool but changed the base depth to -1 so that it won’t cut completely.
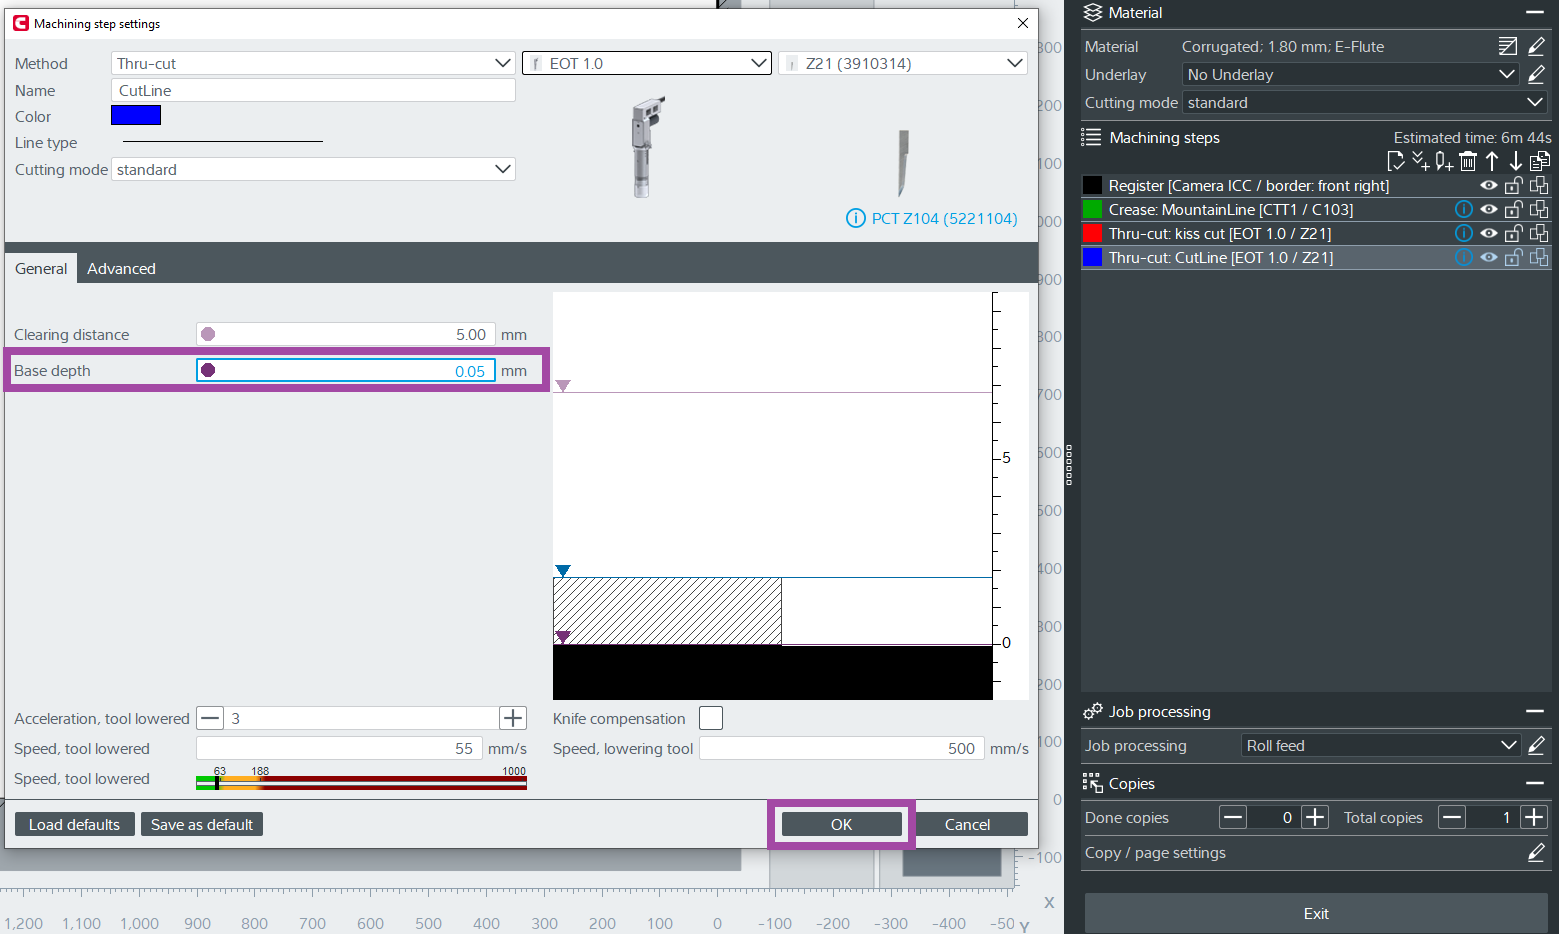
The image below shows the settings of the thru-cut operation.
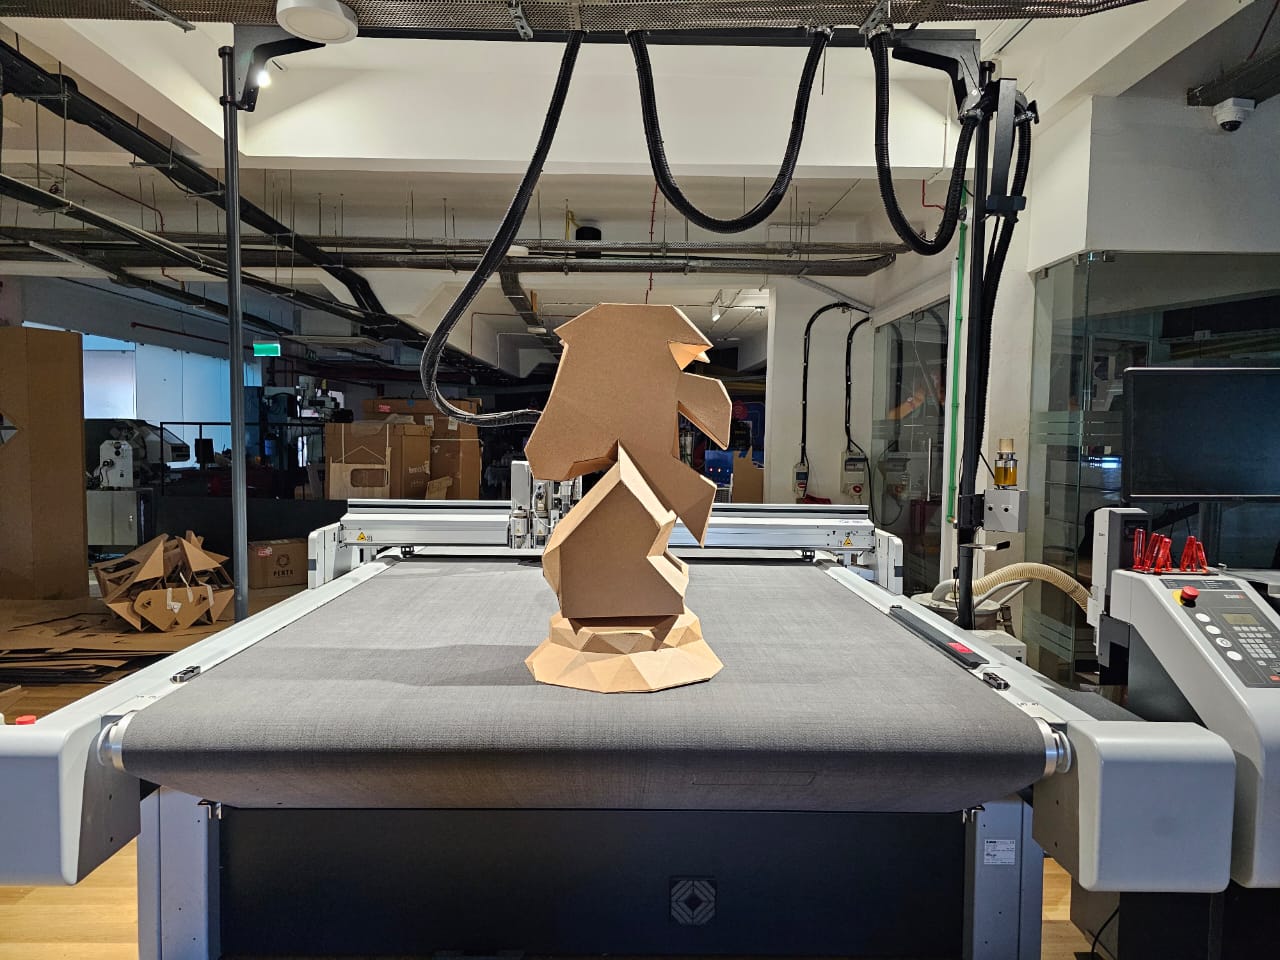
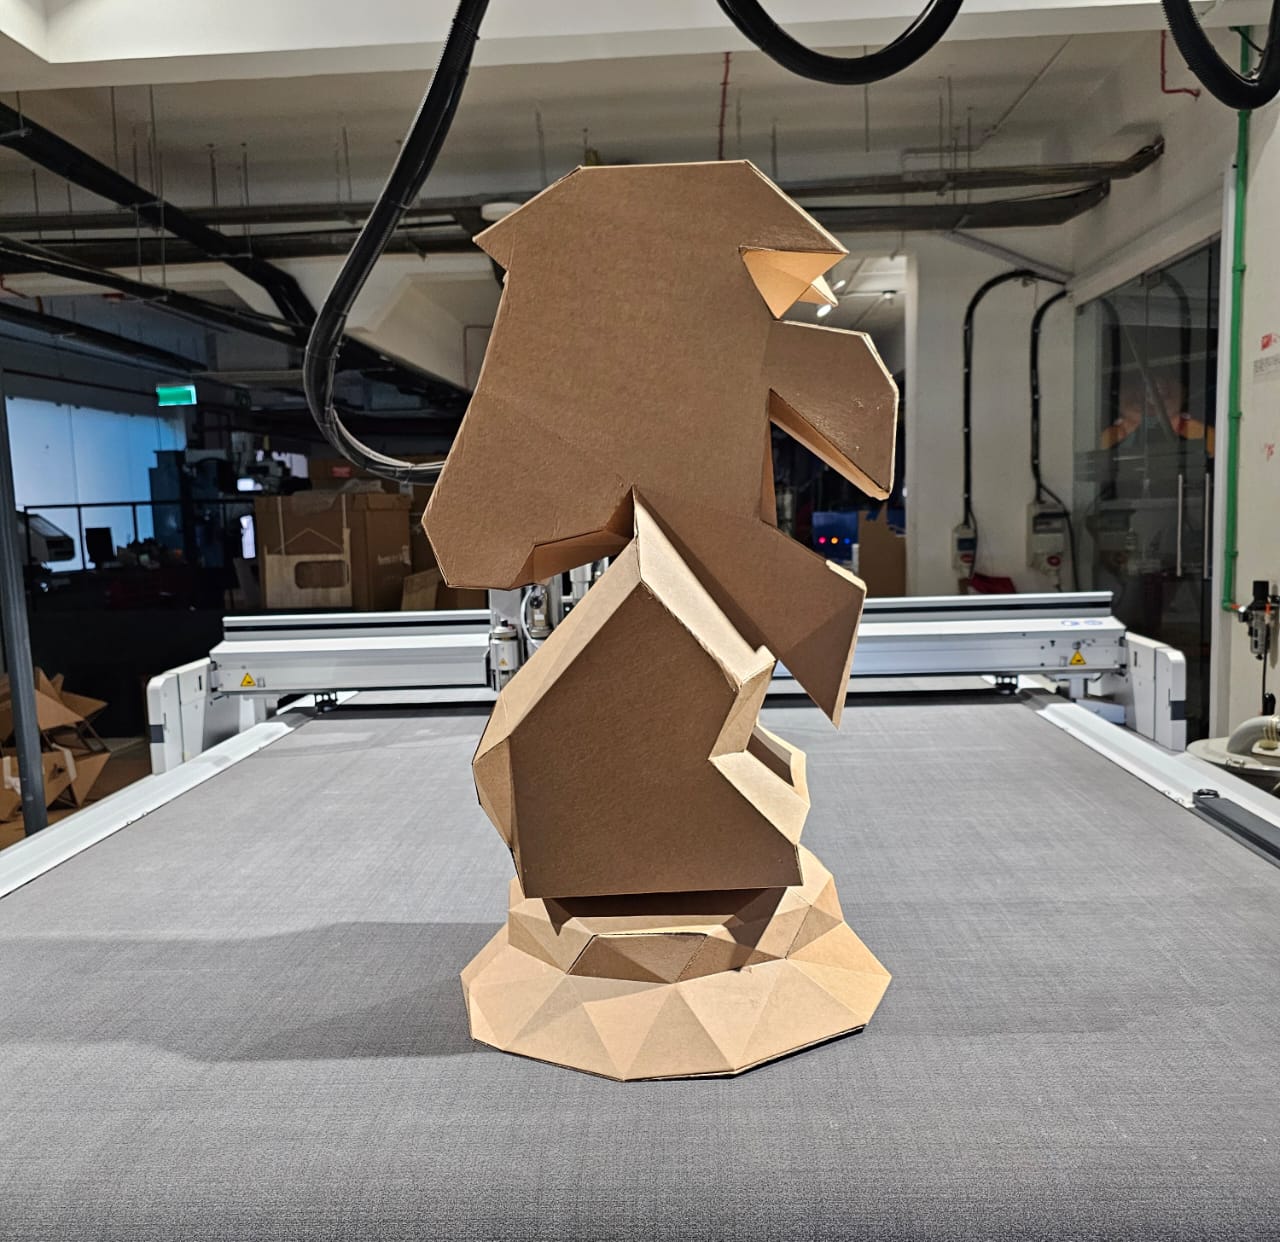
Folding and Gluing
Now it’s time for the real action💪💪💪.
The cut cardboard parts were:
- Sorted and organized based on the unfolding sequence.
- Joined using glue, piece by piece, to create the final chess knight.
- Care was taken to ensure alignment and symmetry during assembly.
Initially, I folded the crease and the valley lines of all the parts.
I used the general-purpose Fevicol to glue the flaps.
By checking the parts in Pepakura software, I realized that the best way to get the work done was by starting from the top and then moving to the bottom. I turn on the “join/disjoin” option and hover over the lines to know which flap is connecting to which side.
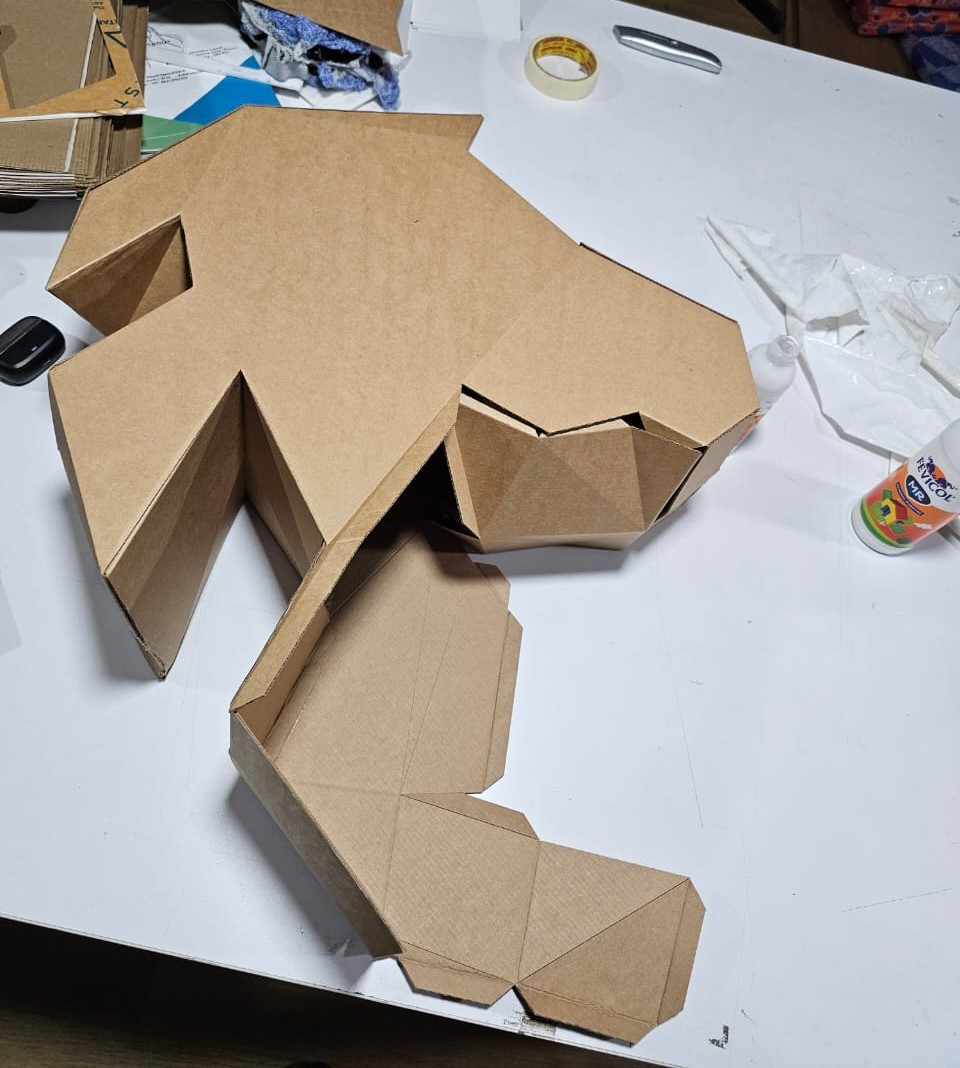
The image below shows the gluing process of the top part.
I used the masking tape to make sure the flaps do not disjoin until it is stuck properly, and once it is stuck, carefully remove the masking tape. However, I used this method only when it was required. Mostly I used to hold the glued flaps for 10 to 30 sec to stick properly.
Once I make sure all the flaps are stuck properly, I remove the masking tapes.
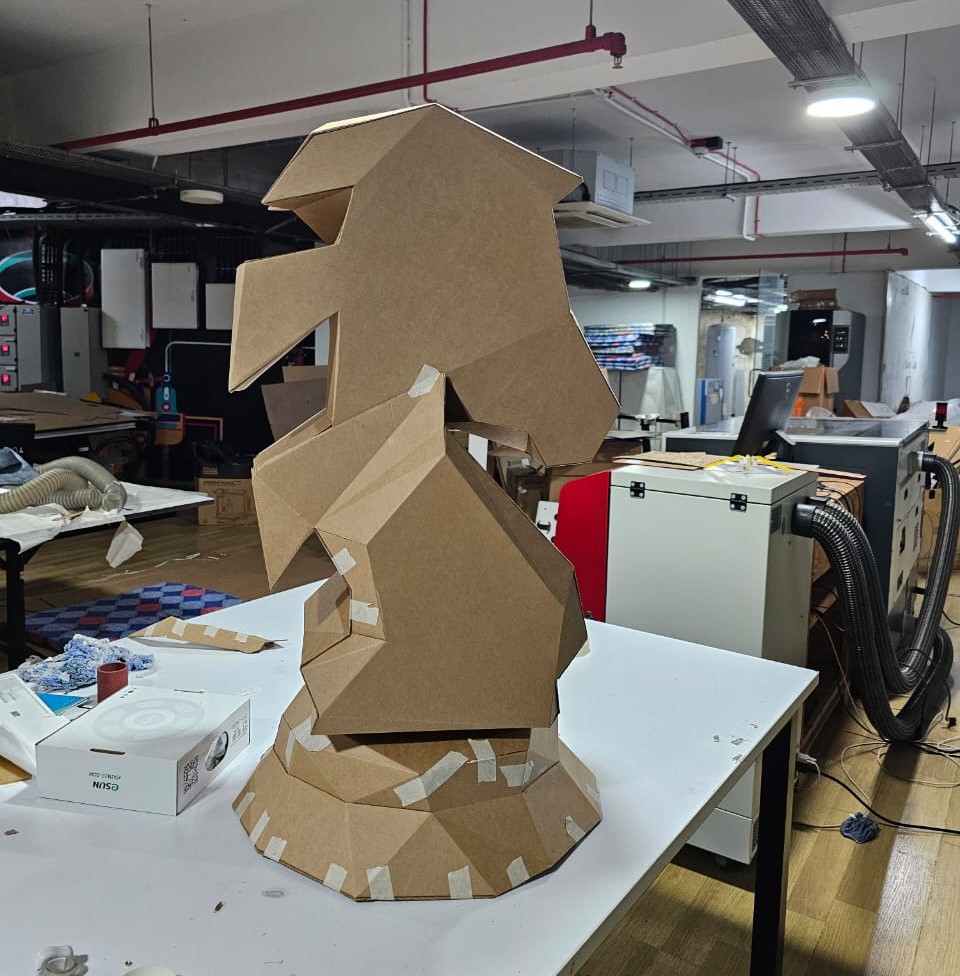
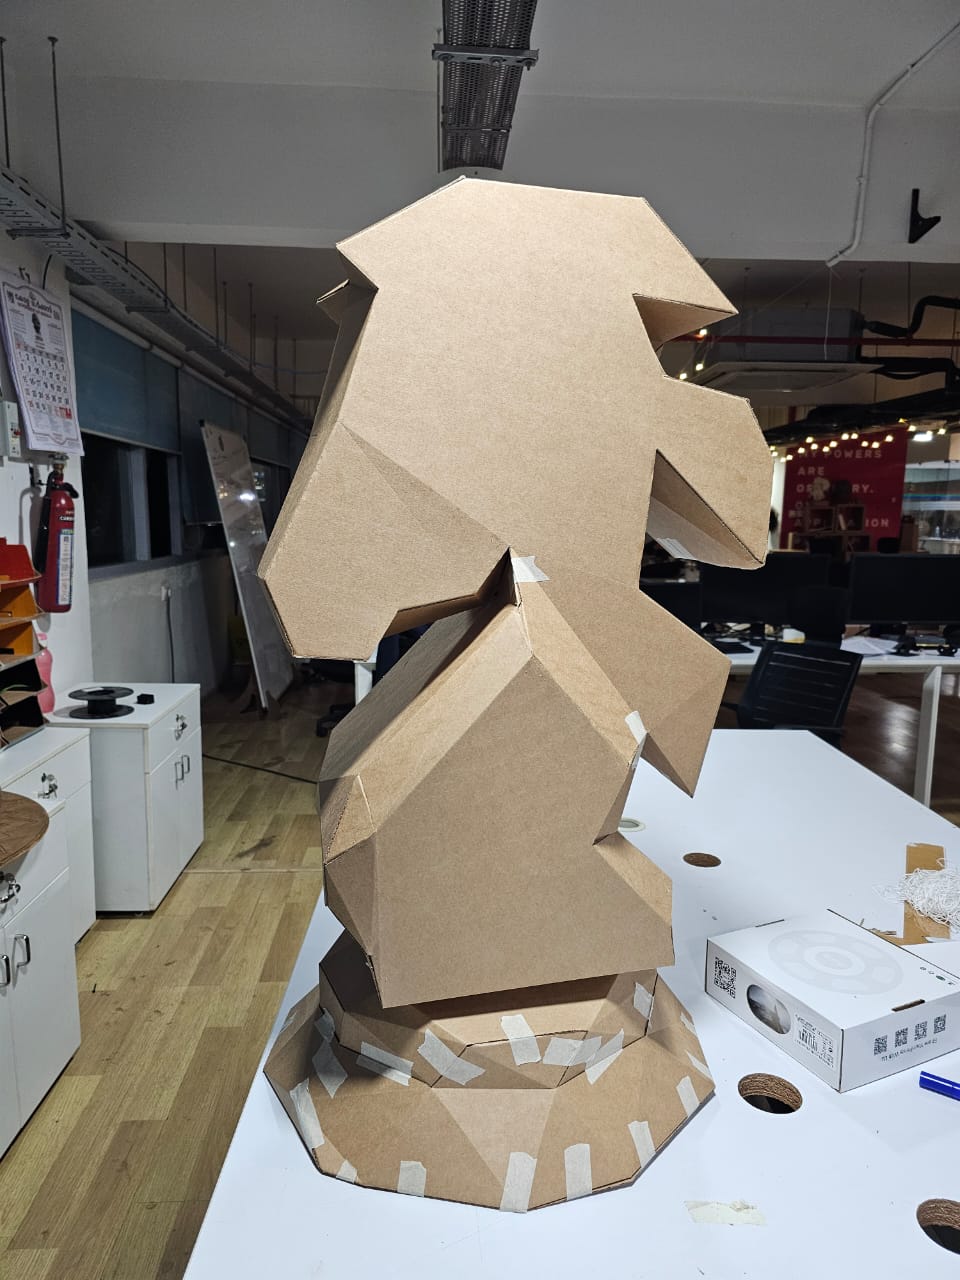
Results
The completed low-poly chess knight stands at 900 mm tall, featuring a unique geometric design and a lightweight, yet robust, cardboard structure. This project demonstrates the creative integration of 3D design, digital fabrication, and manual assembly .
The images below illustrate the final results.